Level Design Development Log
⬐ Click the buttons to skip to sections ↴
Log One - Project planning and first room:
Project planning:
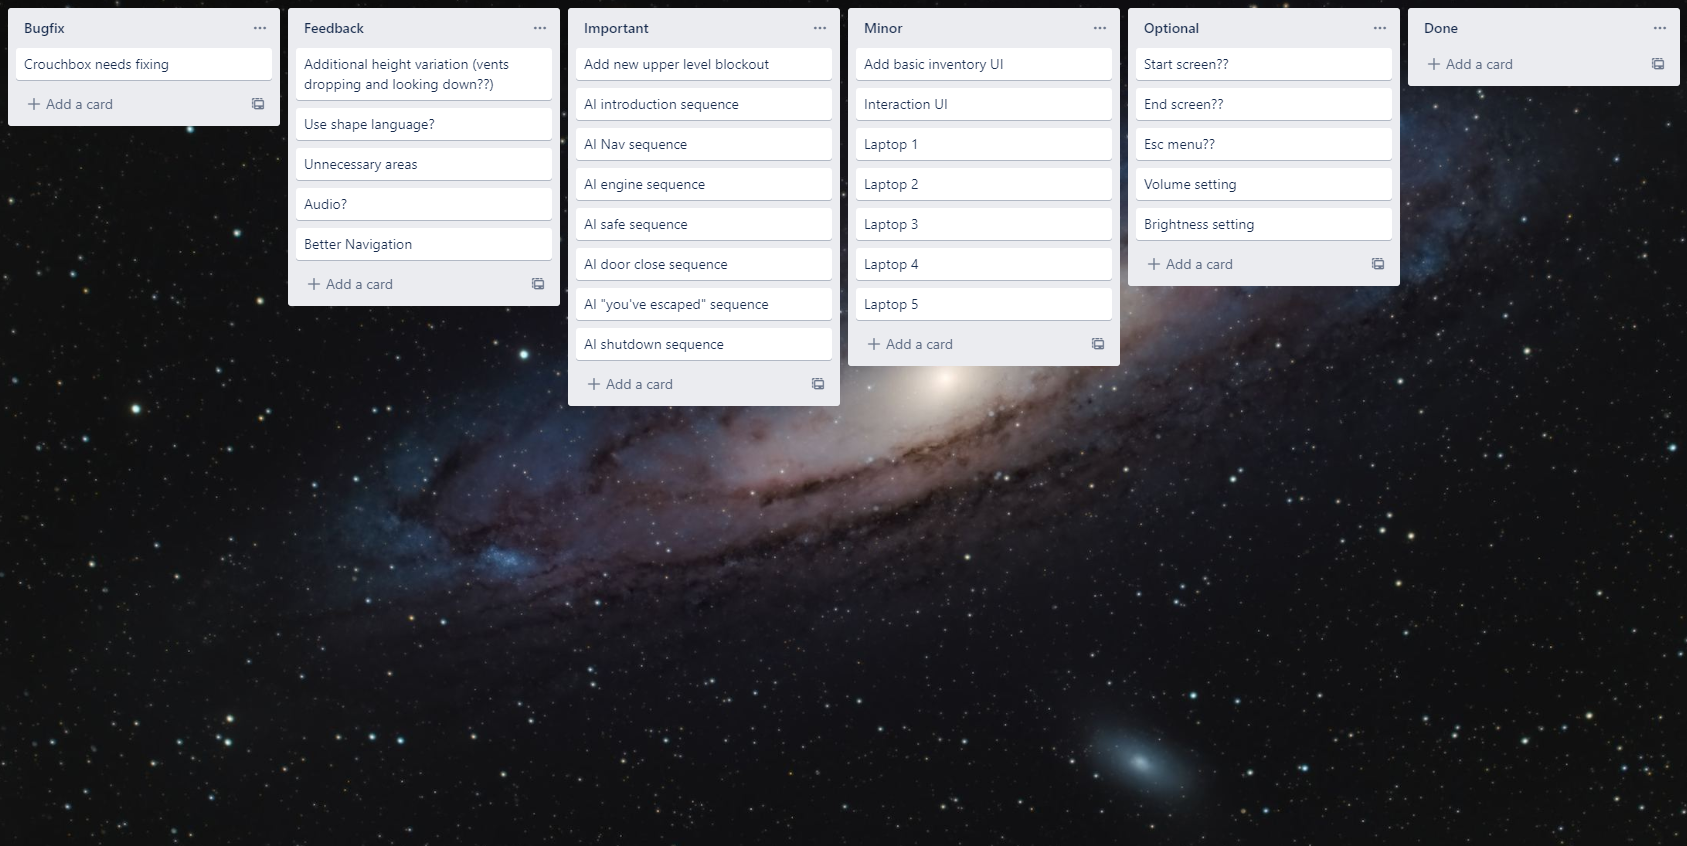
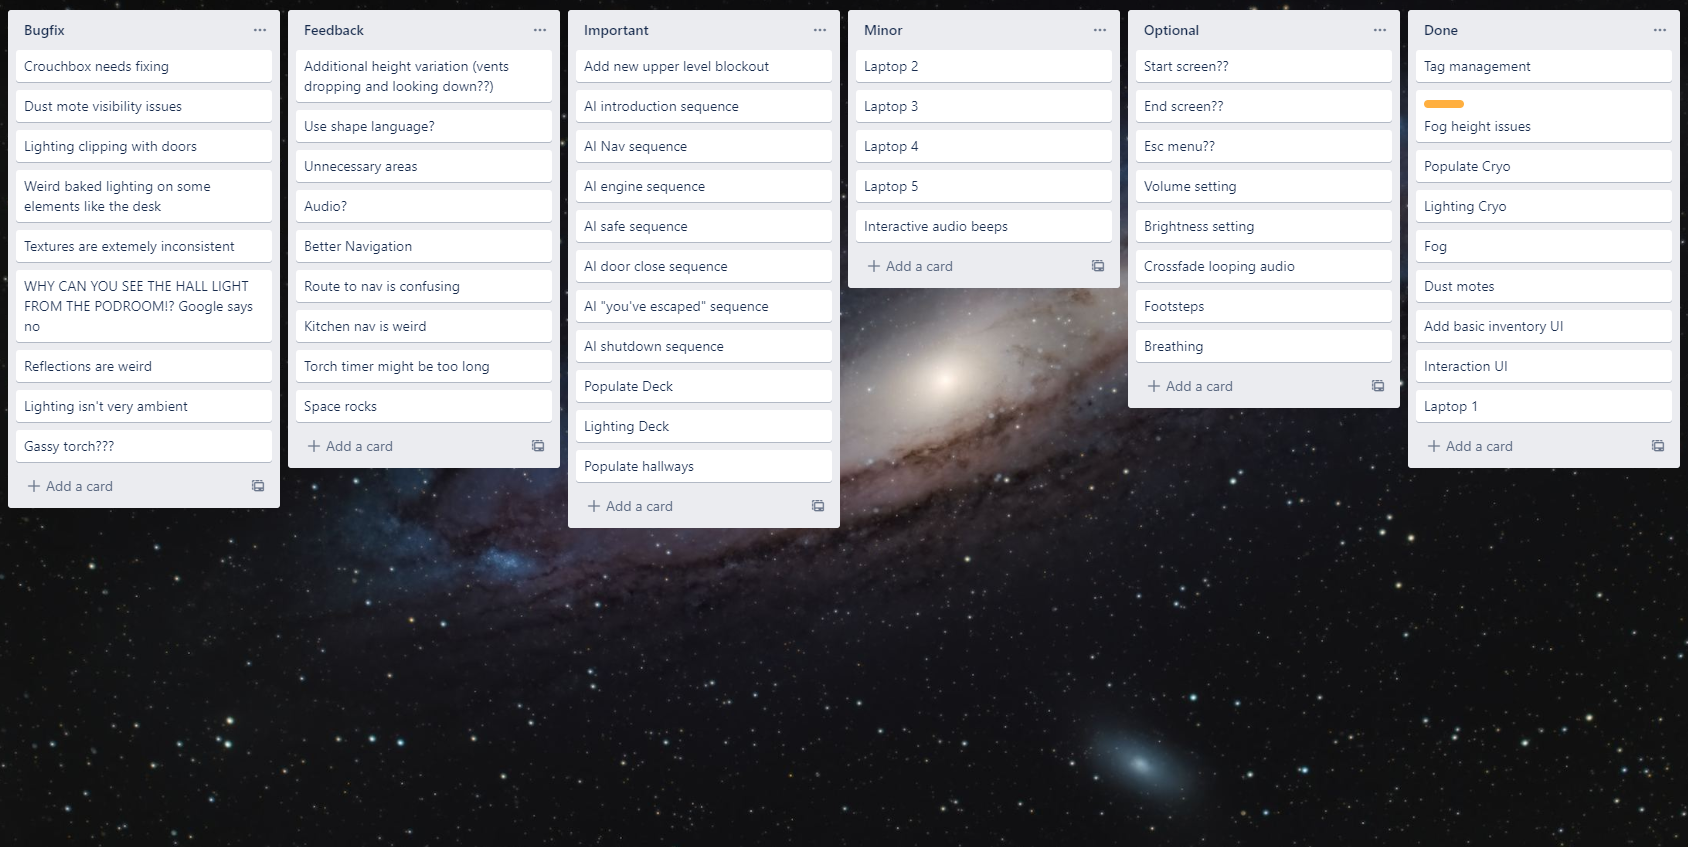
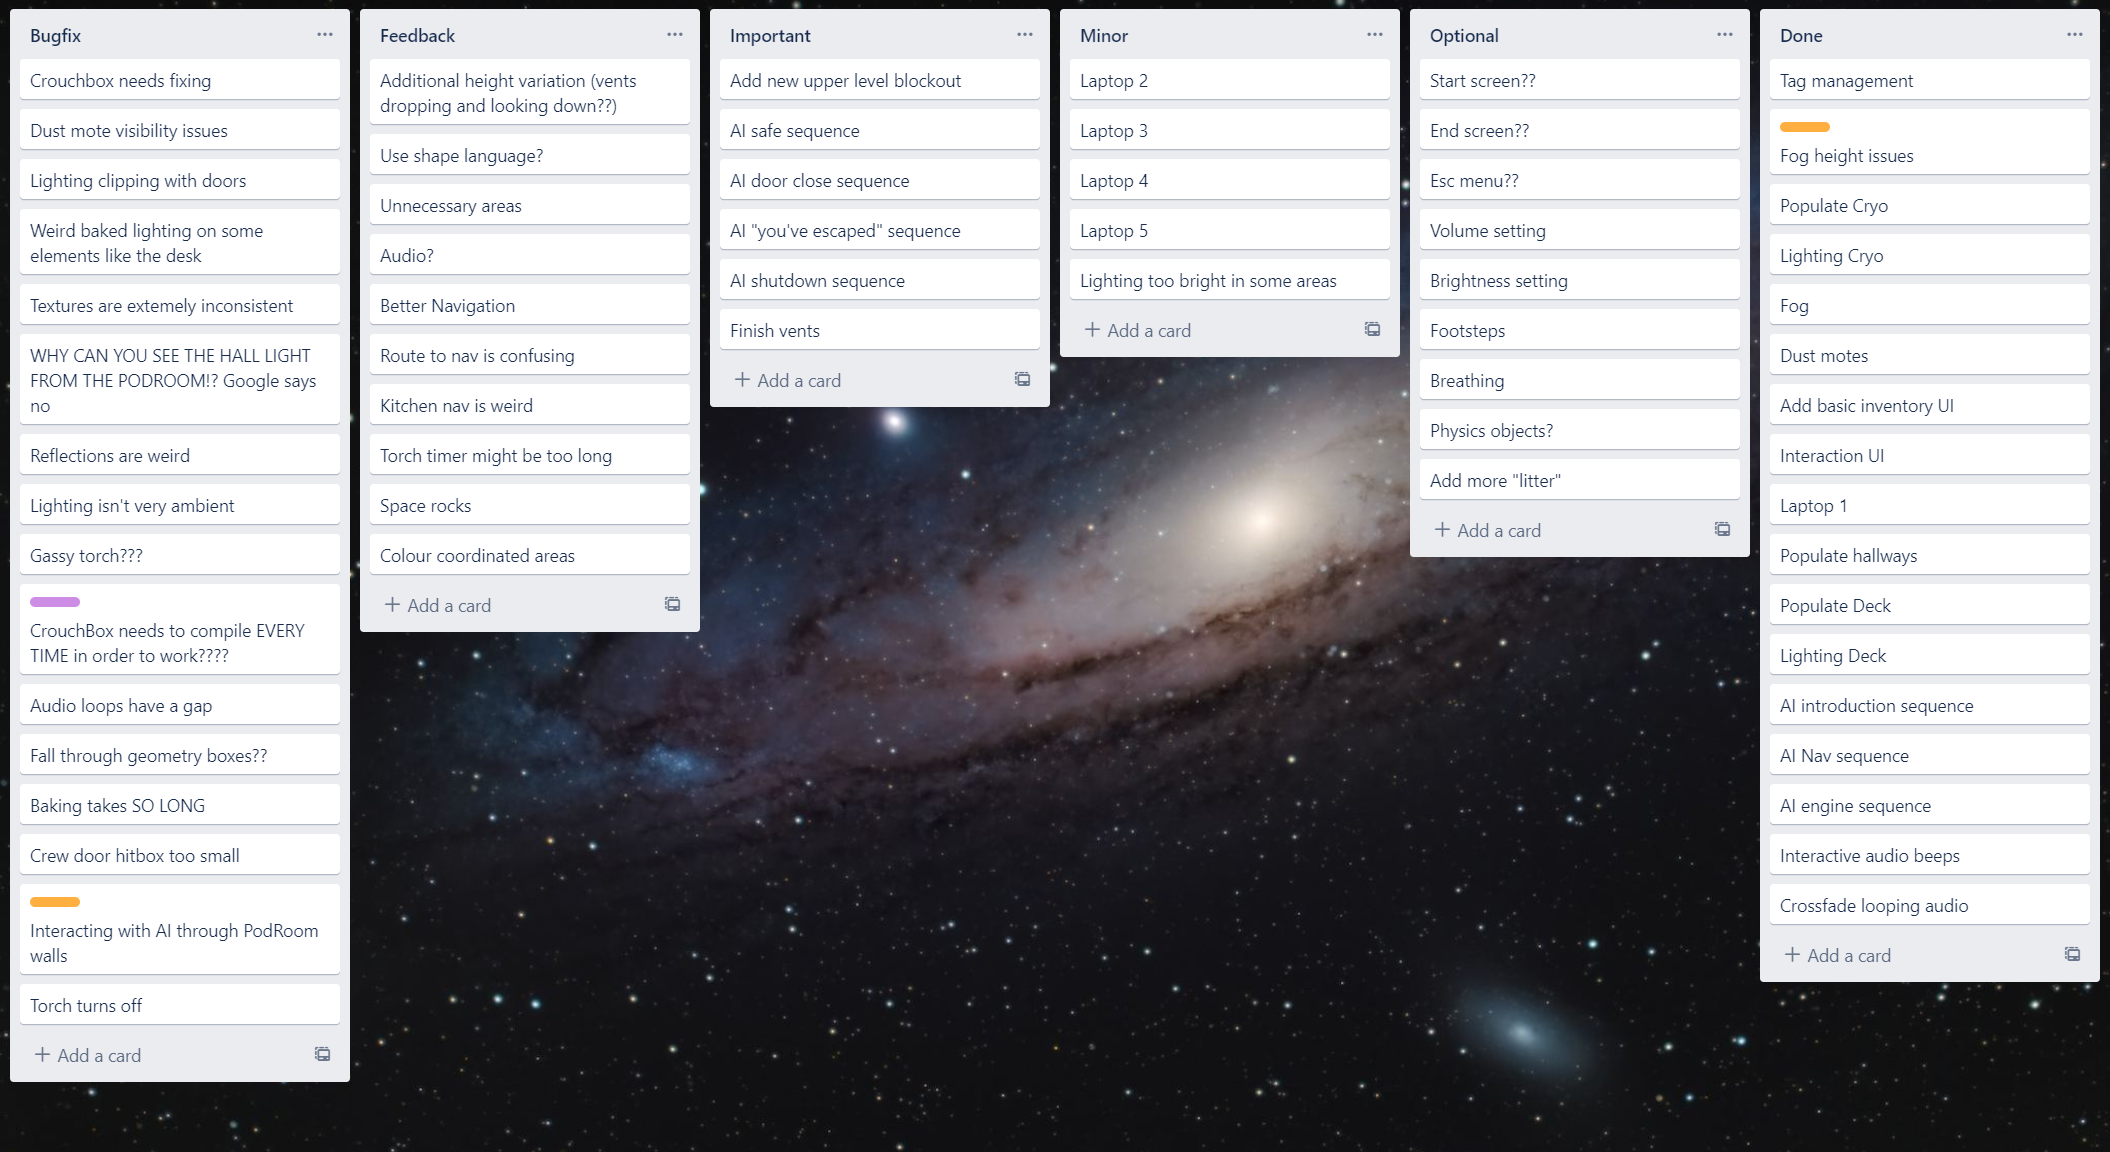
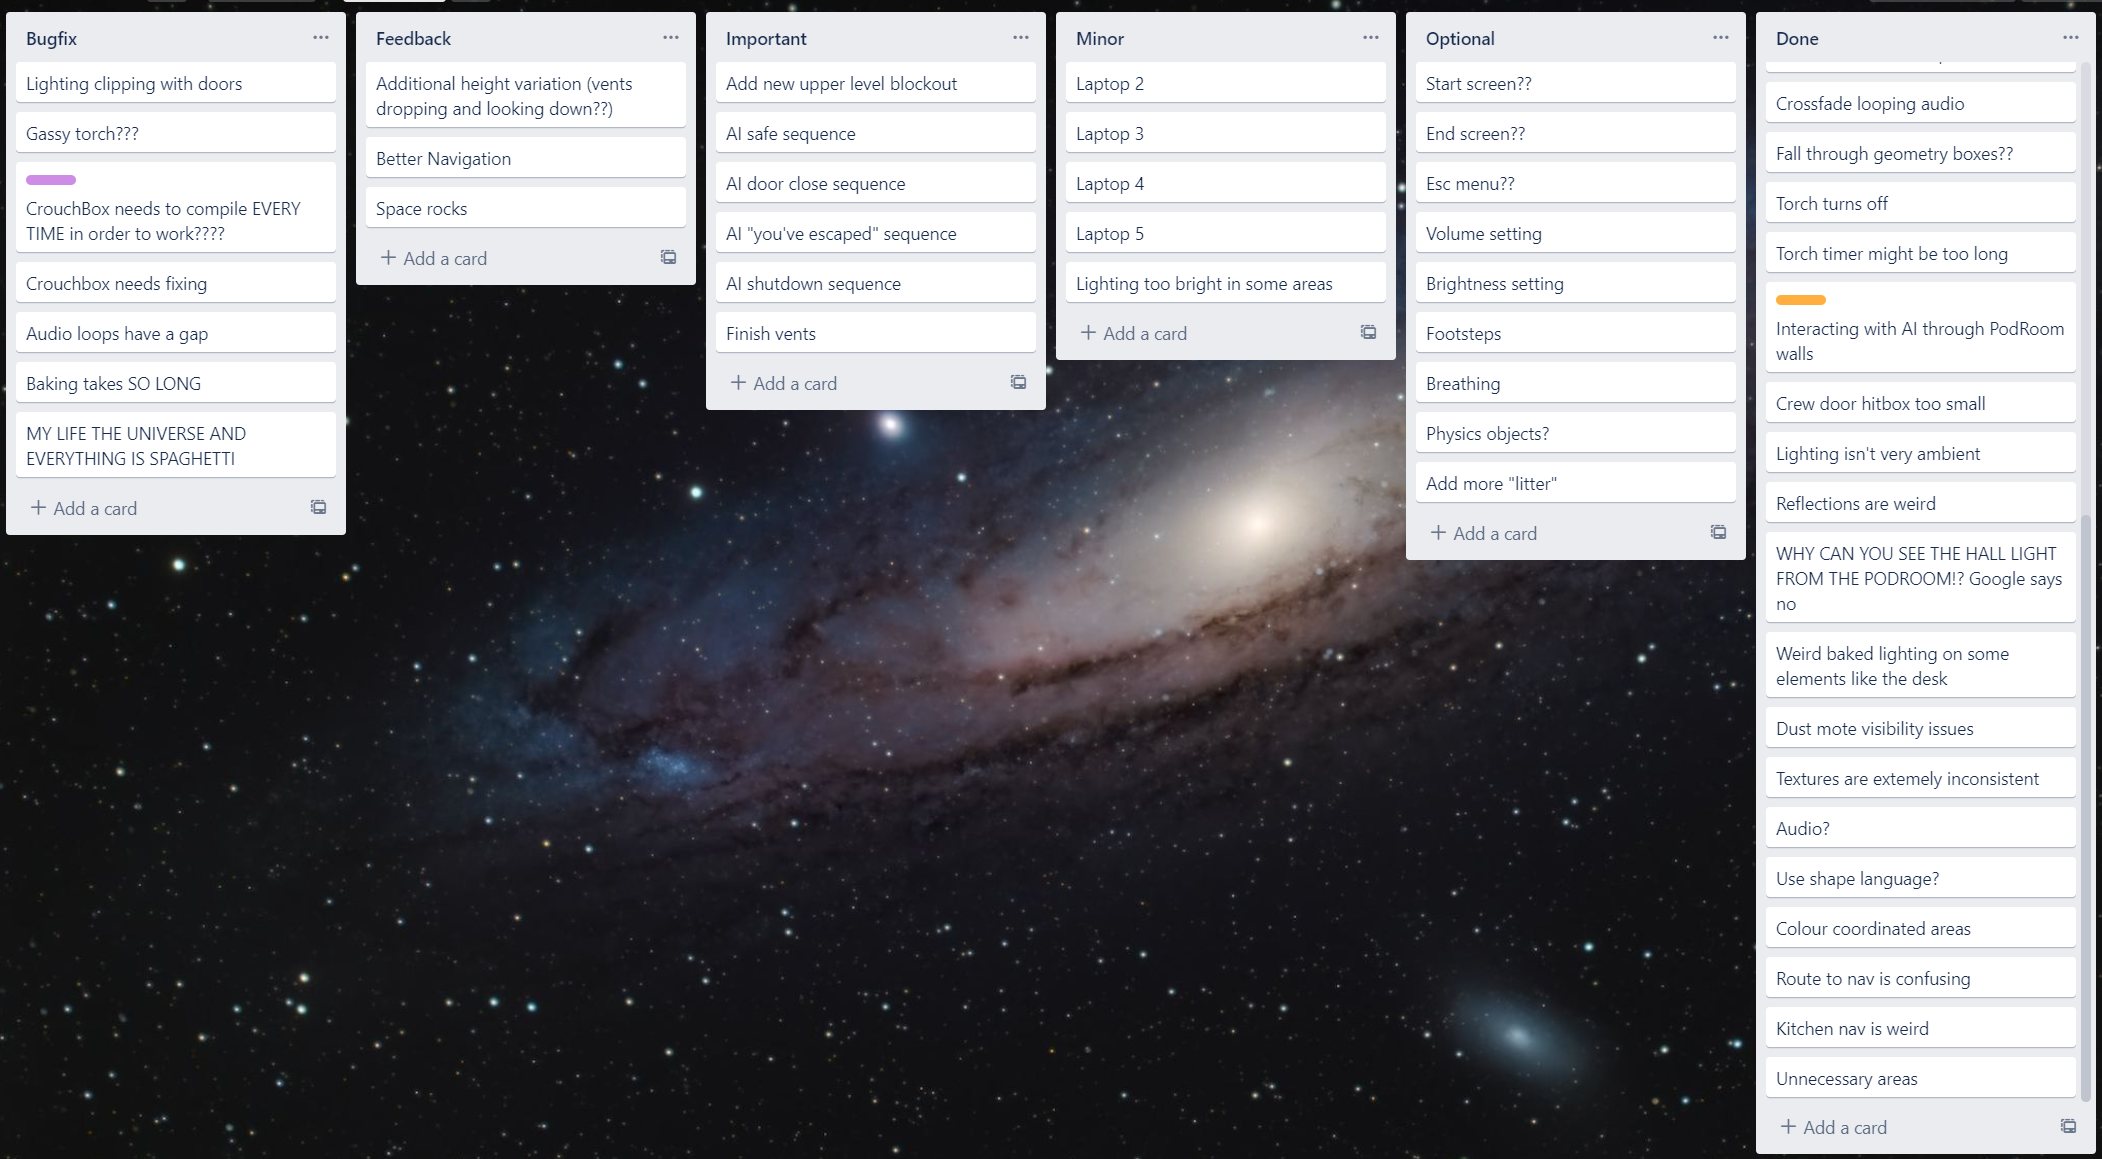
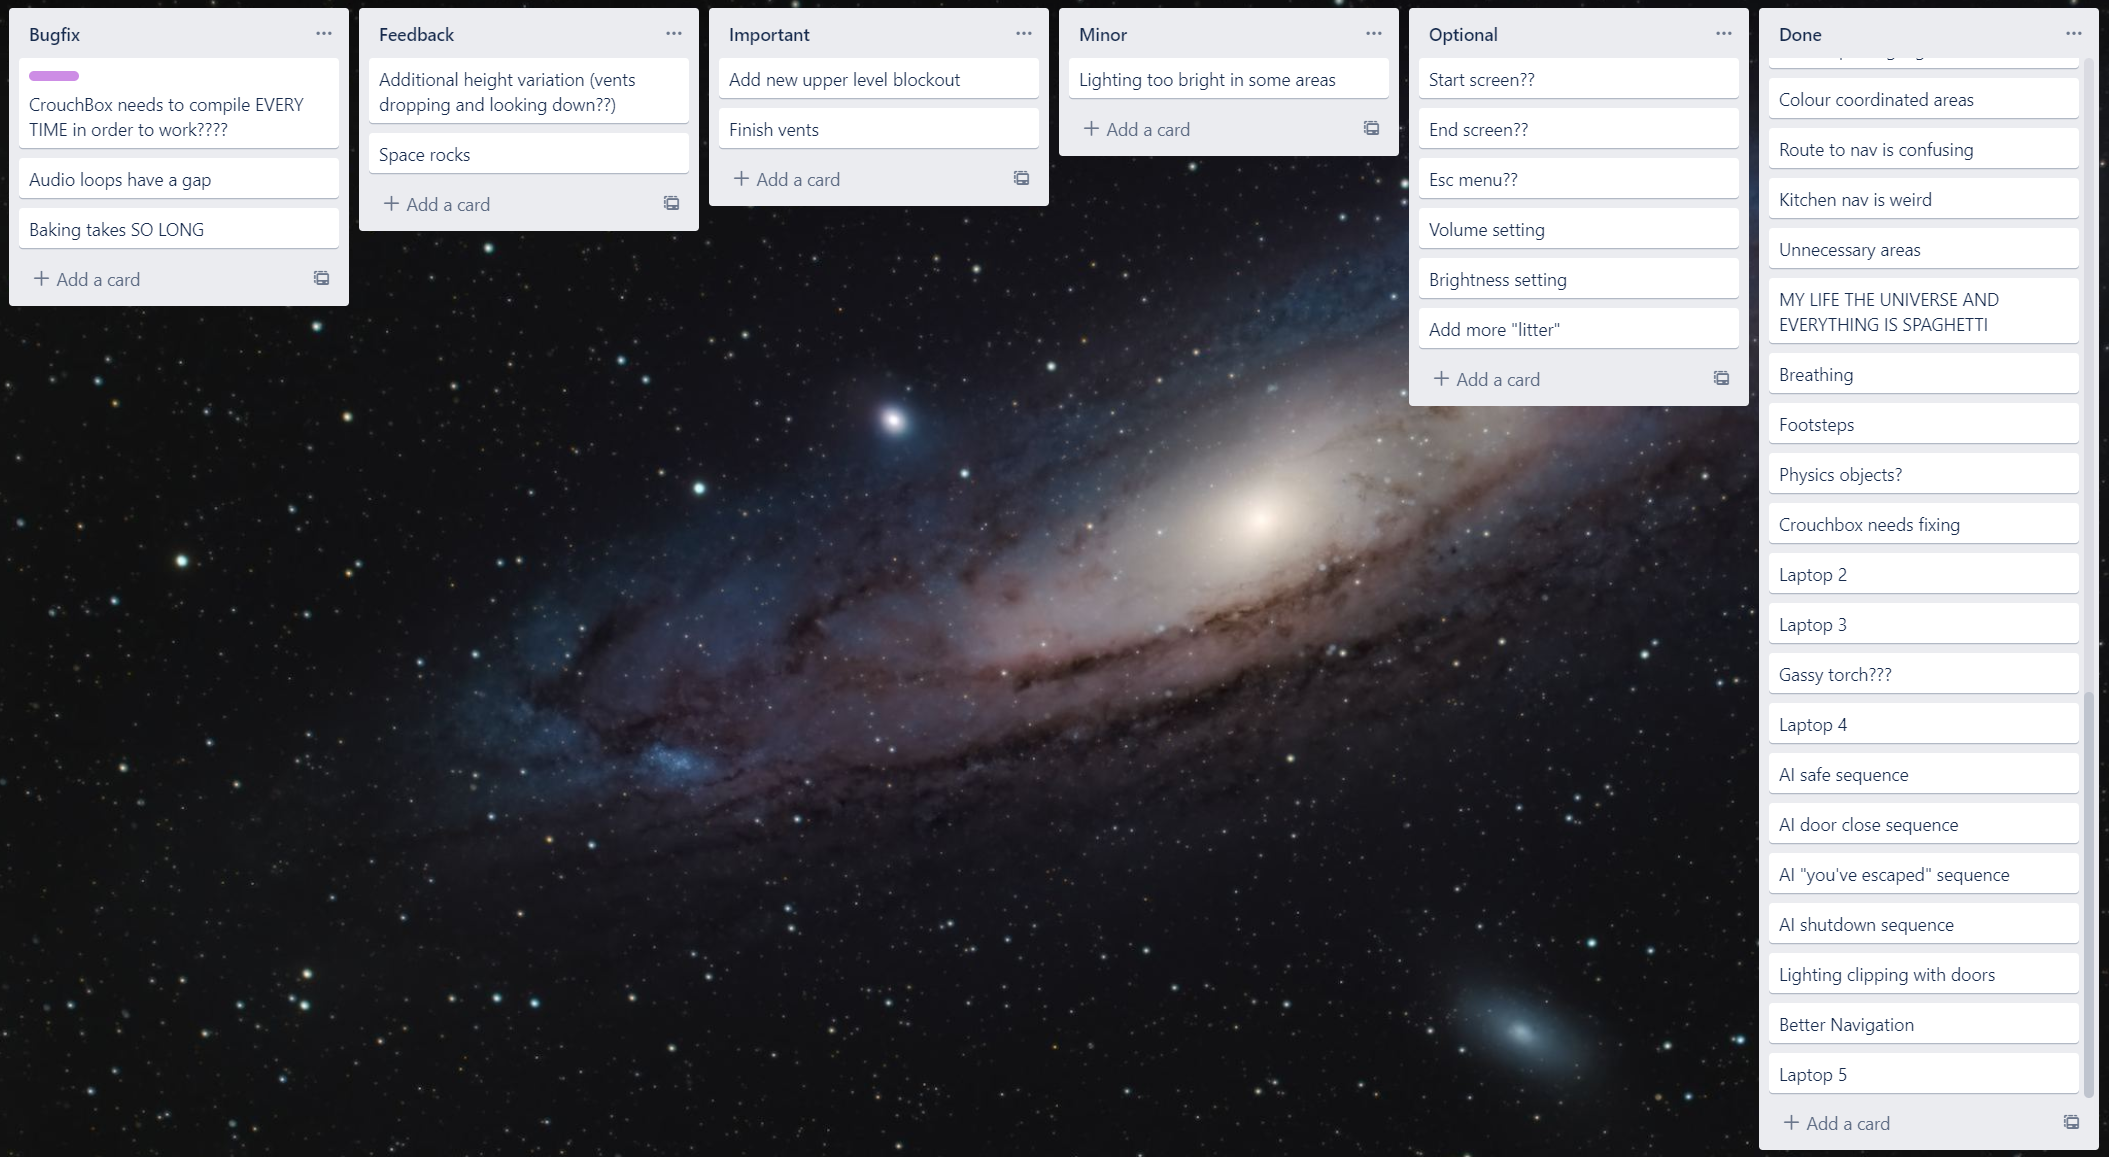
I have decided to start by creating a Trello board to keep track of bugs, to-dos and user feedback. I haven’t had much luck during previous projects keeping on top of my Trello boards, though I feel that it will be beneficial during this project. Hopefully, I will be able to keep on top of using it.
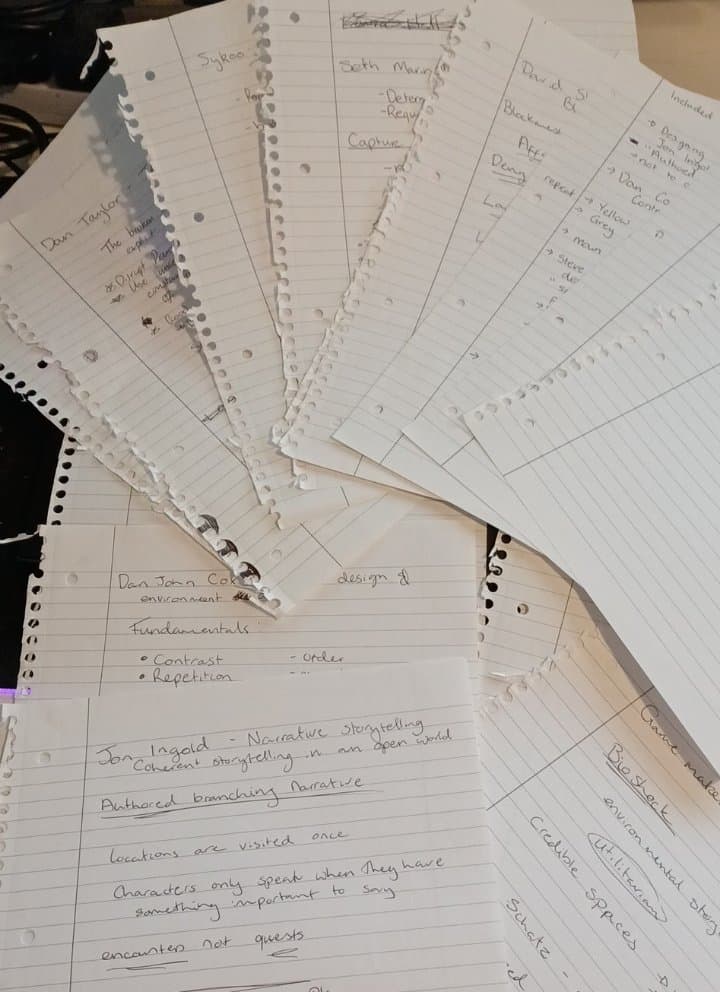
Another project planning idea I’ve had was to take notes about elements of GDC talks that I found particularly useful. That way, I can keep the notes on my desk and make sure I shuffle the stack now and then to focus on different theories that are important to me. Hopefully, this will keep me using plenty of the level design theories throughout my work and will remind me when I’ve missed out on using some of the ones I intended to.
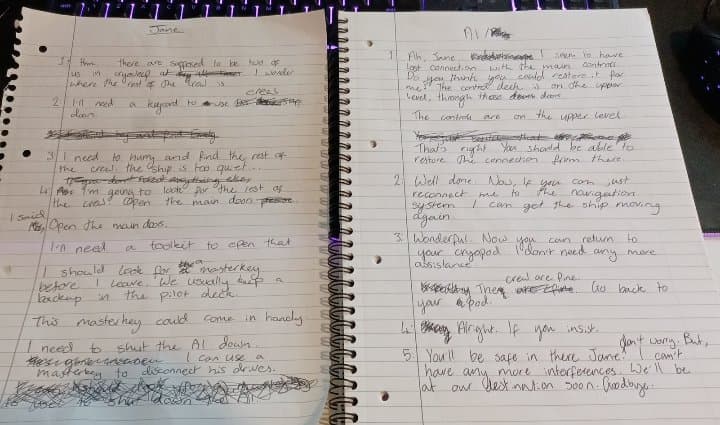
I have written a draft for the audible narrative elements of the story. I think it’s important to keep these in mind since I will start programming some of the interactivity shortly, which could be affected by the audio lines.
I’ve had some difficulty making the lines sound natural. I’ll wait until I’ve recorded the first version of the lines, then ask for feedback from friends and family.
I’ve already got a whole horde of assets from the “free for the month” selections on Unreal Marketplace. However, I’ll keep updating my collection monthly if more useful assets come out.
In terms of creating my assets, I plan to try to use as many found assets as possible and alter them where needed. The only assets I plan to make myself are those of the AI, which I have already made for the block-out.
Here’s a video walk-through of my block-out before I begin working on improving it. It currently has very little functionality and will need a lot of updates based on user feedback.
First room:
I decided to start working in the engine by tackling the Cryopod room. Though I decided to write this entry after completing the Cryopod room, a shocking amount of time has passed due to encountering many bugs and issues which I needed to learn how to resolve very early on.
The following recounts everything I’ve done to complete the Cryopod room to a high standard.
Blockout to Box brush
To start with, I tried to lay some textures on the walls and floor of the Cryopod room. However, I found that none of the textures I was interested in were tiling correctly. The textures were always too big or too small, and I had no control over them without creating huge block-out boxes that spanned much wider than their required size.
I replaced many of my block-out boxes with box brush geometry to resolve this problem. Box brushes allow you to adjust the UV tiling of the textures live on the geometry, giving much more control over the final outcome.
Cryopods
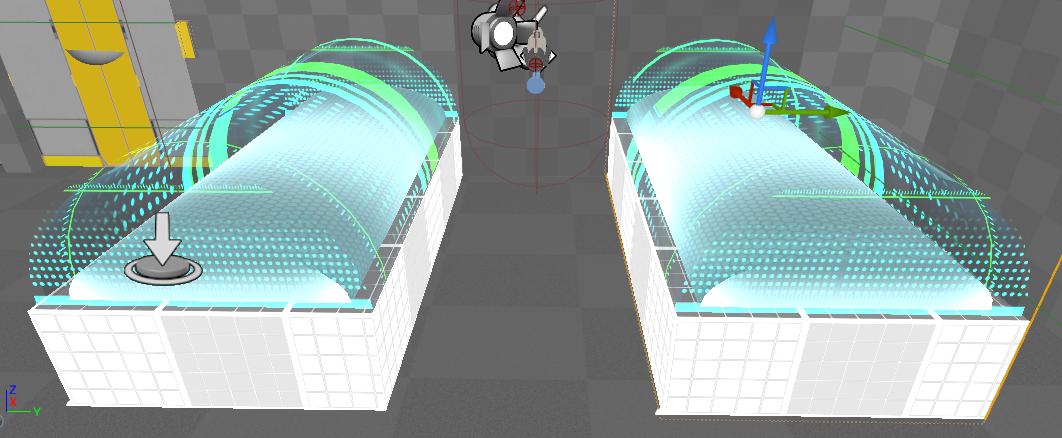
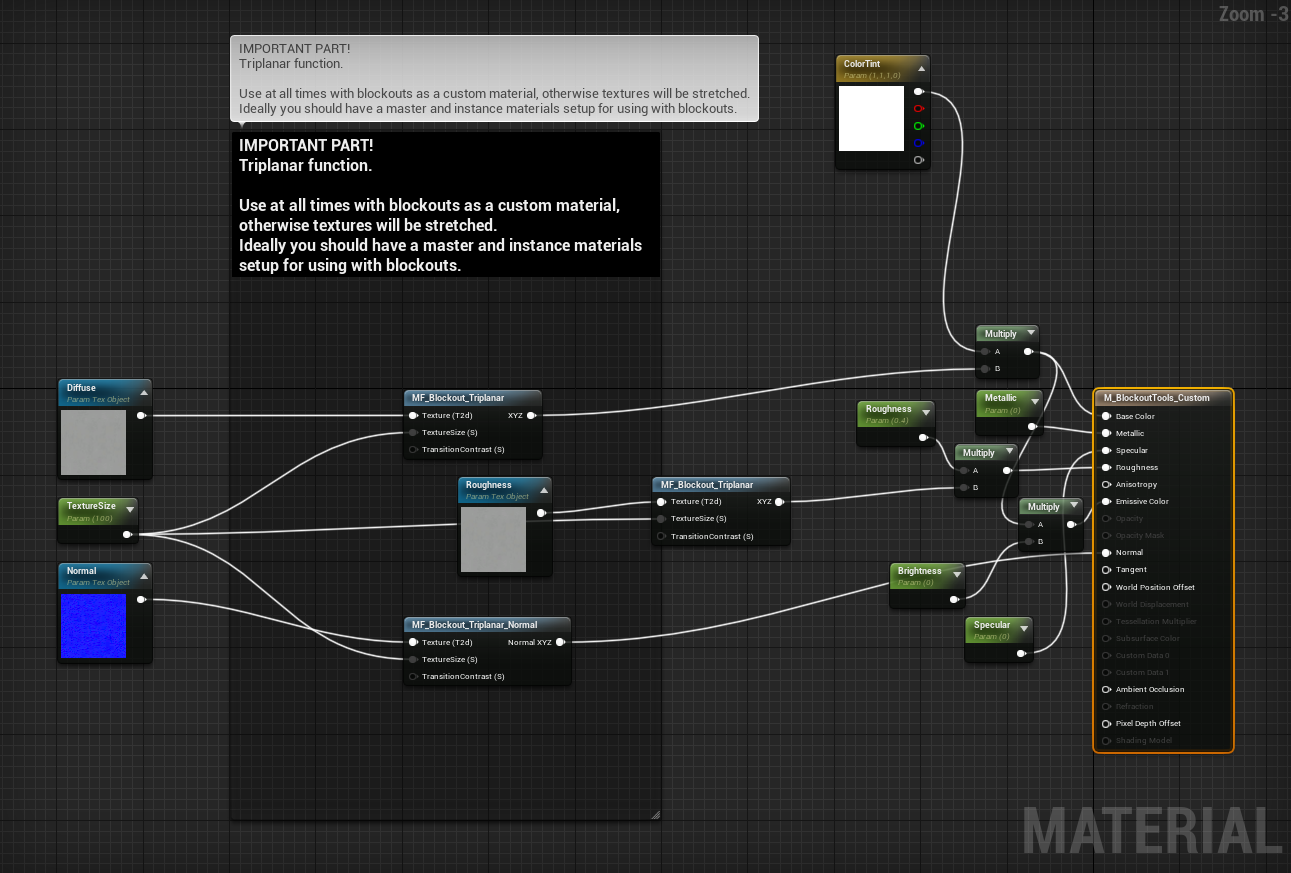
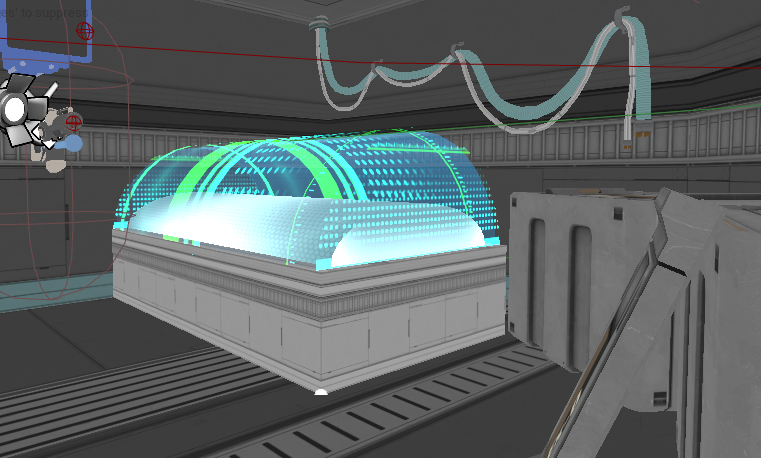
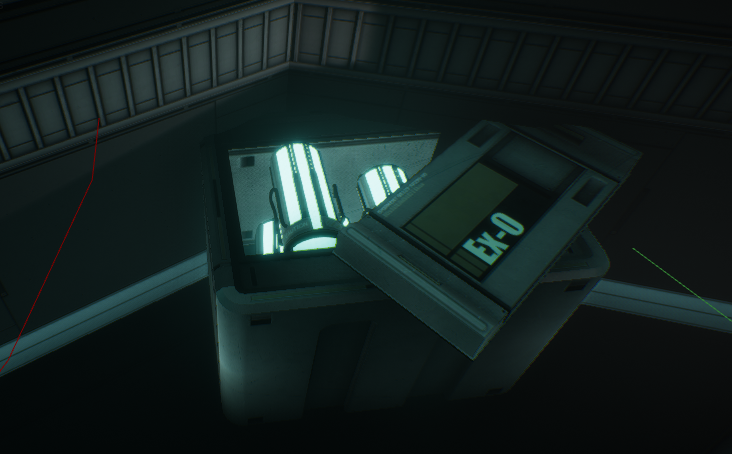
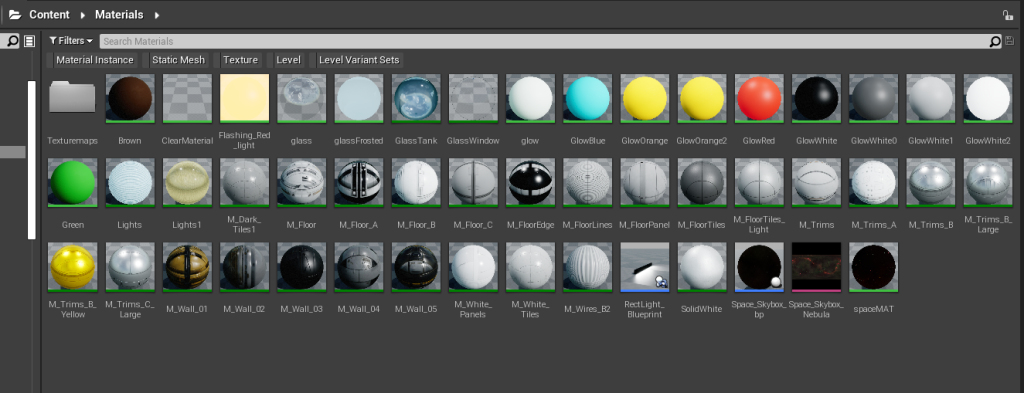
While experimenting with ways to fix the tiling and sizing of textures on geometry, I discovered a method for creating Triplanar materials. Through researching methods of having more control over tiling materials, I found that the addon I was using, Blockout Tools, came with a custom set of blueprints for Triplanar materials. I adjusted these blueprints slightly to accommodate additional settings such as Colour tint, brightness, roughness, and metallic. Then I manually entered the texture maps from each material I wanted to use into a new Triplanar version. The resulting material was often not as detailed as the original material due to not having masked areas for roughness or normal maps, but proved functional for many elements of my game. Such an element was the Cryopod.
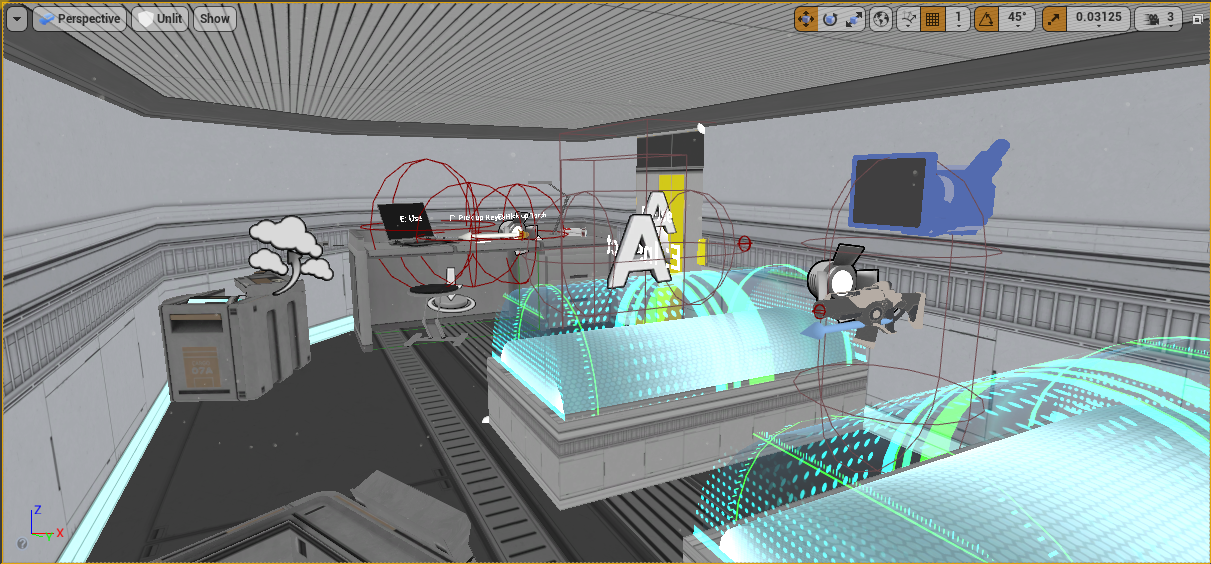
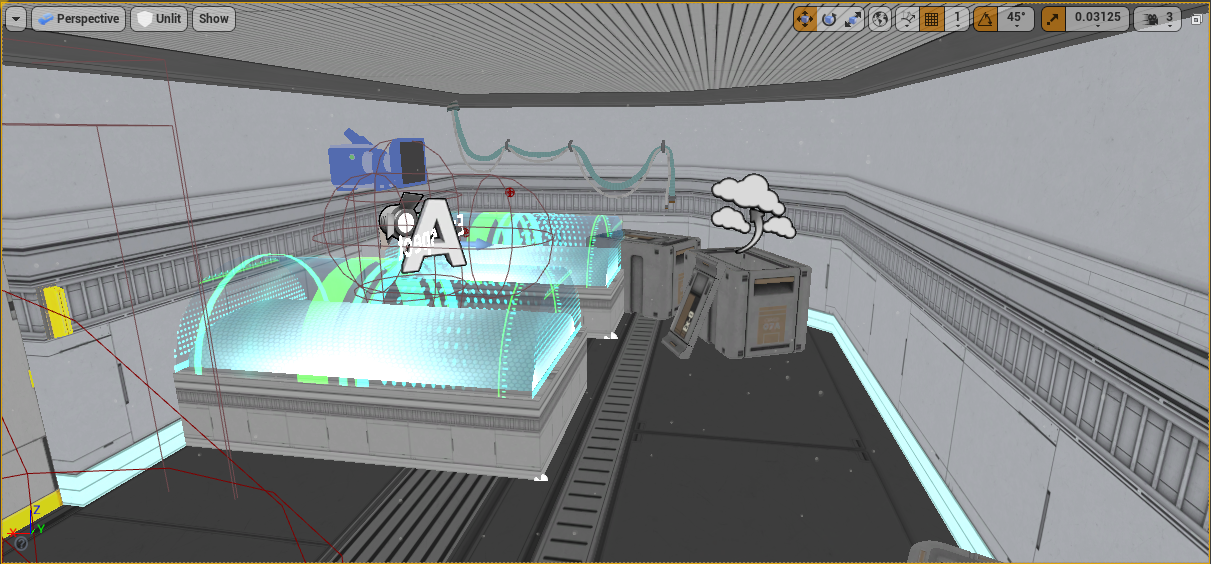
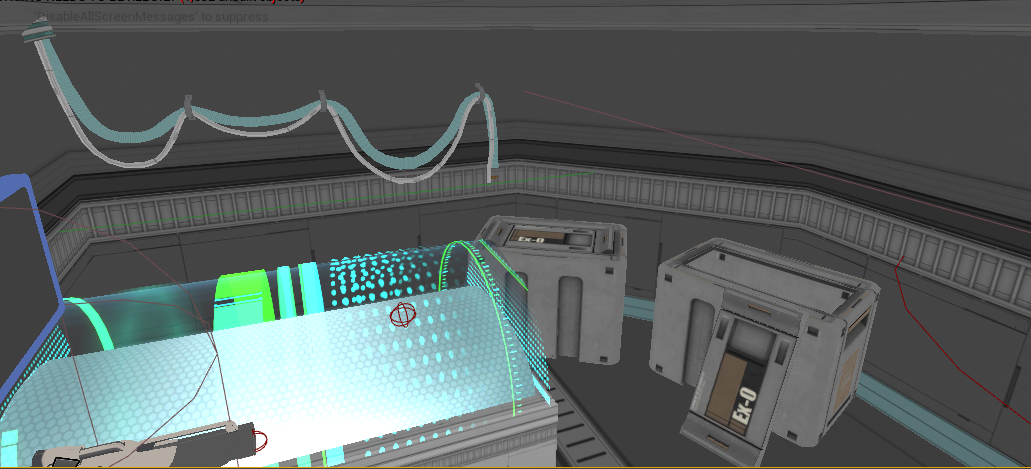
I created a custom triplanar material for both the base of the cryopod and the interior glowing element. I also decided to make the cryopods emissive and use them as one of the lighting sources in the environment. This took quite some time to design and a lot of experimenting and adjusting different materials. However, I am pleased with the outcome, and experimenting allowed me to prepare many additional triplanar materials for later use.
Crouchbox
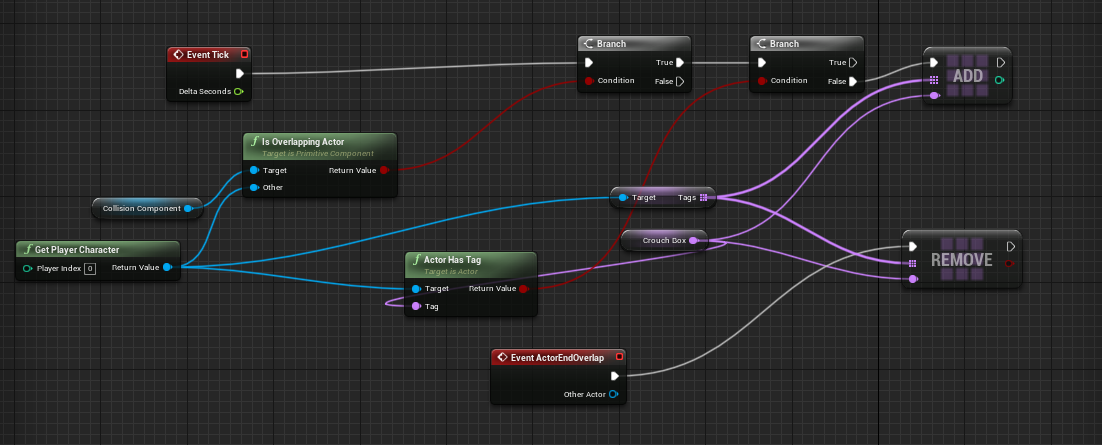
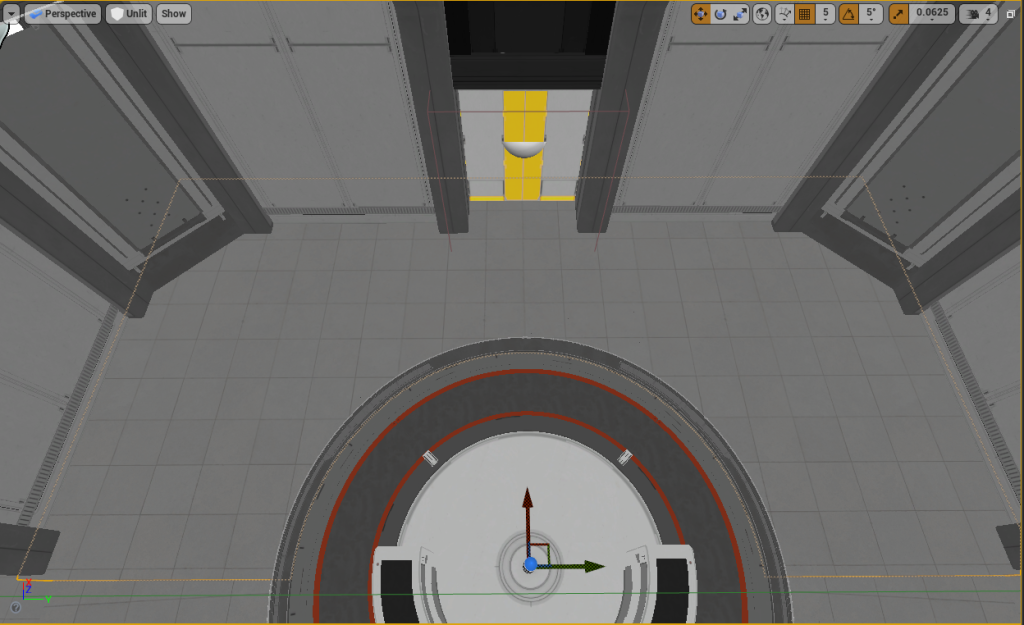
I am having continual issues with the crouch trigger boxes I created during the block-out phase. I am trialling the use of a tag system to fix some of the update issues that I was having. The player keeps popping up to standing when they let go of “ctrl” in a crouching area.
The crouch trigger boxes are intended to keep the player character in a crouched state while underneath something that would cause clipping. However, I couldn’t seem to make the crouch box keep the player crouched when the ctrl key was lifted. Especially not in any further instances of the blueprint.
Implementing a tag system seems to have resolved many errors; however, I still have ongoing instancing problems. Among other errors, the crouch trigger boxes have to be the last blueprint that I have compiled, otherwise they do not work. I have sought help from google and friends, but no one seems to know how to resolve these errors, so I will list it for now as a bug and move on.
Populating the room
Adding items to the room to populate it was probably the most enjoyable part, and I think I got a little bit carried away…
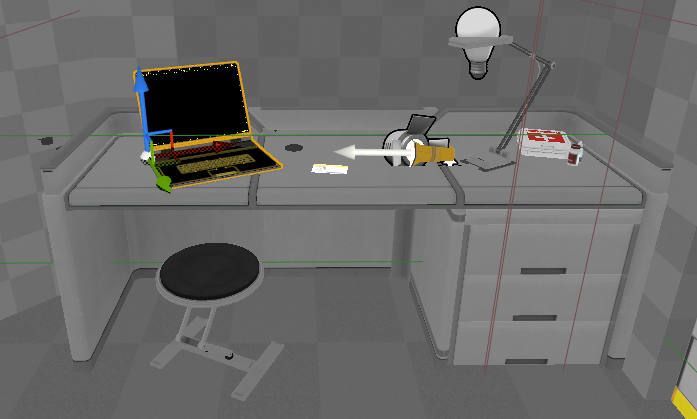
On many of the assets I’ve added, you may notice that the textures differ from the originals presented by the asset packs. This is because, in almost all cases, I have edited the material instances to better match the room. You can see examples of this in the pipes on the wall which were initially yellow, the glowing batteries which were also originally yellow, and the wall skirting board which originally was grey and had no emission. The laptop on the desk was particularly difficult to edit as I had to go into the original texture maps and use colour replacements to make the keys on the keyboard glow and change the hue of the screen elements.
Atmospheric effects
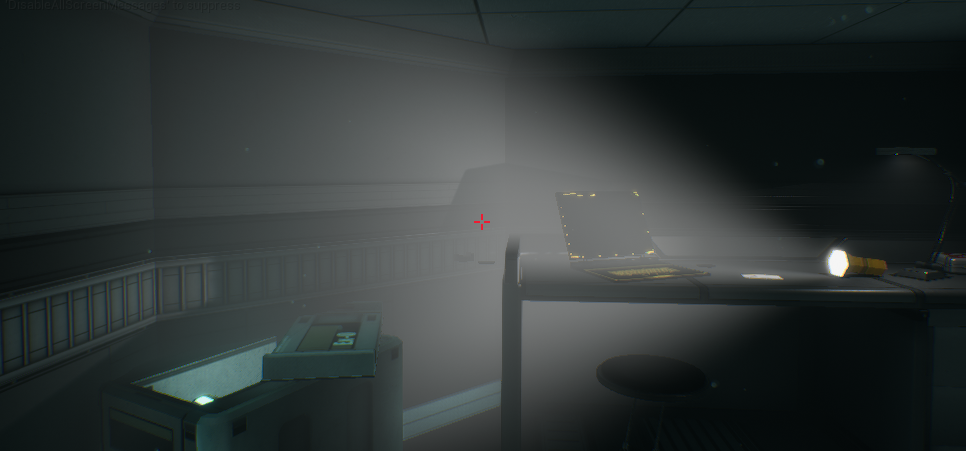
As you may have already noticed in some of my previous gifs, I have created atmospheric effects. These span across the whole ship and include exponential height fog and dust particles.
I used the particle emitter system to create the dust particles based on a found asset from the Modular Sci-fi Hallways bundle, and the built-in exponential height fog emitter to create the fog.
After some experimentation, I found that I needed to use volumetric fog settings rather than exponential height fog, as the default settings were causing my skybox to be completely covered and almost opaque.
Postprocessing Effects
I’ve added various post-processing effects based on advice given in a LinkedIn article by Daniel Stubbington (Stubbington, n.d.).
In his article, Daniel suggests adding various post-processing effects including bloom, chromatic aberration, volumetric scattering, and ambient occlusion. He also recommends custom command lines to adjust some of the default settings.
I have followed almost all of his suggestions in this article. Still, I have taken it a step further by entering these custom command lines into the Unreal Engine build config code files so that I don’t have to enter them every time I boot the engine or use blueprints. I researched how to do this by following instructions on Unreal Docs (Unreal, n.d.).
Interactivity
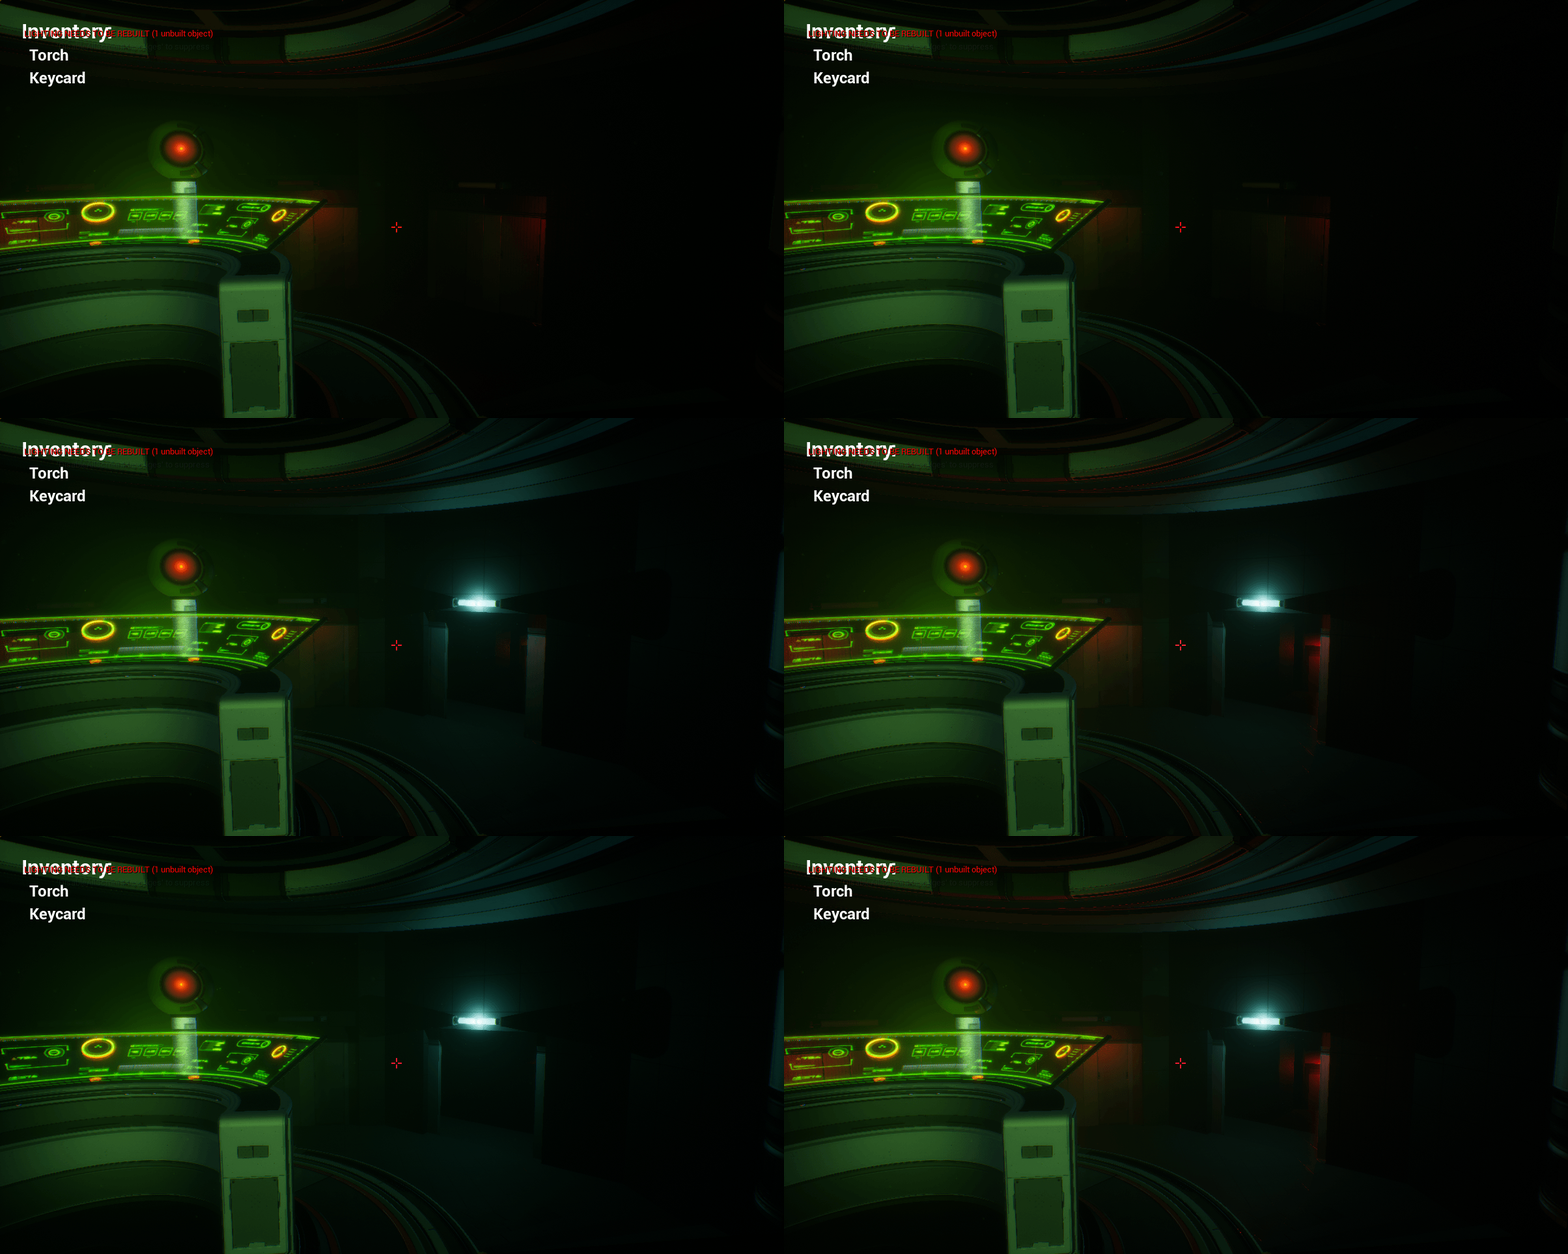
Finally, all that was left was to add the interactivity for elements in the room, including the second cryopod, the laptop, the torch, the keycard, and the door.
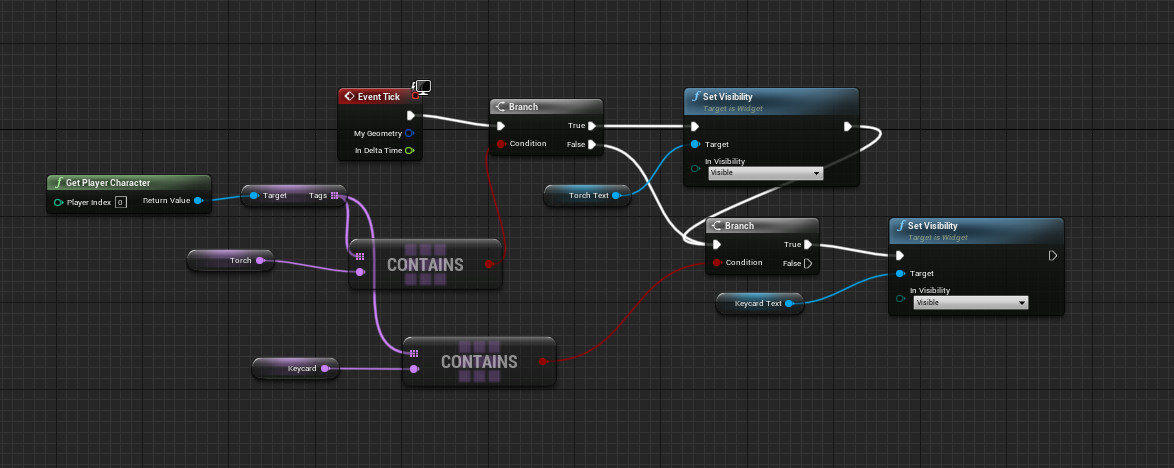
I used the same tag system that I tested earlier with the crouch box to allow for picking up the torch and keycard. I also used the tag system to create stationary tags while using the computer and overlap tags while in the area to open the door. I have set the foundation for future narrative elements by adding permanent tags to the player character showing that they own the crew keycard and torch. This also allowed me to go into the FirstPersonCharacter blueprint and change my existing torch blueprint to only turn on while the character possesses the tag “Torch”.
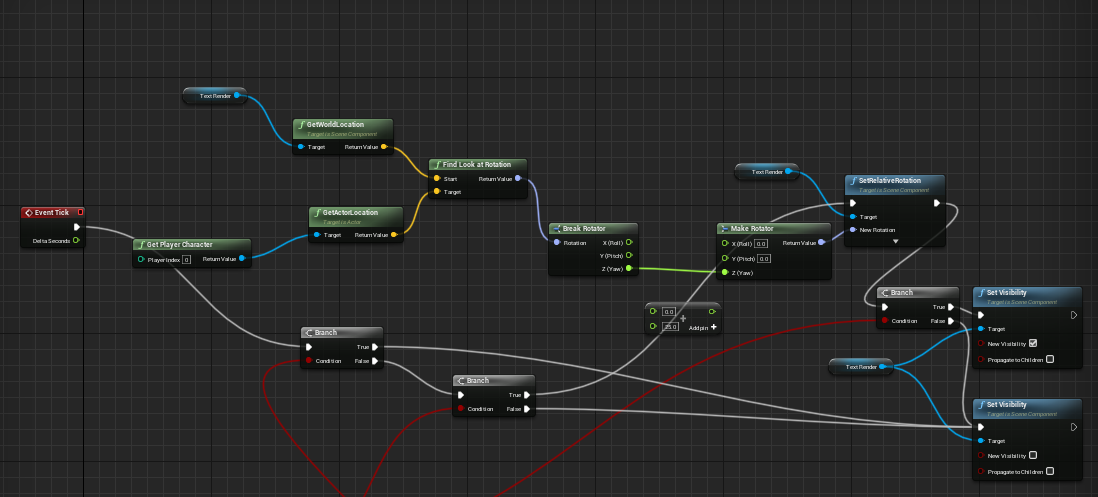
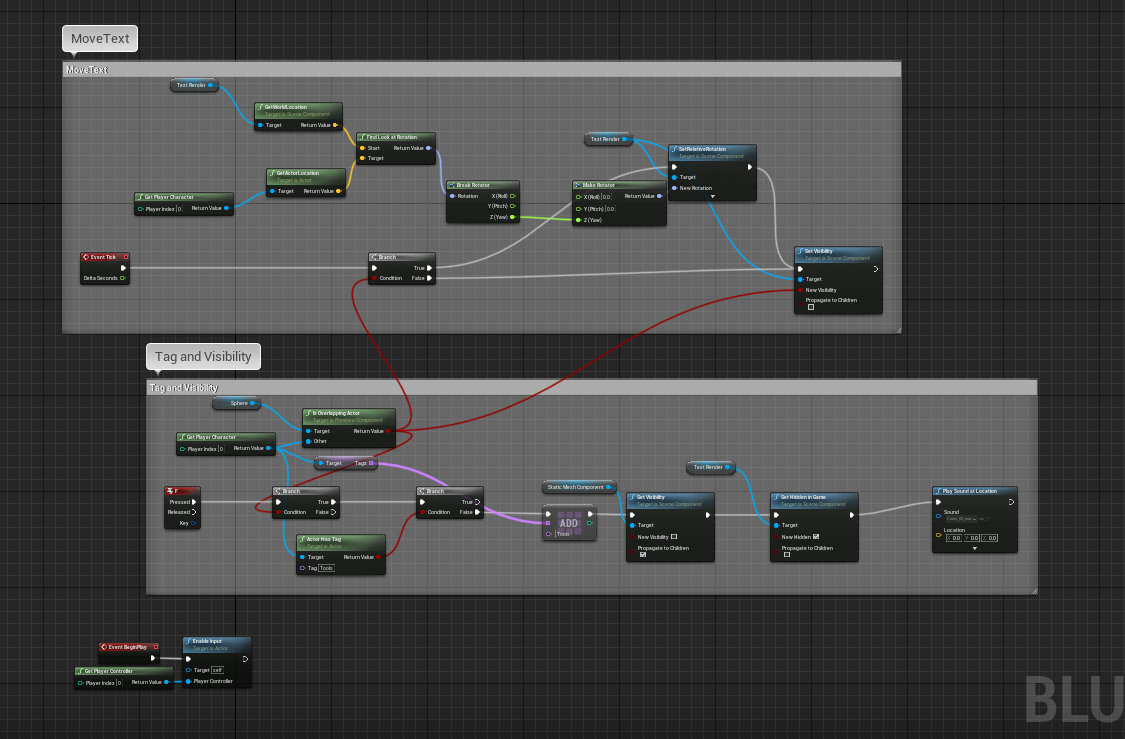
I also added some basic UI elements to the pickups, re-using code I created during the block-out stage for the AI to allow the text to always face the player.
Finally, I set the blueprint to check for collision with the player character, and then when the relevant key was pressed to set the item to be hidden in game.
Log Two - Stairway, main room, sequencing, audio:
Project planning:
Here’s an update on my Trello board! To be honest, I’m finding it difficult to keep on top of this as usual, however at least a now-and-then update is useful to check that I’m on track.
Stairway:
For the stairway, the blockout already had most of what I needed. So I decided to continue using the original stairs and walls from my level blockout, with some minor adjustments to fit better the new textures I would be adding.
Textures
I quickly found a texture that I liked a lot for the stairs, a tile texture which fit perfectly across the stairs without gaps or overlaps. However, this quickly tied me into using this across the rest of the level for continuity. So, I spent a lot of time making minor adjustments to the few tile textures I had made to perfect them since they would surely be used regularly across my level.
By this time I had created many custom textures for use across my level, such as the tiles, and the wall texture you can see in the hallway. As I mentioned in the previous post, these were created using a triplanar method, and work nicely on the original blockout boxes that were in my level.
Assets
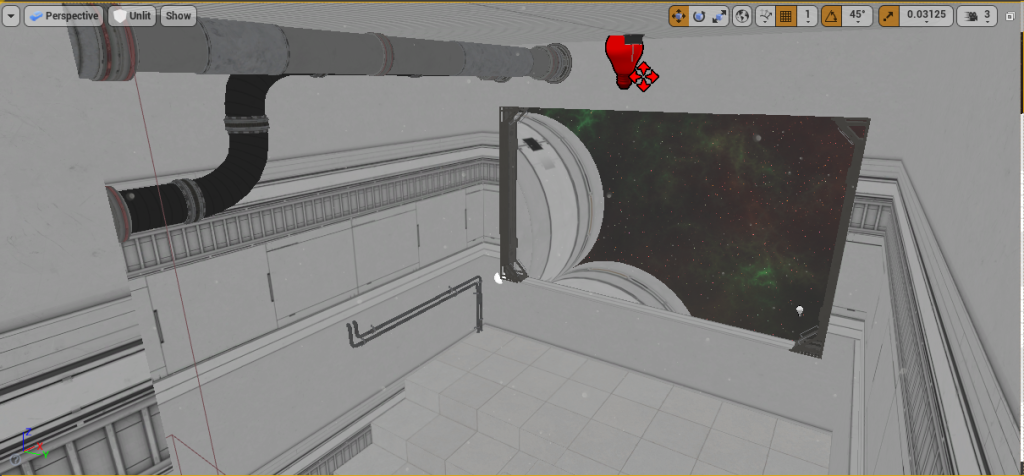
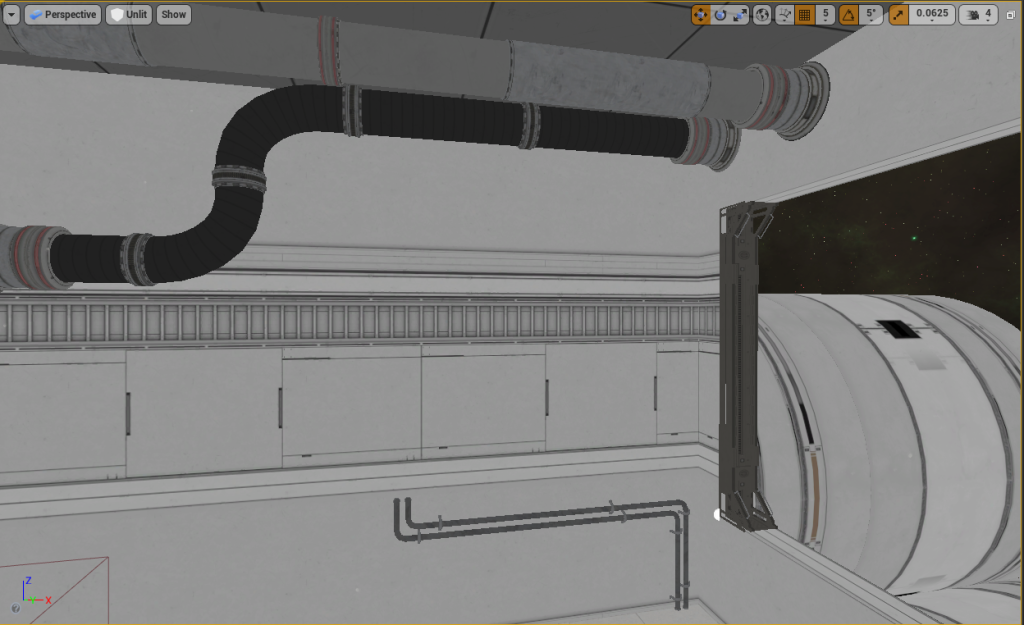
I added some pipes on the walls for effect and found some door frame pieces that fit nicely into the window to add extra detail. I also added some “engines” to be visible outside. I spent quite a bit of time looking at different variations of glass that I could use for the window. I ultimately decided to keep the original material as other glass materials’ convex/concave effects were not pleasant in this case.
Main room:
The main room of my level is designed using the hub and spoke pattern, a level design theory talked about by Steve Gaynor and Kate Craig in The level design of Gone Home GDC talk (Gaynor and Craig, 2015). They talk about how spaces should have a main hub which naturally spokes out into other spaces. This method of layout creates linear spaces which feel non linear because the player is presented with false choice.
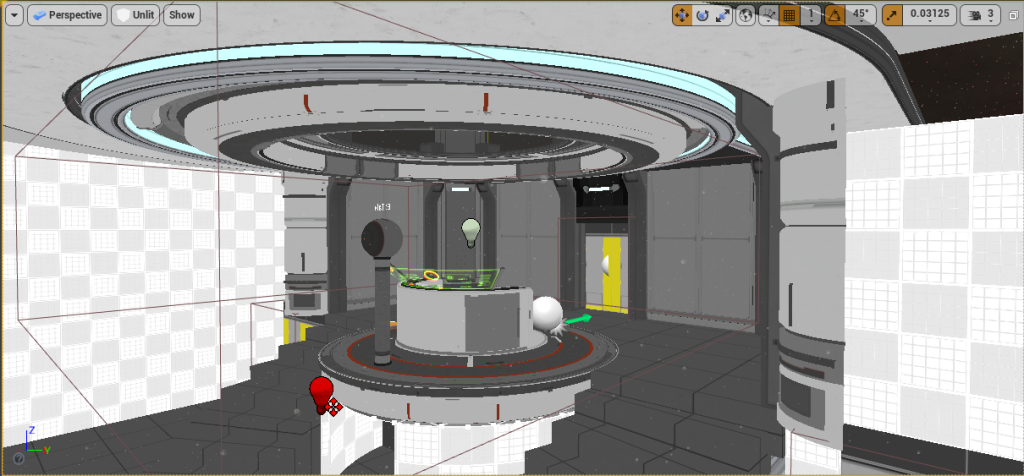
The main room was quite interesting to populate because I used an entire set of assets from the Modular Sci-fi set. These assets were far too large for my main room, but I was able to resize them to work nicely in my space.
I’m pleased with the final look of them in the space. However, I feel they are created to a much higher polish level than the rest of my level will because I will be using flat textures in many places. I hope this won’t cause too much of a jarring effect later.
Assets
Because I was working with many found assets in this main room, it was quite a challenge to make the assets I created (floors and walls) fit around them. I had to remove my original blockout boxes for the floor on this level hen re-create them using geometry boxes.
This technique came with its challenges which I had to learn to overcome. Whenever I committed the geometry to static mesh, it often no longer had the same collision properties as before. I found a workaround to combat this issue by forcing the mesh to use complex collision as simple.
Textures
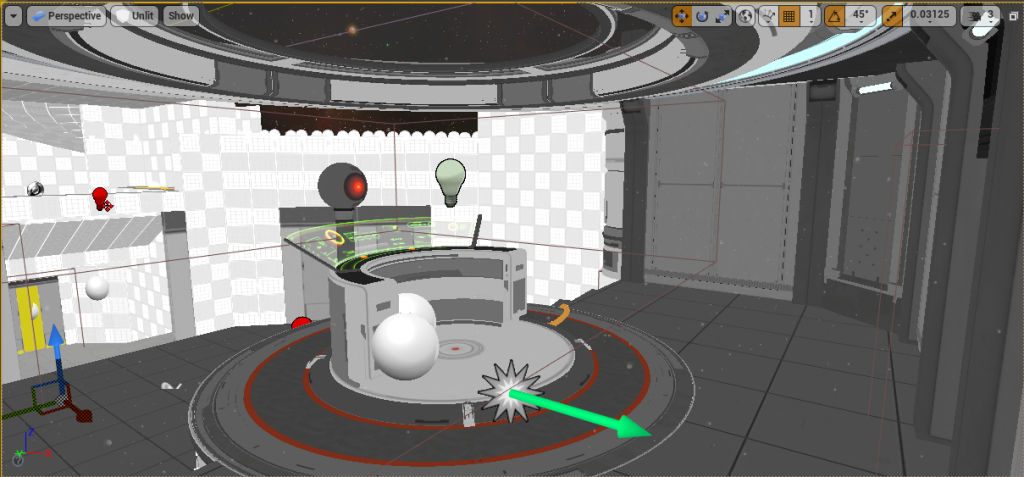
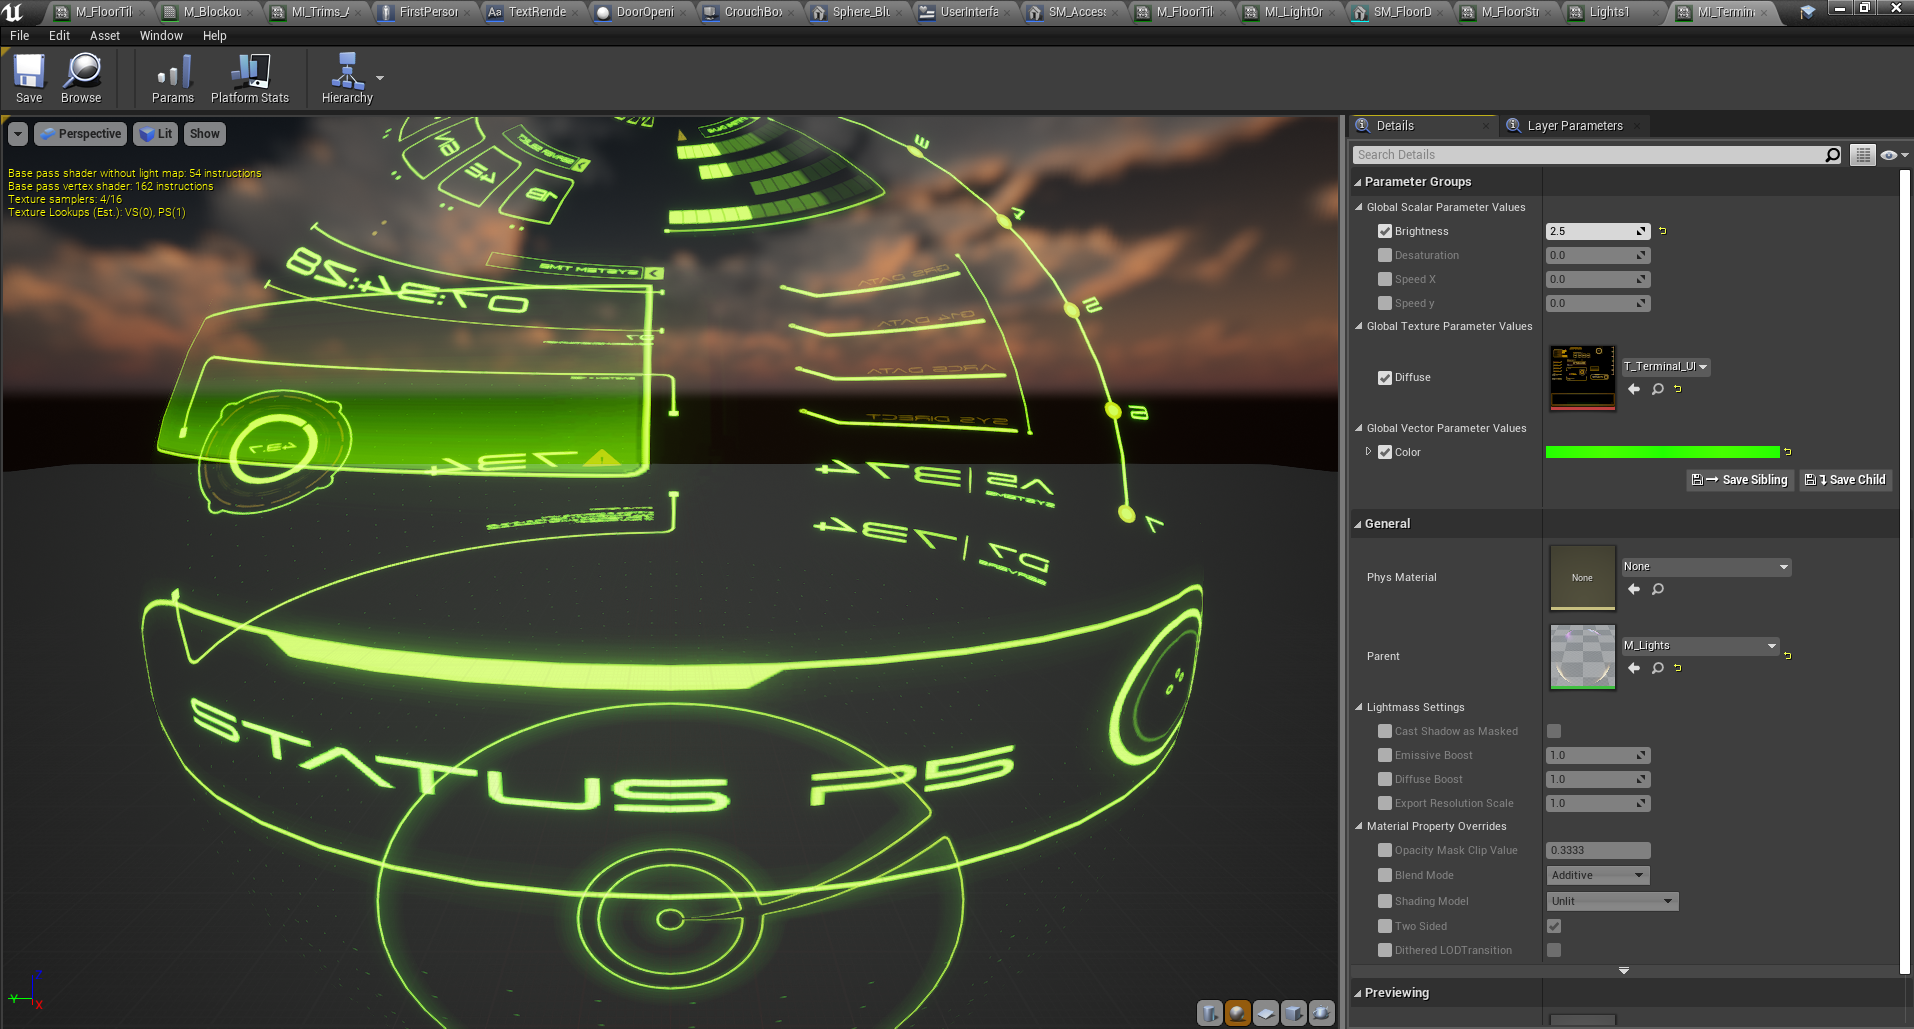
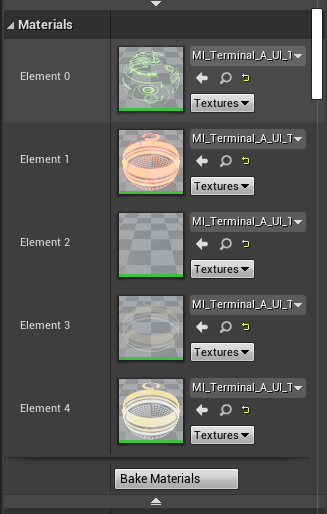
Because so many elements in this section had their textures, there was minimal texturing work to do here. However, one fun texturing element I did work on in this section was the custom interface for the AI’s console table. I’m really enjoying adjusting and working on different dynamic texturing elements such as these.
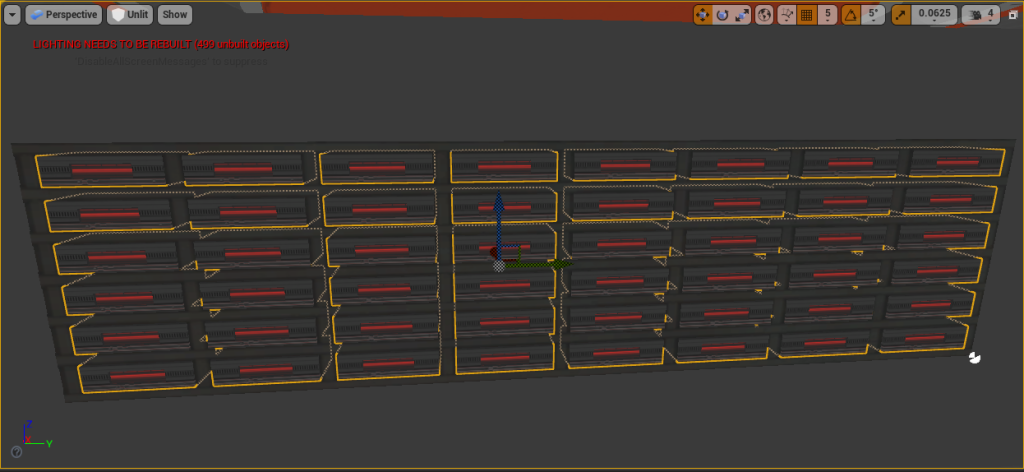
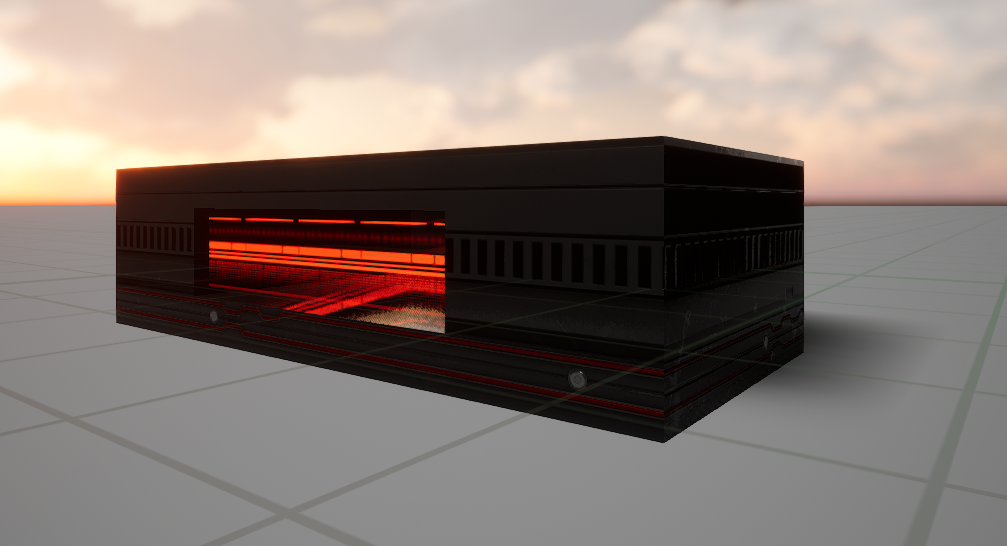
Another element I tackled during my work in the main room was creating the servers that would ultimately be used to shut down the AI. Again, I made these using geometry boxes. I started with a basic cube and extruded it until the front face had nine faces. I then added textures to each face separately, including one of my adjusted textures for the centre panel. This is a texture from the Modular Sci-fi set, which would usually be used on the console table.
Sequencing:
I started working on my game’s sequencing elements at this stage. Previously, during the level blockout stage, I used keyboard numbers to trigger events such as doors opening. It was pretty challenging to figure out how to create these sequenced events. I ultimately did it the hard way as I decided to re-use the tag system. I now realise, after research, that there were other ways I could have handled this.
I used a mixture of trigger boxes and BPs to create the sequencing system. First, I had a trigger box give the player a tag when they entered it; then, I had the AI BPs and player BPs constantly looking for those tags. Then, using branch and do once nodes, I triggered sounds to play in order or other events to happen as soon as the tag appeared on the player.
Audio:
At this time, I also recorded the audio elements for my entire game. My partner and I recorded parts of the audio for our respective characters. In addition, my partner gave me feedback about some of my script elements during this process, and I’m thrilled with the result.
I have uploaded all of these audio clips privately to sound cloud so that you can listen to them here:
Once I converted my files to .WAV and then added them to the game, I ran them through various post-processing sound effects to make the Jane voice more physical and the AI voice more electronic.
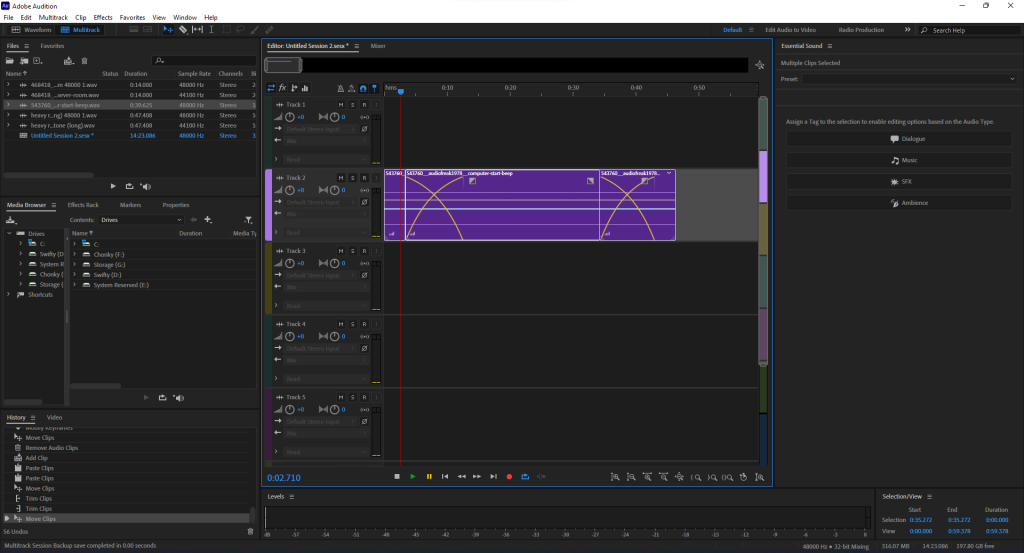
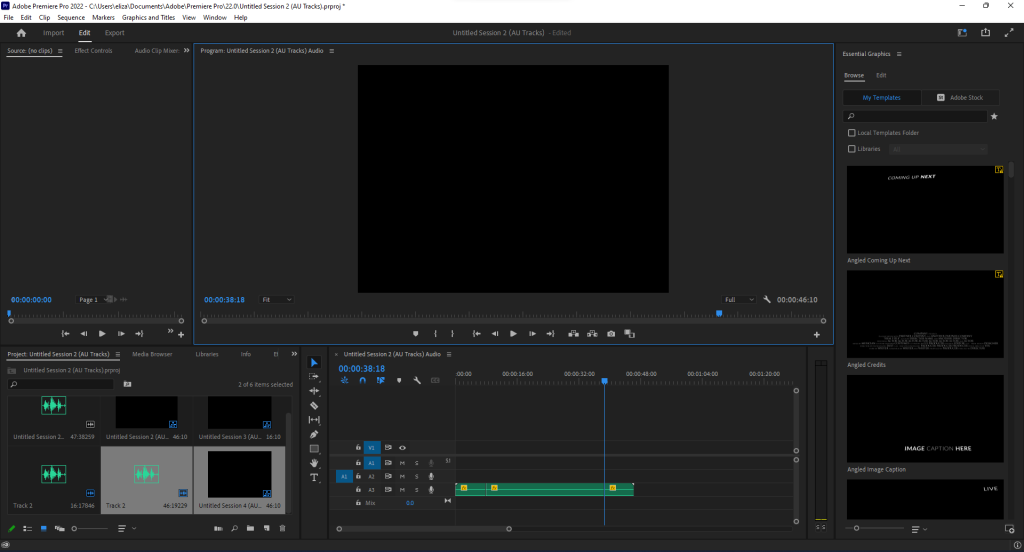
I also added found sound elements for the atmosphere sound loop, doors, and other pickup elements. I had to edit all of these elements in some way or another using Adobe Audition and Adobe After Effects. Luckily, I already had some experience with these programs.
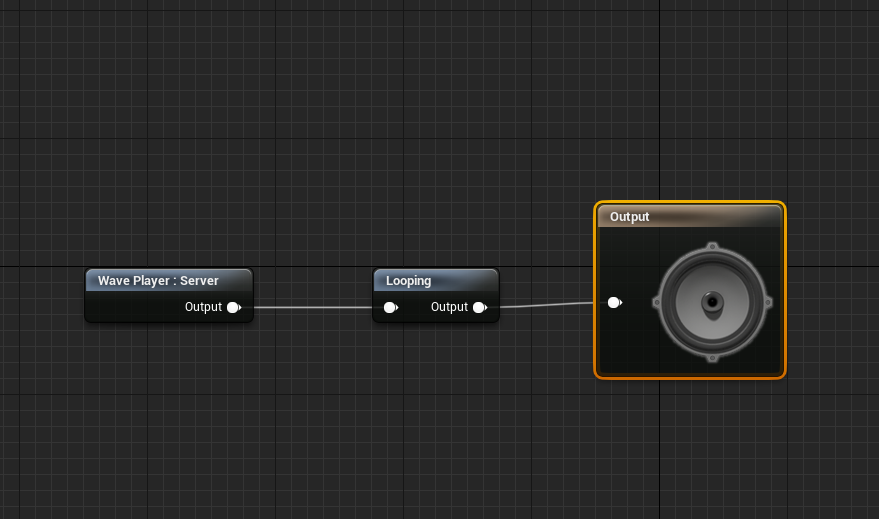
I was experiencing some clipping issues with all of my looping audio. I tried using external software to repair these issues, but I could not fix it and ultimately had to leave it as it was. I did try to research a solution on google. Still, there wasn’t much documentation regarding the problem, and most of the answers said, “use an external program to fix it”, but the audio gap wasn’t an issue for me in the external programs. I may return to this bug at a later time if it continues.
Log Three - Kitchen, Nav deck, and Lower level.
Project planning:
Another Trello board update. Unfortunately, there are a lot of bugs at the moment. But things are moving forward, at least. At this point, I am starting to remove elements that I know will become unnecessary later, as I am planning to add another floor to the ship based on user feedback. I’m also planning to add a sequenced event where the player falls through a vent.
Kitchen:
The kitchen was the most enjoyable room so far to work on. So many of the found asset packs I have installed are kitchen related, so it was super fun to populate this room with so many assets.
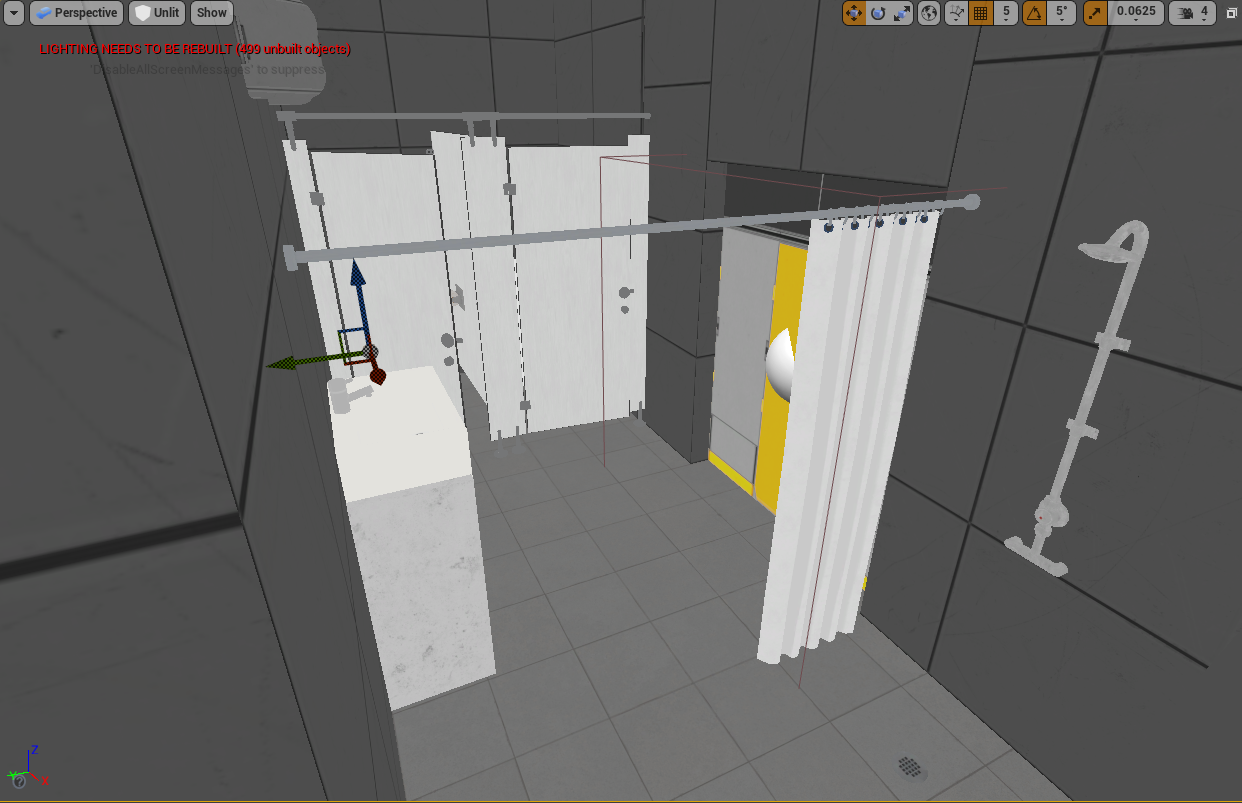
I adjusted the counters, cupboards, tables, and shelves with custom materials so that they would suit my theme. I mainly used assets from a supermarket pack to place in the fridges and added a small bathroom section. Aside from the removed vent, the level design elements are the same as the original blockout.
In “How level design can tell a story” by Game Maker’s Toolkit, they talk about how spaces should be credible but not necessarily real. I added at least one bathroom and kitchen to the level design to give it this “could be real” feeling.
Nav Deck:
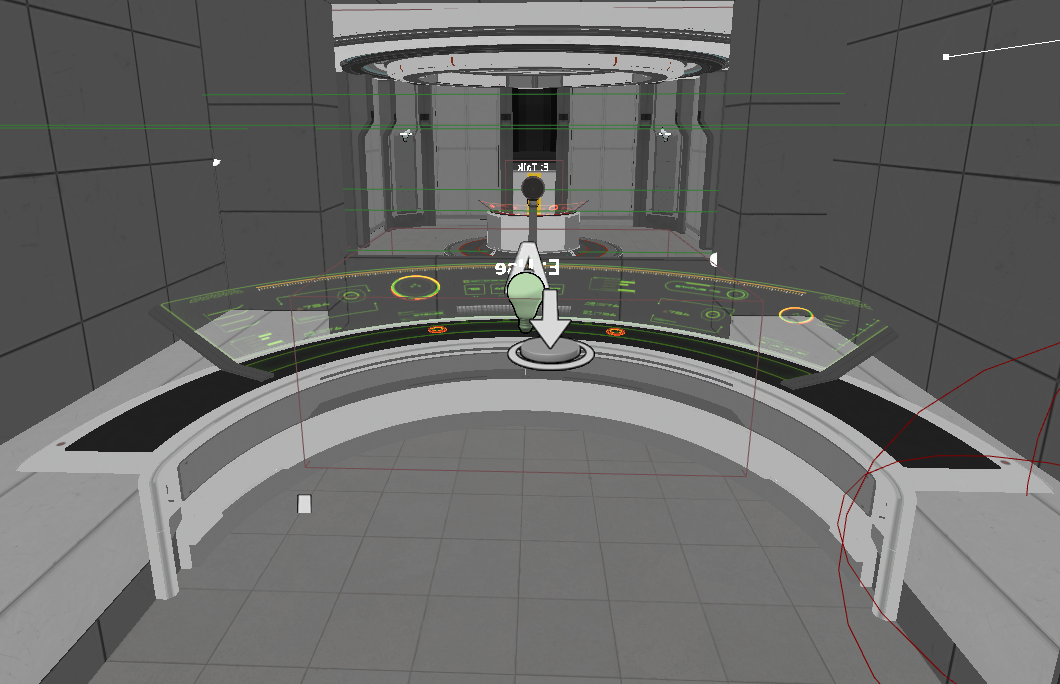
I started by adding another console deck, the same one I used for the AI, to the Nav deck. Unfortunately, none of the other asset packs I have installed contains anything similar to this console table, so I will have to re-use this across the level. I have adjusted the UI’s colour to red on the AI deck and the deck’s size in the Nav deck so that the two don’t look identical.
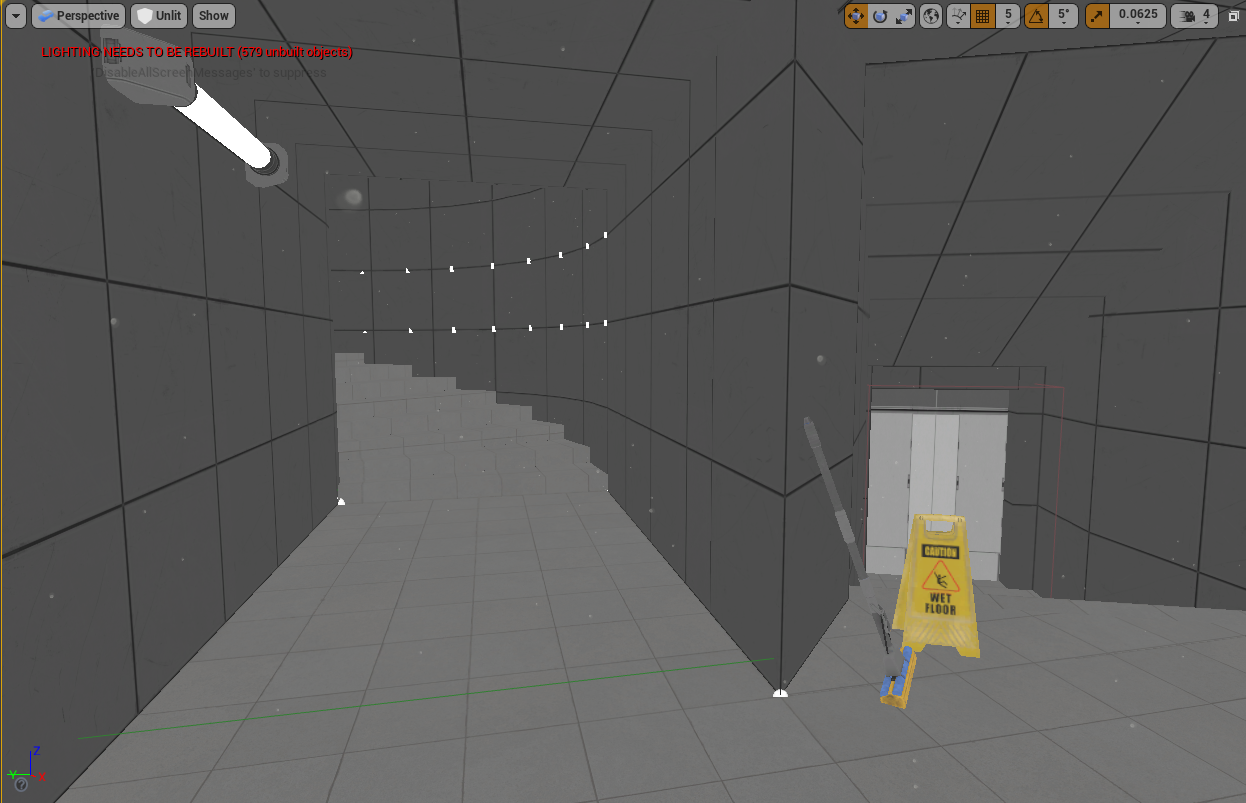
At this stage, I asked my partner to test play my level to get some feedback. While walking up to the Nav deck, I noticed that he was drawn to the other door. I used the advice given in David Shaver’s GDC talk, Level Design Workshop: Blockmesh and Lighting Tips, to tackle this issue. David Shaver discusses how you can use triangular shape language to dissuade a player from taking a particular route. I added a triangular sign and mop to the problem path and a light to the correct path. In further player tests, this issue was resolved.
Also, while working on the Nav deck, I decided to go ahead and create the UI for the laptop notes and write the first few entries. I placed a laptop here in the Nav deck as well.
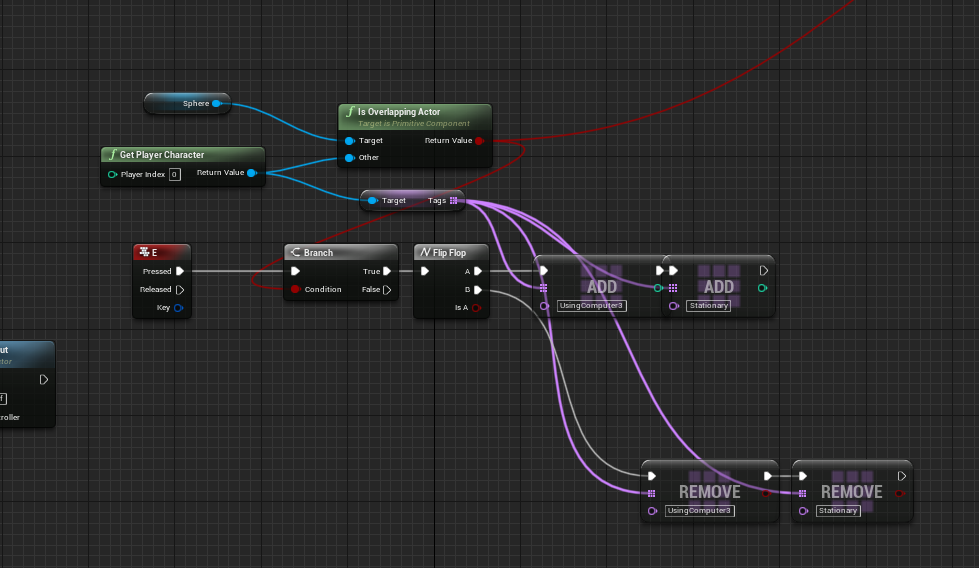
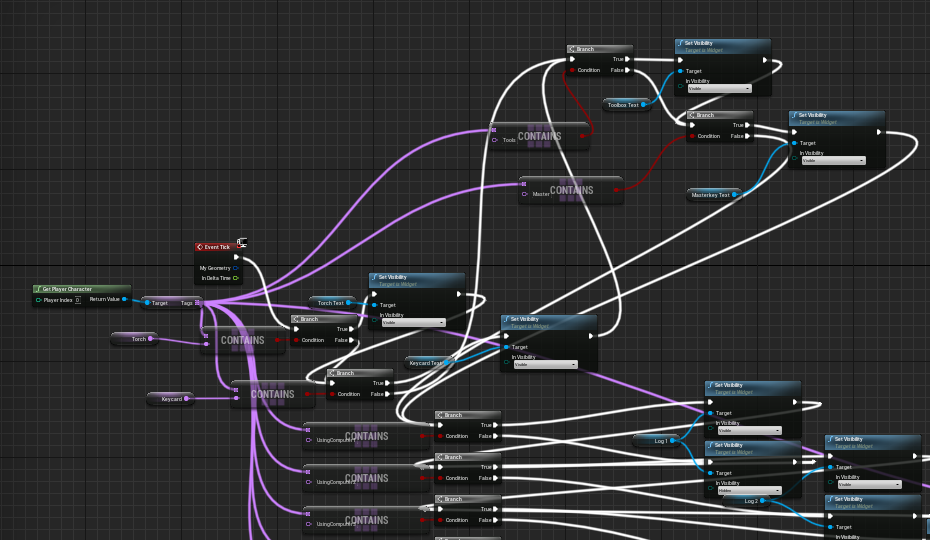
To create the UI, I used preset UI elements and triggered their visibility using the tag system (I’m sure there was a better way I could have done this… but it works). I also added a stationary tag while the player is using the laptops, which removes control over the main pawn. This stationary control was added in my movement section of the player BP.
Lower Level:
Based on the feedback given by Stuart in my original level design blockout stage, I decided to flood the lower level with a bright green light. Stuart said that if I wanted that section to be recognisable by the player when they re-enter the zone, it would have to have something unique about it. I added a green moveable just in front of the vent from which you enter the area, so that the light would react dynamically when the vent is opened.
I also added a sizeable console-ish wall to this zone. I didn’t want to re-use the console from the AI in such a small space, so I made do by adding some of the adjusted materials to the wall as planes.
This area was simple to populate, though I could add more assets as it is sparse. I’m adding this as an optional extra to my Trello board, as I find myself too often stuck on small details like this, and I want to move on with the rest of the level.
Sequencing:
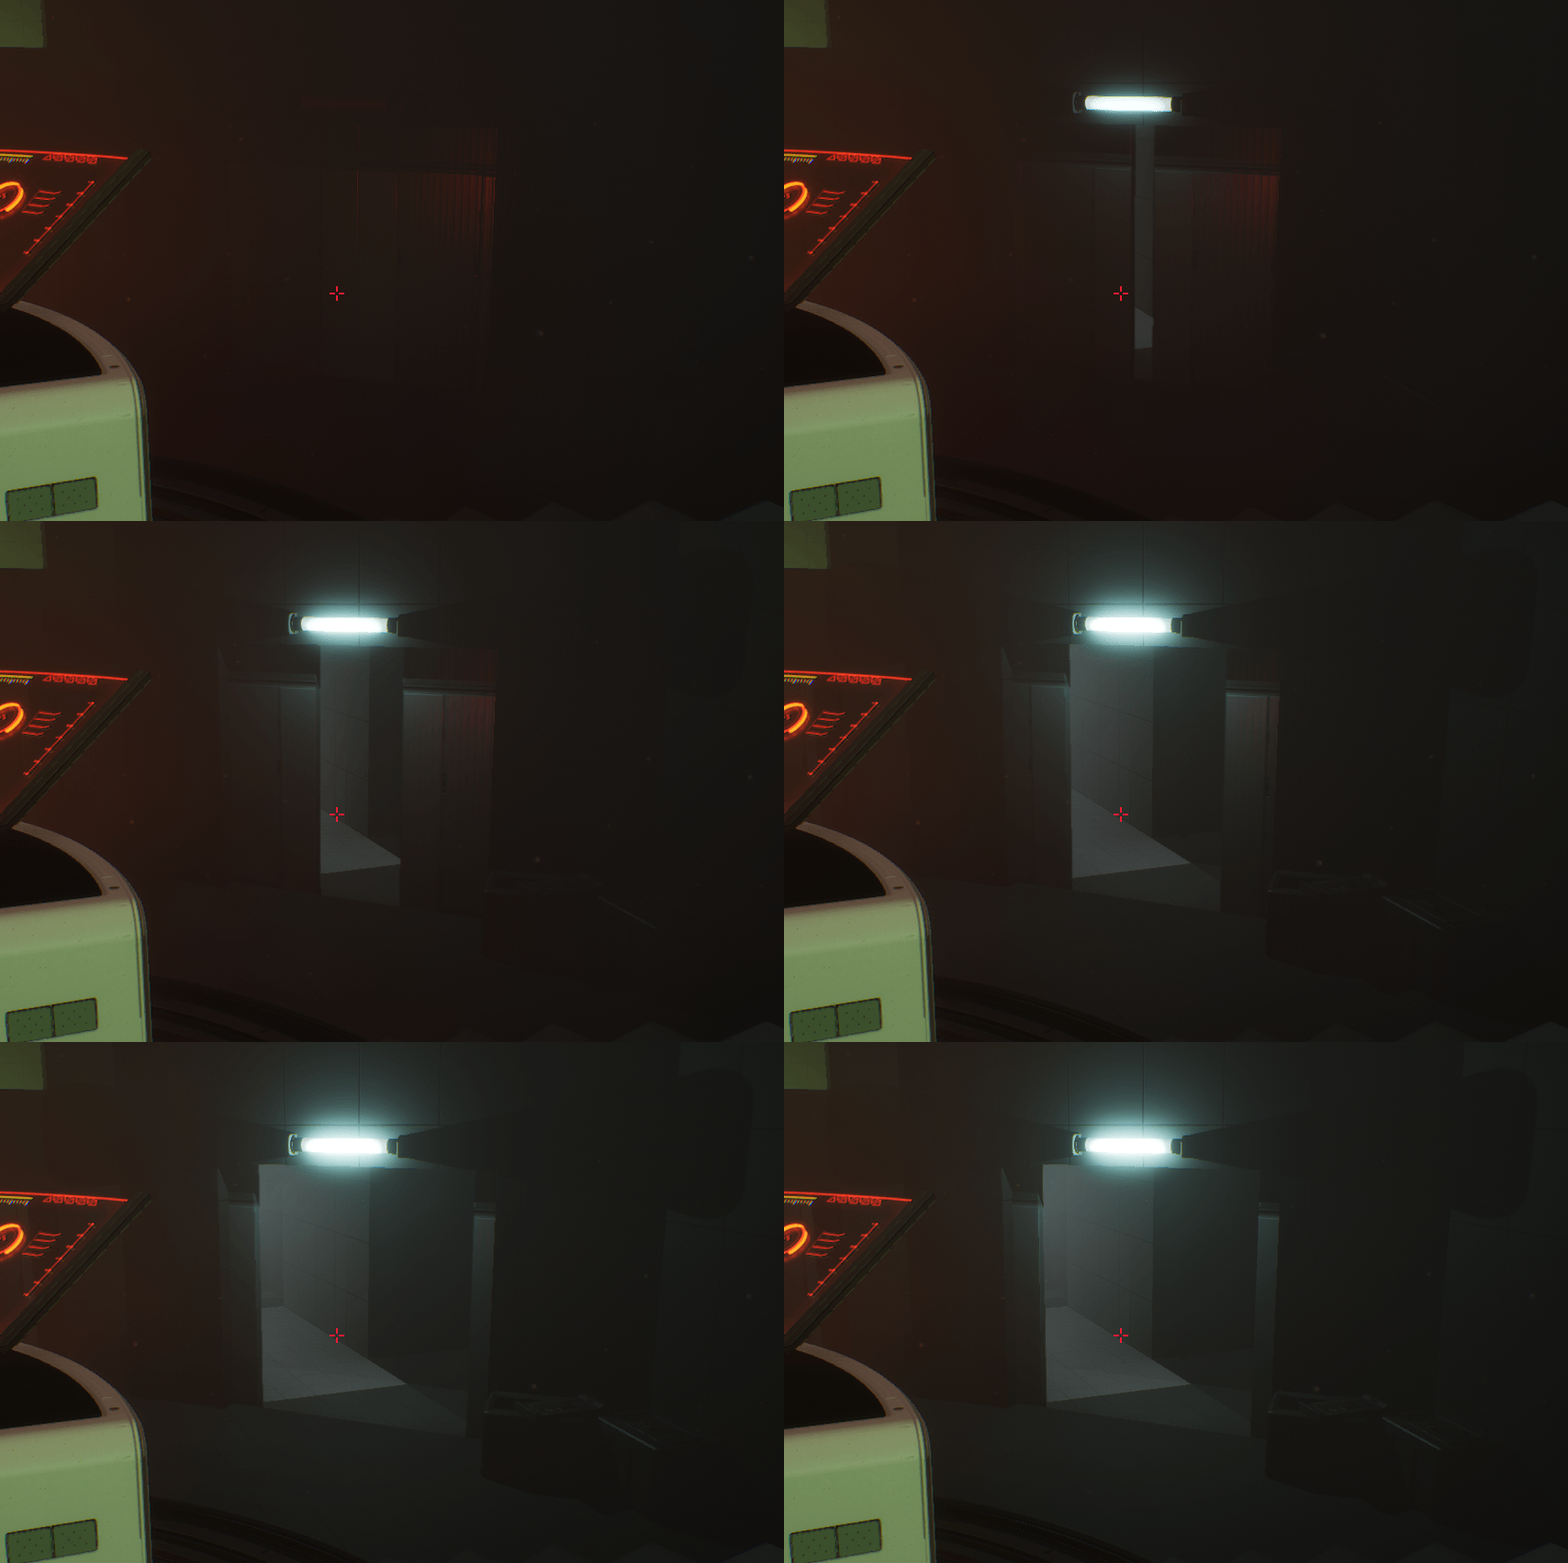
As a brief update to the sequencing, I added some BPs for the tag system to make the doors open and close. Along with lights above the doors to light up.
To create this, I made two light materials, one with a lit emissive and one without. I triggered a material swap when a tag was found on a player and a moveable light to illuminate simultaneously. However, the result was quite jumpy. As a result, I came back to this after a while and decided to use timelines and lerps to make this illumination smooth.
Log Four - Hydroponics and spaghetti...
Planning:
My Trello is a little bit dead at the moment because most of my issues are with existing blueprints…
Are all blueprints spaghetti? Or is all spaghetti blueprints?
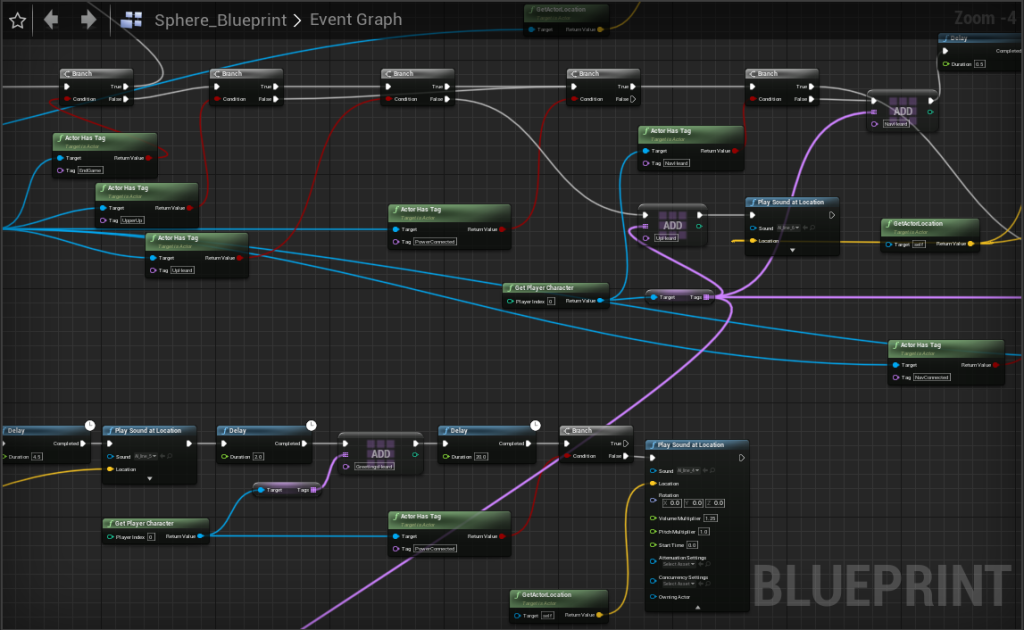
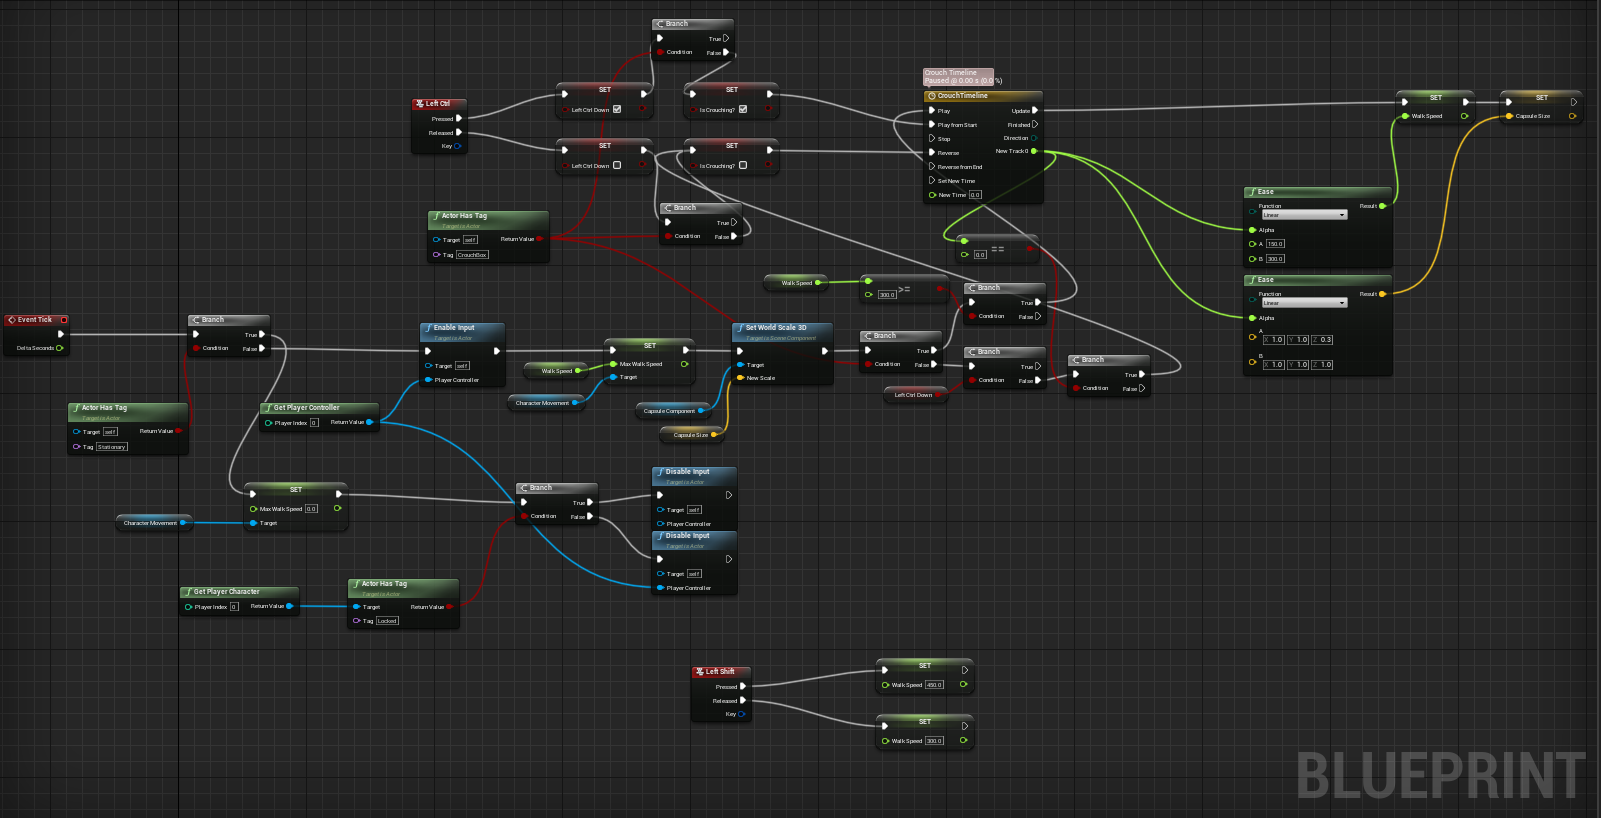
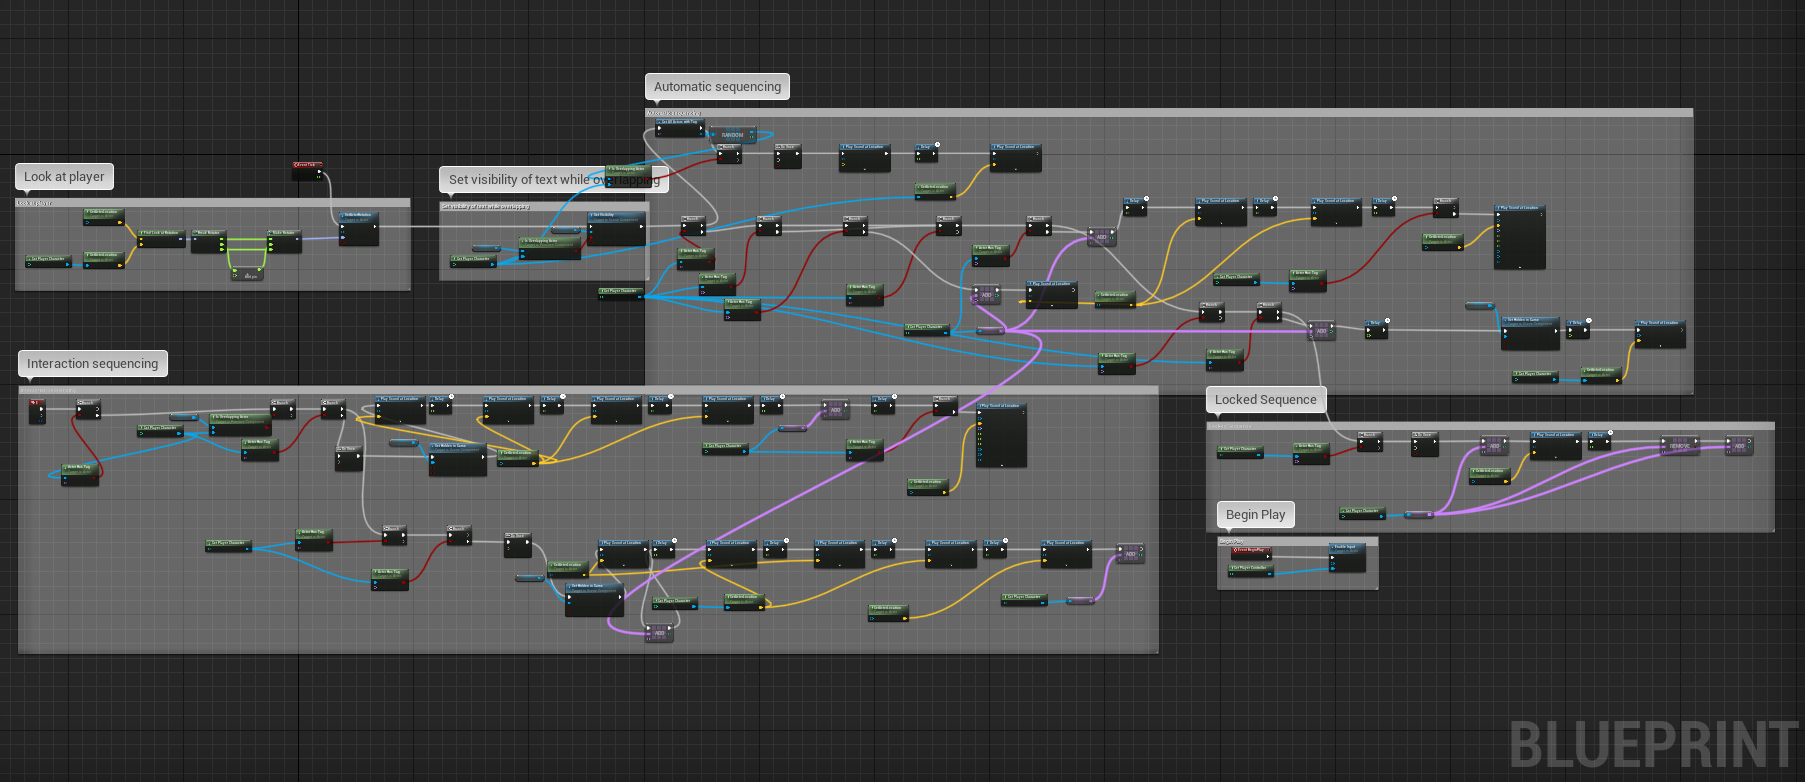
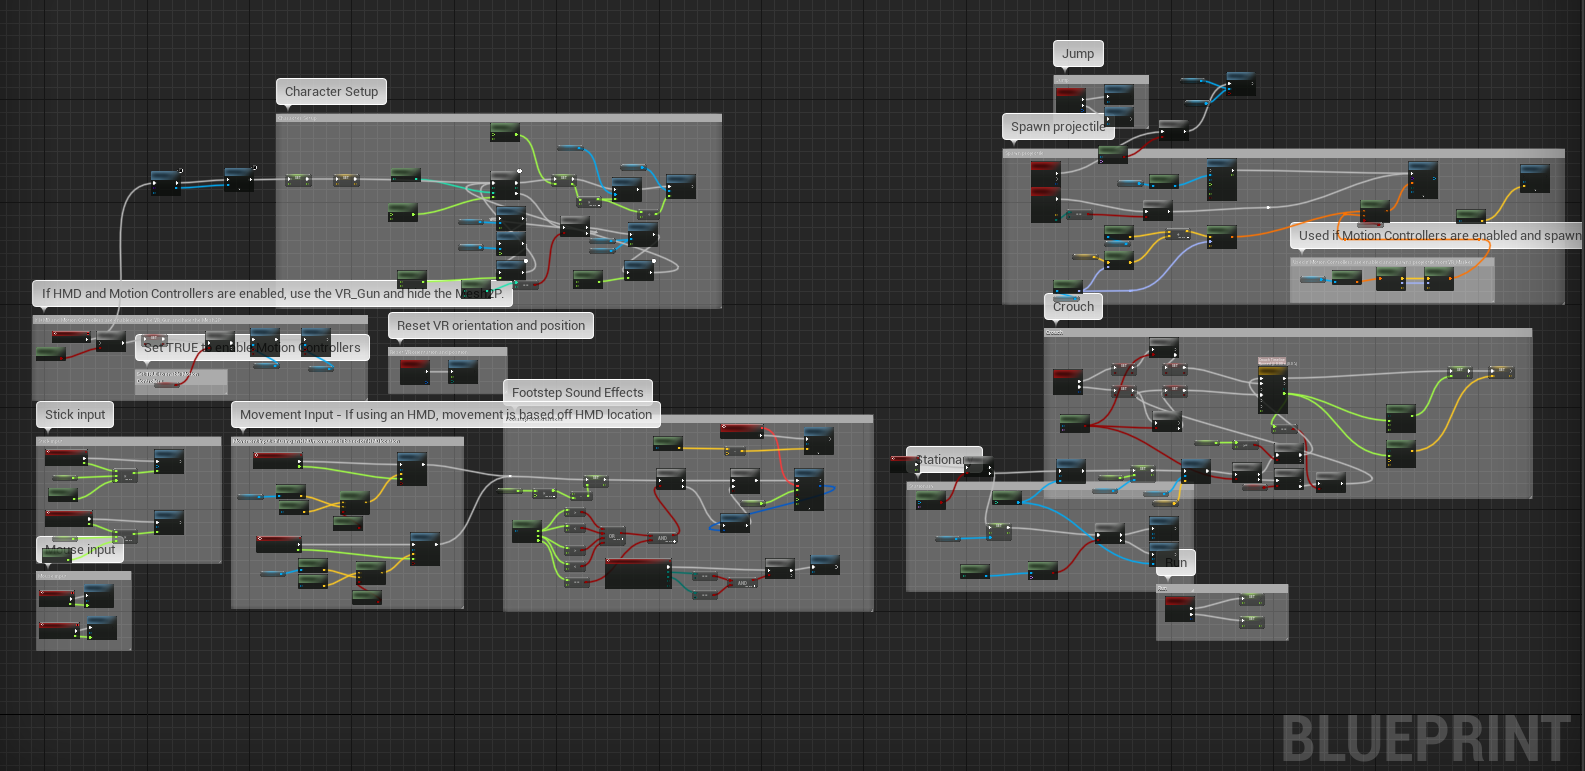
My blueprints are becoming impossible to handle at this point. I basically have an existential crisis every time I open a blueprint. It’s taking so much time to add any interactivity. And continually returning to BPs that I haven’t used for some time is jarring and confusing as I have to figure everything out all over again.
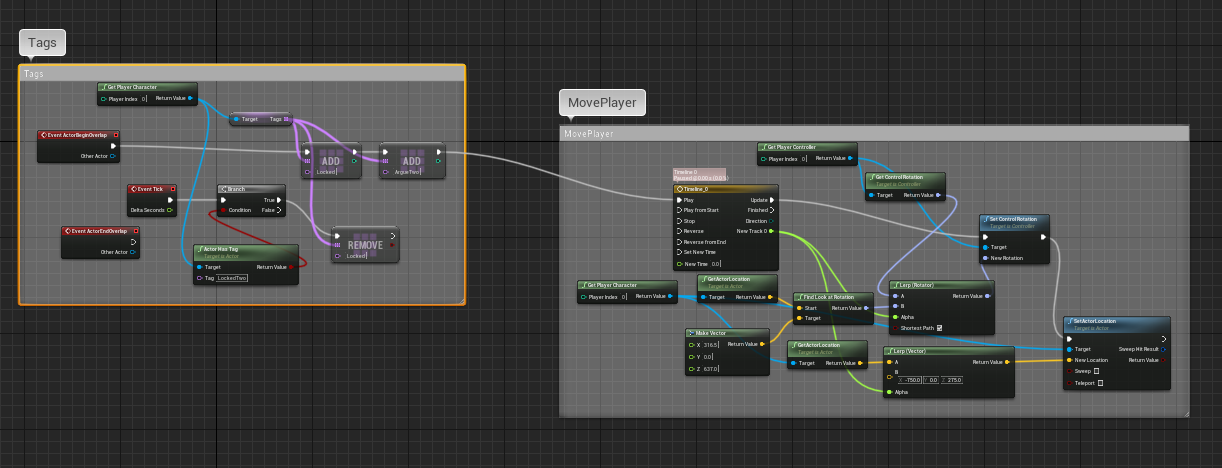
I, therefore, decided to spend a little time tidying up some of my previous blueprints, sectioning where I could.
I also used this time to create and adjust additional blueprints needed to complete my level so that there would be less returning to previous sections.
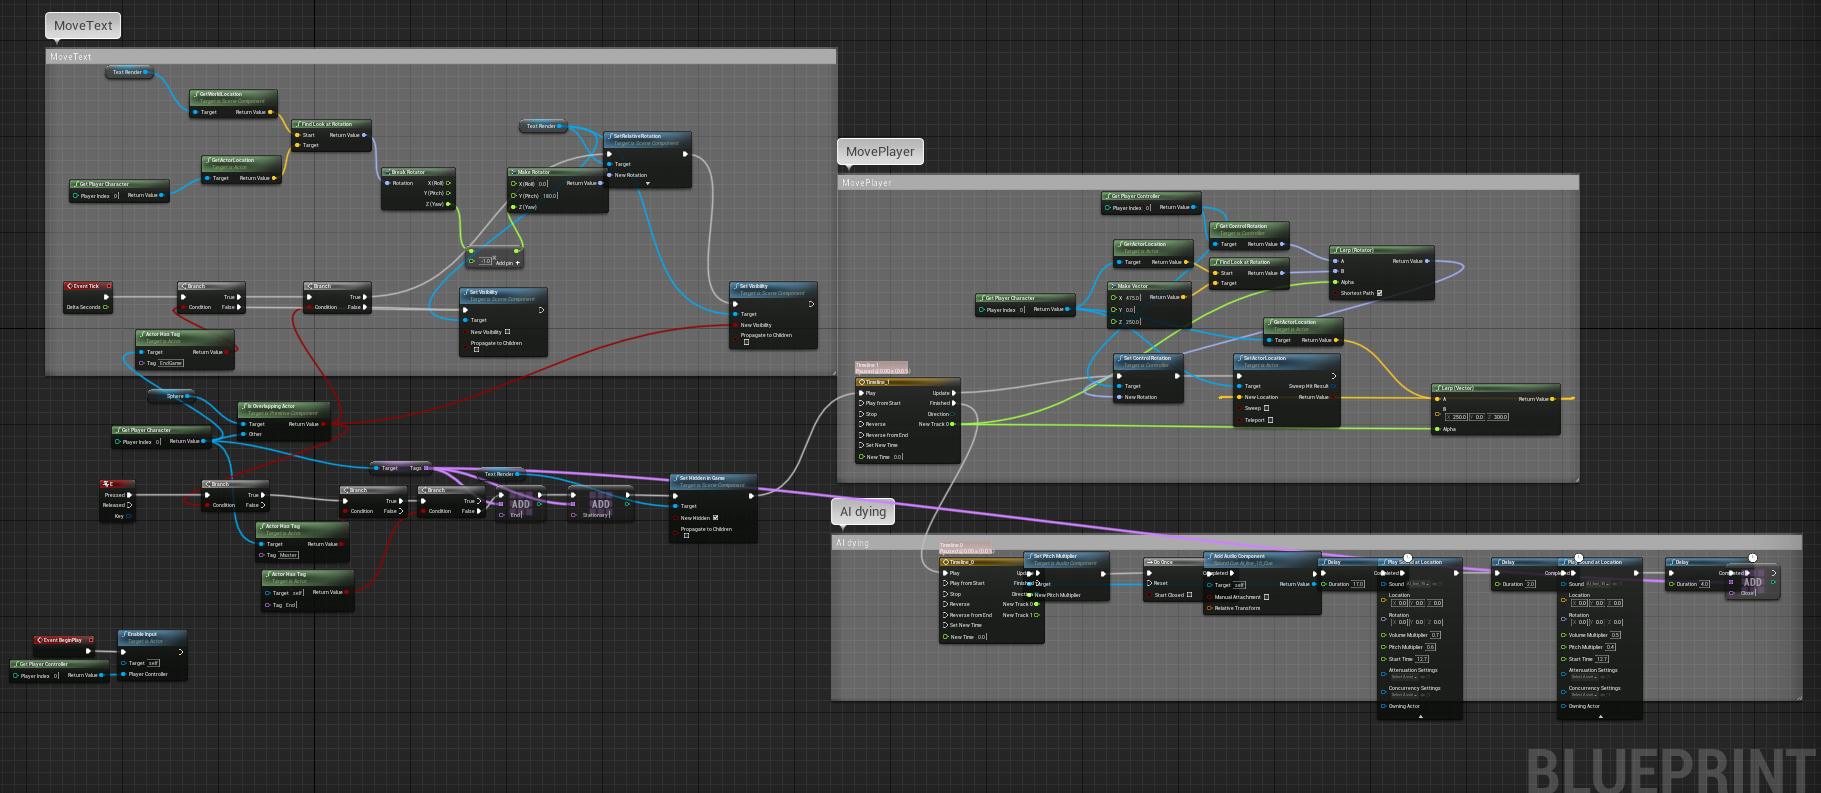
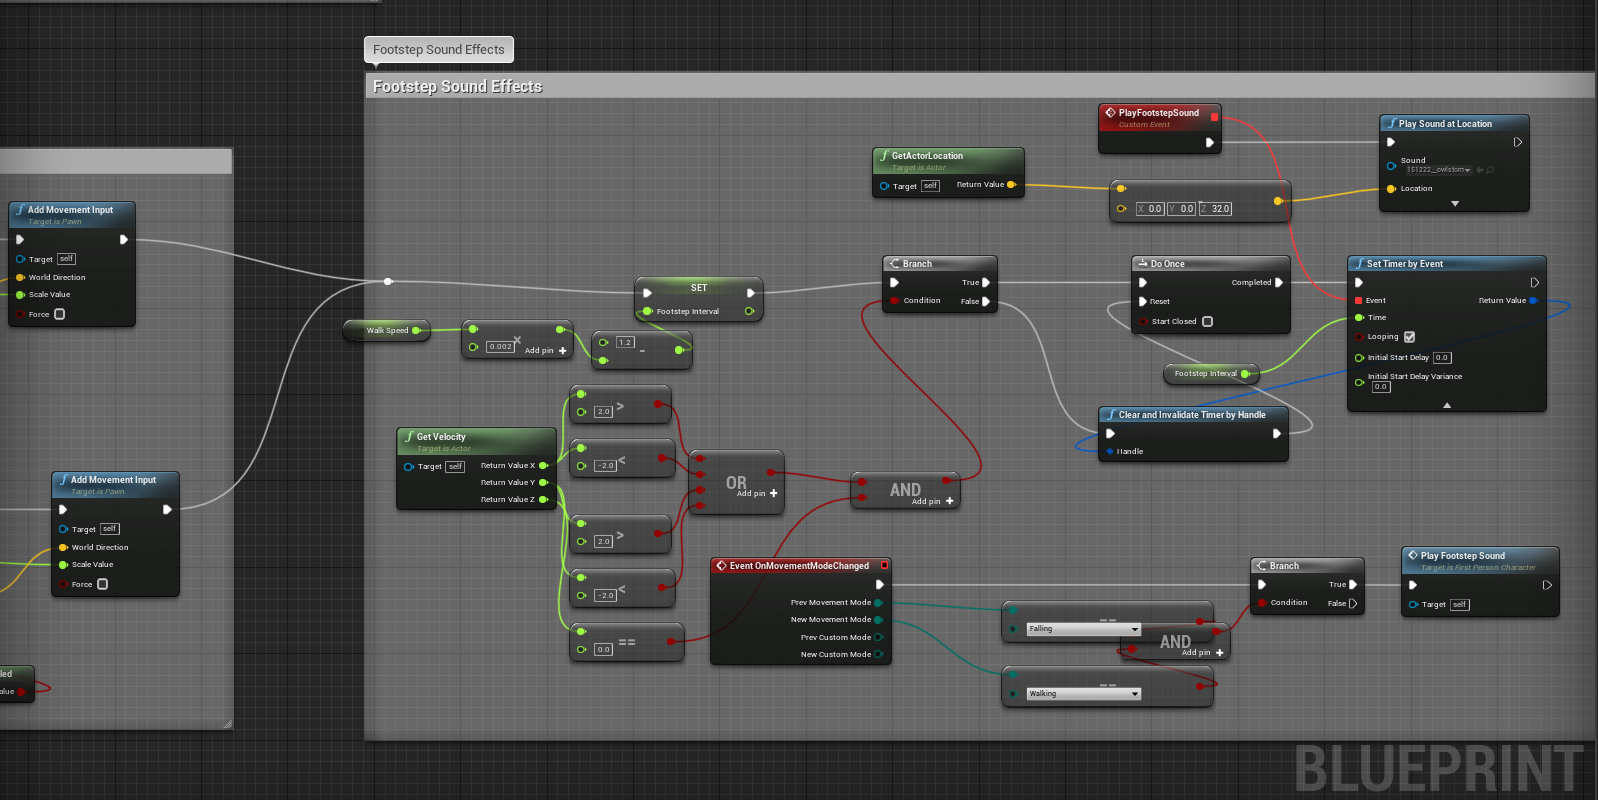
Some of the elements I have added include footsteps, improvements to the crouch boxes, and interaction updates.
After some research, I have realised that using an events-based system would have been much more straightforward, tidier, and faster for creating this project. So I have used tutorials to learn how to create custom events to use this knowledge for future projects. However, it seems like a waste of time to go back and change everything now, so I will continue to work with what I’ve got right now.
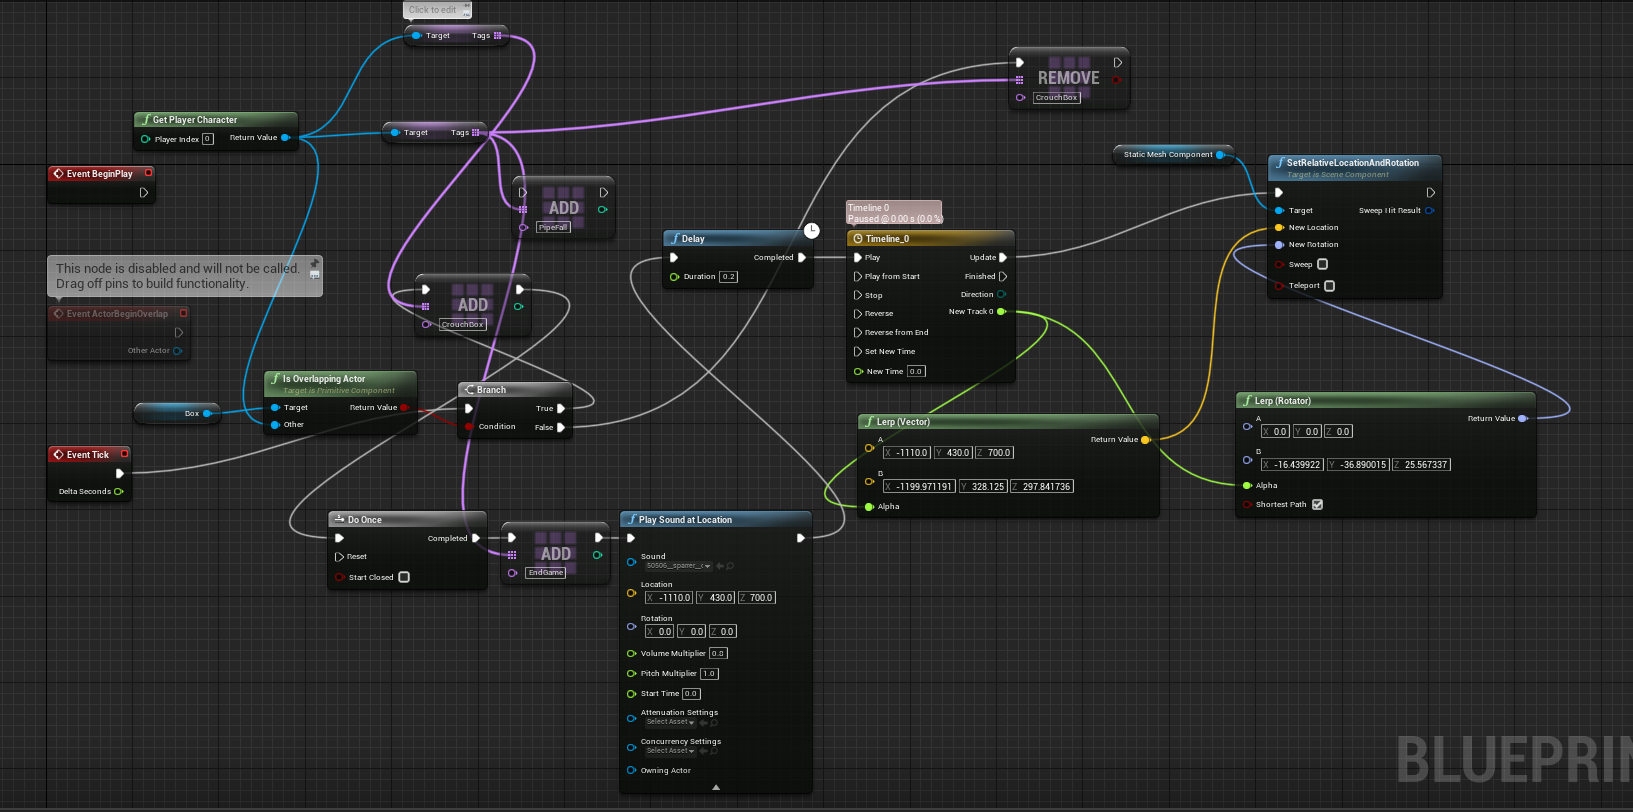
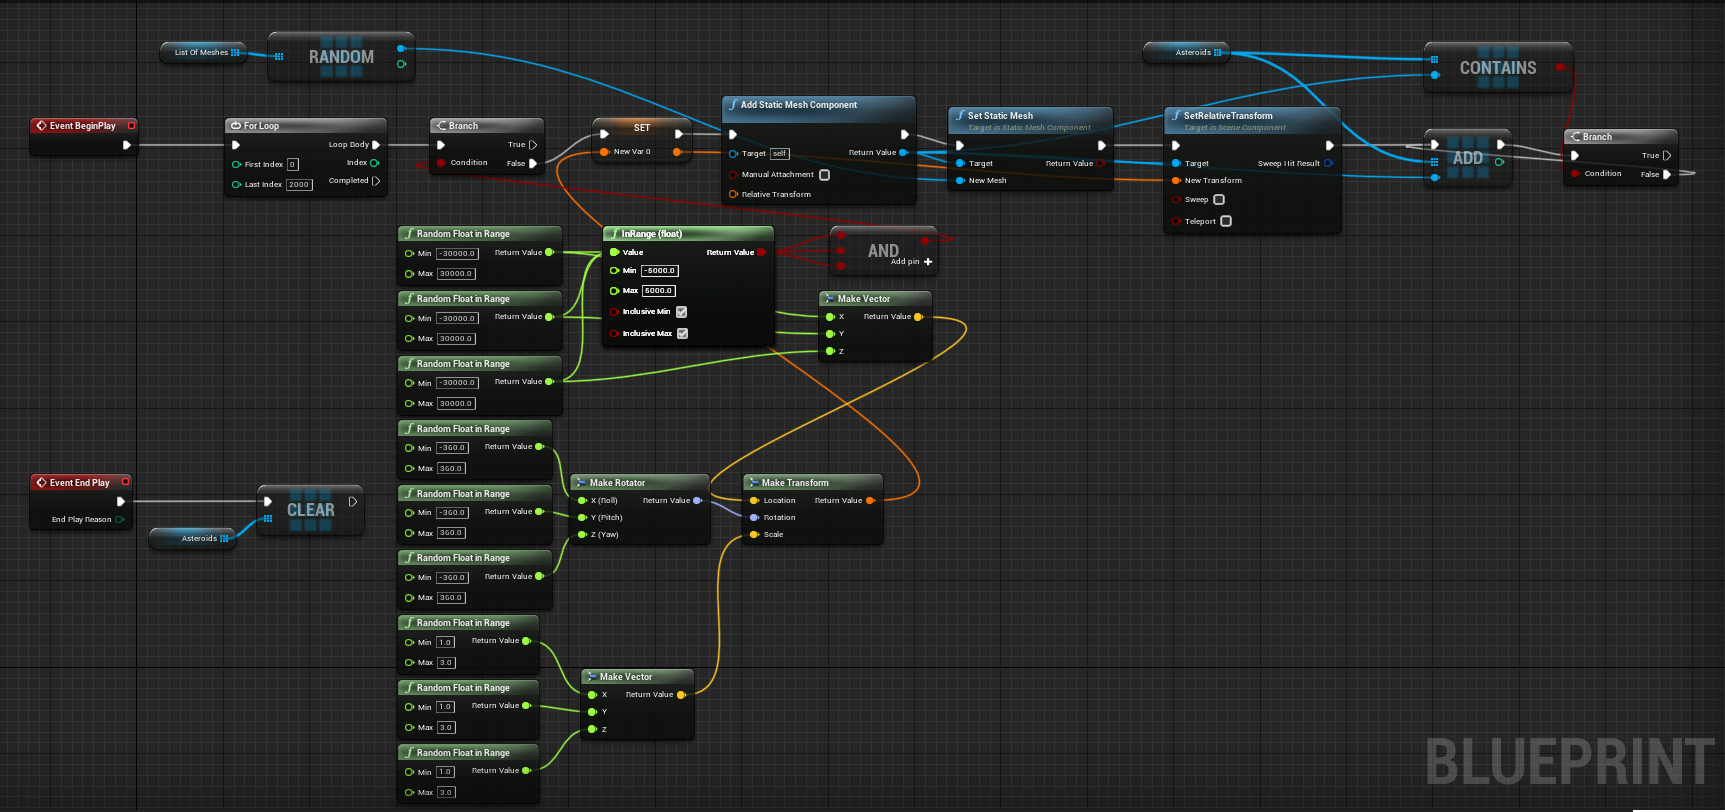
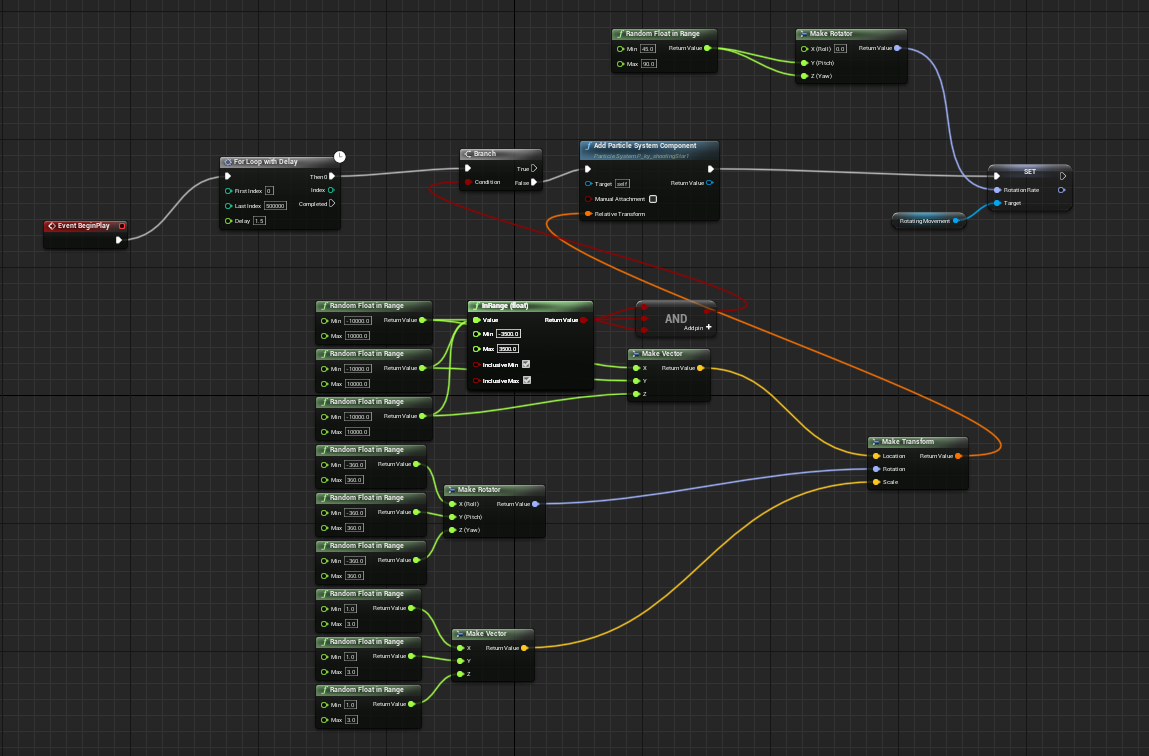
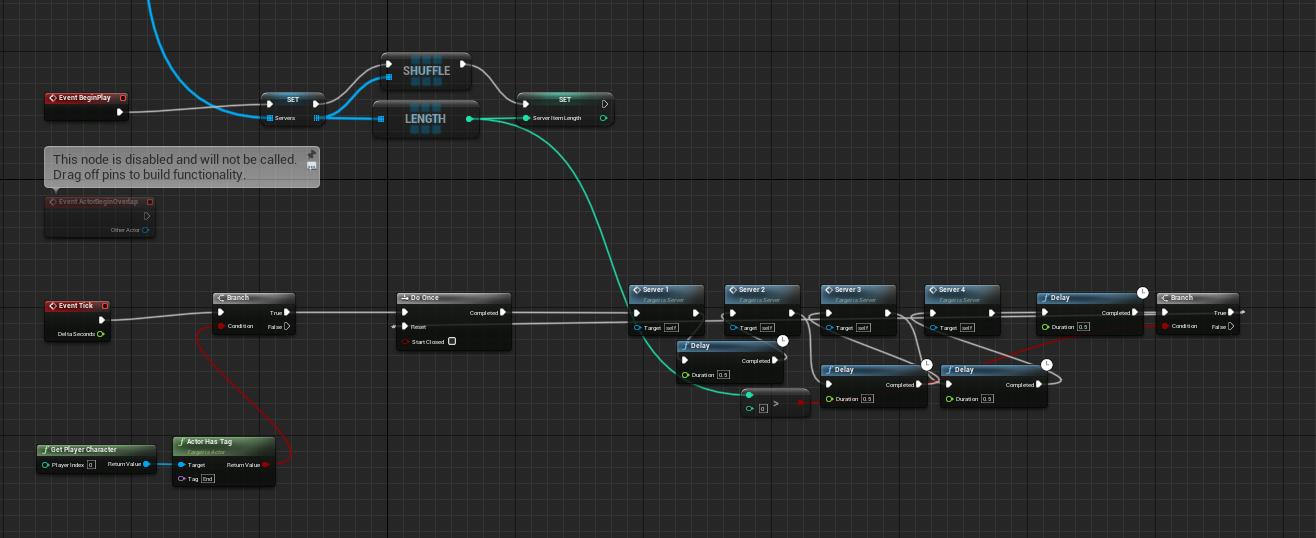
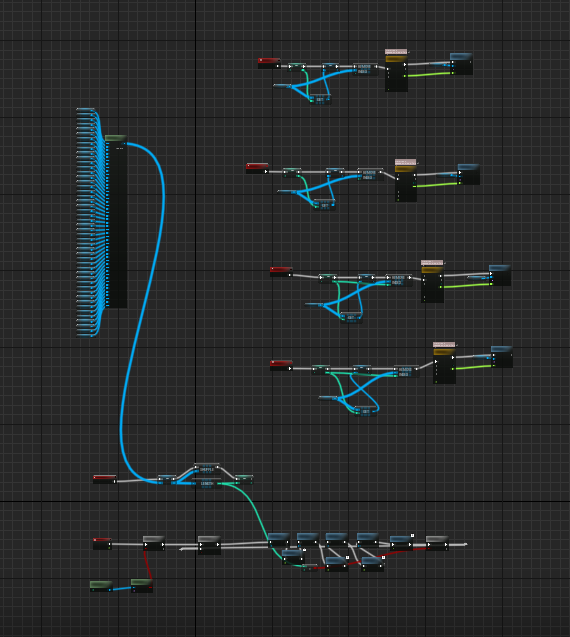
The following is a dump of all the blueprints I’ve created at this stage and the adjustments I’ve made; please see the captions for descriptions.
The Hydroponics bay
The hydroponics bay was similar to the kitchen, I had a lot of fun creating this zone.
When entering the zone I have a small passageway, followed by entering into the large Hydroponics bay. This technique is mentioned by many Level Designers in many GDC talks. However, I particularly like Emilia Schatz’s description of how a small space transitioning to an open vista gives the player hope.
I used rect-lights and custom geometry to create the “grow zones” and the Mediterranean Plants asset pack to populate them. I was excited to see that the plants automatically animate a little when placed, which adds a life-like effect to this room. The rect lights use the same shape language mentioned earlier to point the player towards the centre of the room.
I also added subtle arrows to the floor of the room to encourage the player to move forward to the next area.
I populated the sides of the room with boxes, bottles and other storage-type items from the variety of asset packs loaded into this project.
Log Five - The new "upper" zone and VFX!
Planning:
Many of my bugs and issues across the level are now resolved; all that is left to do is add the “upper” area and final VFX. I still have some unresolved optional cards, but I will likely not complete them as I have very little time remaining.
The Upper zone:
The upper zone includes the server room, pilot deck, and fall pipe.
Server room
I started this section by creating the server room. I used assets from packs with emissive animated lights. This gave a wonderful dynamic lighting effect to the room.
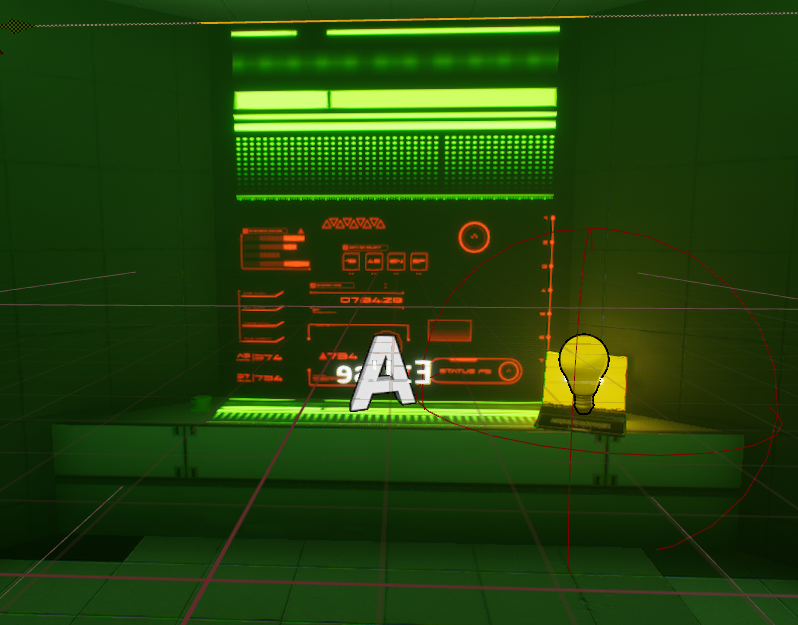
The toolbox is in this room, an item the player needs to pick up to move through the vents. Therefore, I placed the toolbox next to the glowing yellow laptop to draw the player’s attention. Throughout the level design, I have tried to consistently use the colour yellow to signal to players that they can interact with objects that are coloured bright yellow. This is based on a GDC talk theory by Jolie Menzel where she talks about how games such as Mirrors Edge and Dying Light use contrasting colours such as yellow to direct the player in this way (Menzel, 2017).
I also added environment noises to this room, for this I used downloaded sound assets from users Audiofreak1978 (Audiofreak1978, n.d.) and MSEpitaph (MSEpitaph, n.d.) to create the ambient sound.
I struggled quite a lot to correctly adjust the lighting in this section, and the room was very bright for quite some time during its development. However, I believe I struck a good balance by the end.
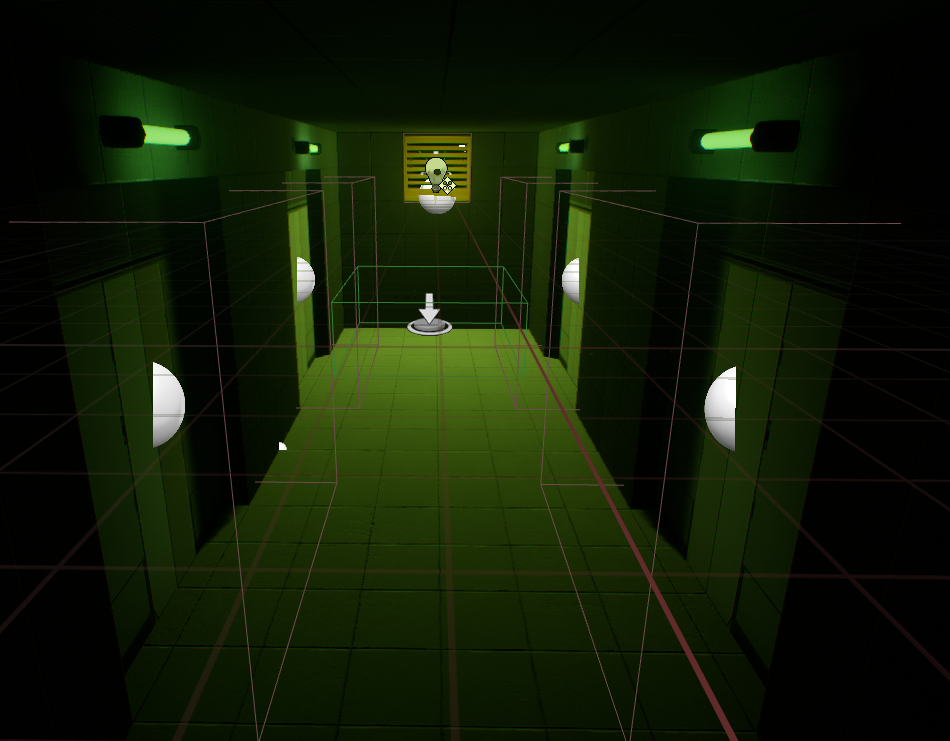
Similarly to the hydroponics room, this room has a hallway leading to it. creating another small space > open vista effect. However, unlike the hydroponics room, I lightly lit this space. I used an orange light for one end and a green light for the other to signal subliminally to the player that they are moving between zones. I then lit the upstairs with all blue lights.
Transition section
The transition section is flooded with blue light and simply decorated with custom geometry stairs I created.
I also added some subtle decals to the walls directing the player towards the stairs in case this section felt confusing to navigate.
Upper Level
The upper level has been flooded with blue and red lights to indicate the player’s zone.
Of all the rooms I’ve created, I feel like this is the worst laid-out room. This is likely because I revised it so late in the process after all of the other rooms were created. I created this additional space to increase the number of exciting areas and height variation in my level. However, I feel like, ultimately, this space was a detriment to the level’s overall feel due to its difficult-to-navigate nature.
I tried to use the same yellow light as in previous rooms to draw the player towards the vent, and a white light to draw the player towards the masterkey card. However, I don’t know if I have been successful as I’m lacking user testers.
I also feel that this room had some size creep. It was hard to fit where I wanted this room to be around the other elements in my level, so this room ended up being huge in comparison. I tried to keep all of my other areas relatively small and tight based on Kate Craig’s theory of how large spaces lack intimacy, which she talked about in the GDC The level design of Gone Home (Gaynor and Craig, 2015).
Fall pipe
One really interesting yet difficult section to create was the fall pipe section.
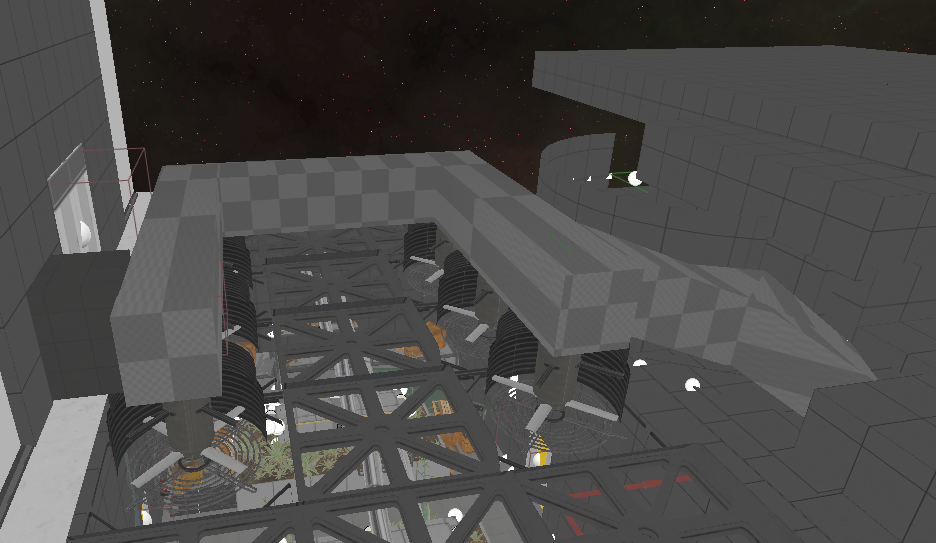
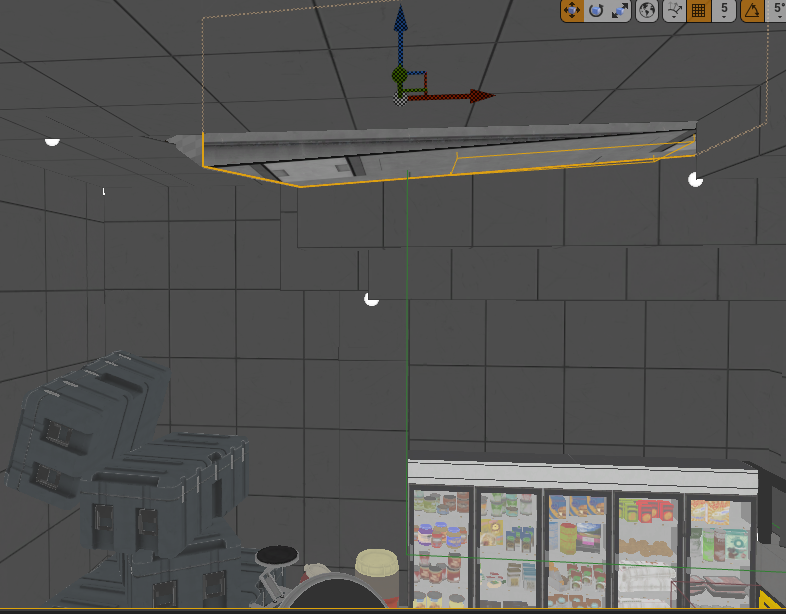
I created a section of the vent using custom geometry. I added small hatched vents into it so that you can look down into the hydroponics room, creating a feeling of verticality for the player. Eventually, the player will hit a trigger box which causes the pipe they are in to fall into the room below, the kitchen.
To make the pipe fall, I used a blueprint attached to the section of vent that falls. I added a trigger box which when the player enteres for the first time it will trigger the pipe to fall. I then lined up, as best I could, the timeline of the fall motion with the sound that I had downloaded for the event by user Sparrer on FreeSound (Sparrer, n.d.).
VFX:
Wow, I can’t believe I’m at the end of the project, and it’s finally time to create the VFX and the finishing touches.
Asteroids
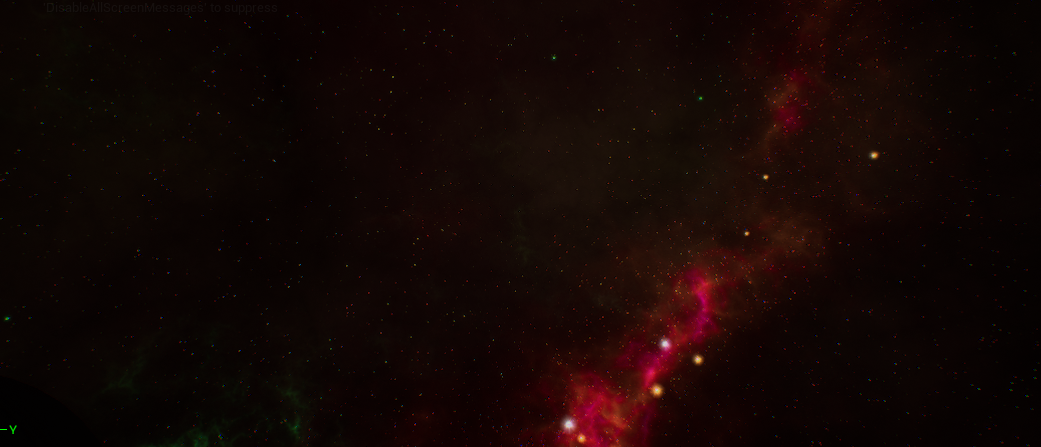
Based on feedback from Stuart during the level blockout phase, I decided to add some space asteroids to my level. I wanted them to rotate during play slowly, so I knew I had to put them into their blueprint instead of just placing them in the level.
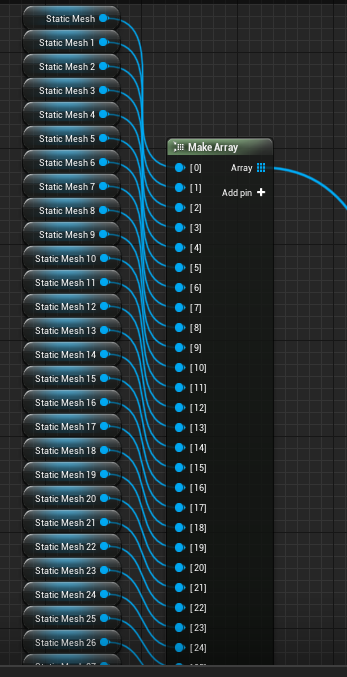
I created a spawning blueprint using knowledge from a previous game I made during the Rapid Prototyping module and a new coding understanding of arrays and methods. This blueprint selects from various assets and places them at random locations within a set zone.
Then, a rotation component sets the entire BP to rotate.
If I had additional time, I would potentially try to make the asteroids move randomly instead. I attempted this, but it wasn’t working, so I left it as is with the simple full rotation.
Shooting Stars
By re-using my blueprint from the asteroids, I was able to create shooting stars. They spin in a similar direction to the asteroids, only this randomises slightly so that it doesn’t line up perfectly. For the shooting star asset, I used a particle effect which came built-in with one of the installed asset packs.
References:
References 2001: A Space Odyssey. 1968. [film] Directed by S. Kubrick. Brown, J., 2016. The Importance of Nothing: Using Negative Space in Level Design.
Available at: <https://www.youtube.com/watch?v=GZ99gAb4T0o>. Cox, D., 2016. Interior Design and Environment Art: Mastering Space, Mastering Place.
Available at: <https://www.youtube.com/watch?v=WWXsmnlmADc&t=2624s>. Game Makers Toolkit, 2020. How Level Design Can Tell a Story.
Available at: <https://www.youtube.com/watch?v=RwlnCn2EB9o>. Gaynor, S. and Craig, K., 2015. The Level Design Of Gone Home.
Available at: <https://www.youtube.com/watch?v=n6__ftHSEfM>. Haggins, M., 2017. Storytelling Tools to Boost Your Indie Game’s Narrative and Gameplay. [image] Available at: <https://www.youtube.com/watch?v=8fXE-E1hjKk>. Ingold, J., 2020. Narrative Sorcery: Coherent Storytelling in an Open World.
Available at: <https://www.youtube.com/watch?v=HZft_U4Fc-U&t=473s>. Marinello, S., 2018. Level Design in a Day: A Series of First Steps – Overcoming the Digital Blank Page.
Available at: <https://www.youtube.com/watch?v=R75g3elj7y4>. Menzel, J., 2017. Level Design Workshop: A Narrative Approach to Level Design.
Available at: <https://www.youtube.com/watch?v=FhKjv7CPUqw&t=60s>. Shaver, D., 2018. Level Design Workshop: Blockmesh and Lighting Tips. [image] Available at: <https://www.youtube.com/watch?v=09r1B9cVEQY>.
Stubbington, D., n.d. Unreal Engine – High Quality Settings for Cinematics. [online] Available at: <https://www.linkedin.com/pulse/unreal-engine-high-quality-settings-cinematics-daniel-stubbington/>.
Docs.unrealengine.com. n.d. Build Configuration. [online] Available at: <https://docs.unrealengine.com/5.0/en-US/build-configuration-for-unreal-engine/>.
MSEpitaph, n.d. Fan Drone Sever Room.wav by MSEpitaph. [online] Freesound. Available at: <https://freesound.org/people/MSEpitaph/sounds/468418/>.
Audiofreak1978, n.d. Computer_Start_Beep.wav by Audiofreak1978. [online] Freesound. Available at: <https://freesound.org/people/Audiofreak1978/sounds/543760/>.
Sparrer, n.d. crash.wav by Sparrer. [online] Freesound. Available at: <https://freesound.org/people/Sparrer/sounds/50506/>.
OwlStorm, n.d. Hard Female Footstep by OwlStorm. [online] Freesound. Available at: <https://freesound.org/people/OwlStorm/sounds/151222/>.
Aspland, M., 2021. First Person Footsteps | No Mesh Or Animations – Unreal Engine 4 Tutorial.
Available at: <https://www.youtube.com/watch?v=I973d6ABTf4>.


No comments yet.