Visual Effects proposal
⬐ Click the buttons to skip to sections ↴
Visual Effects Proposal
by Elizabeth Midgley
Introduction
Inspirations:
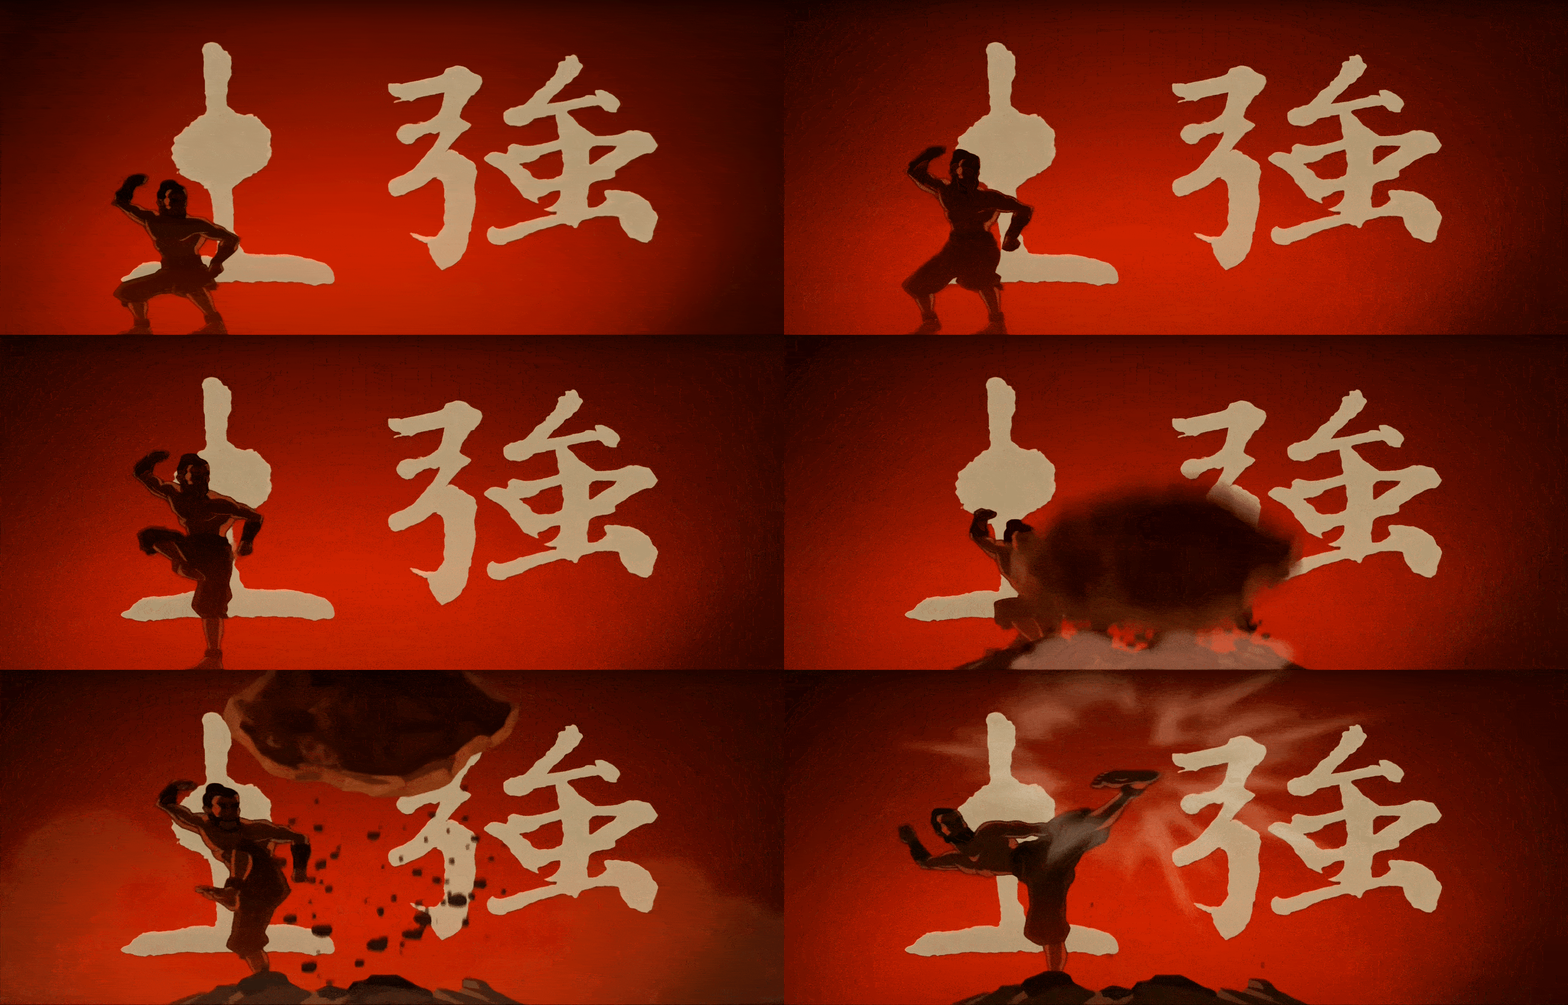
I have been primarily inspired by Avatar: The Last Airbender and Avatar: The Legend of Korra for this project. I really enjoyed watching both of these animated shows and particularly enjoyed the introduction sequences showcasing each element’s bending abilities. My idea is to create a VFX sequence in Unreal that would be an introduction to an Avatar game, themed the same as these Avatar anime introductions, but with VFX that could be used as in-game attack animations.
(BRT Videos, 2021)
(Jared Koh, 2023)
( The Amagi, 2021)
Basic Setup:
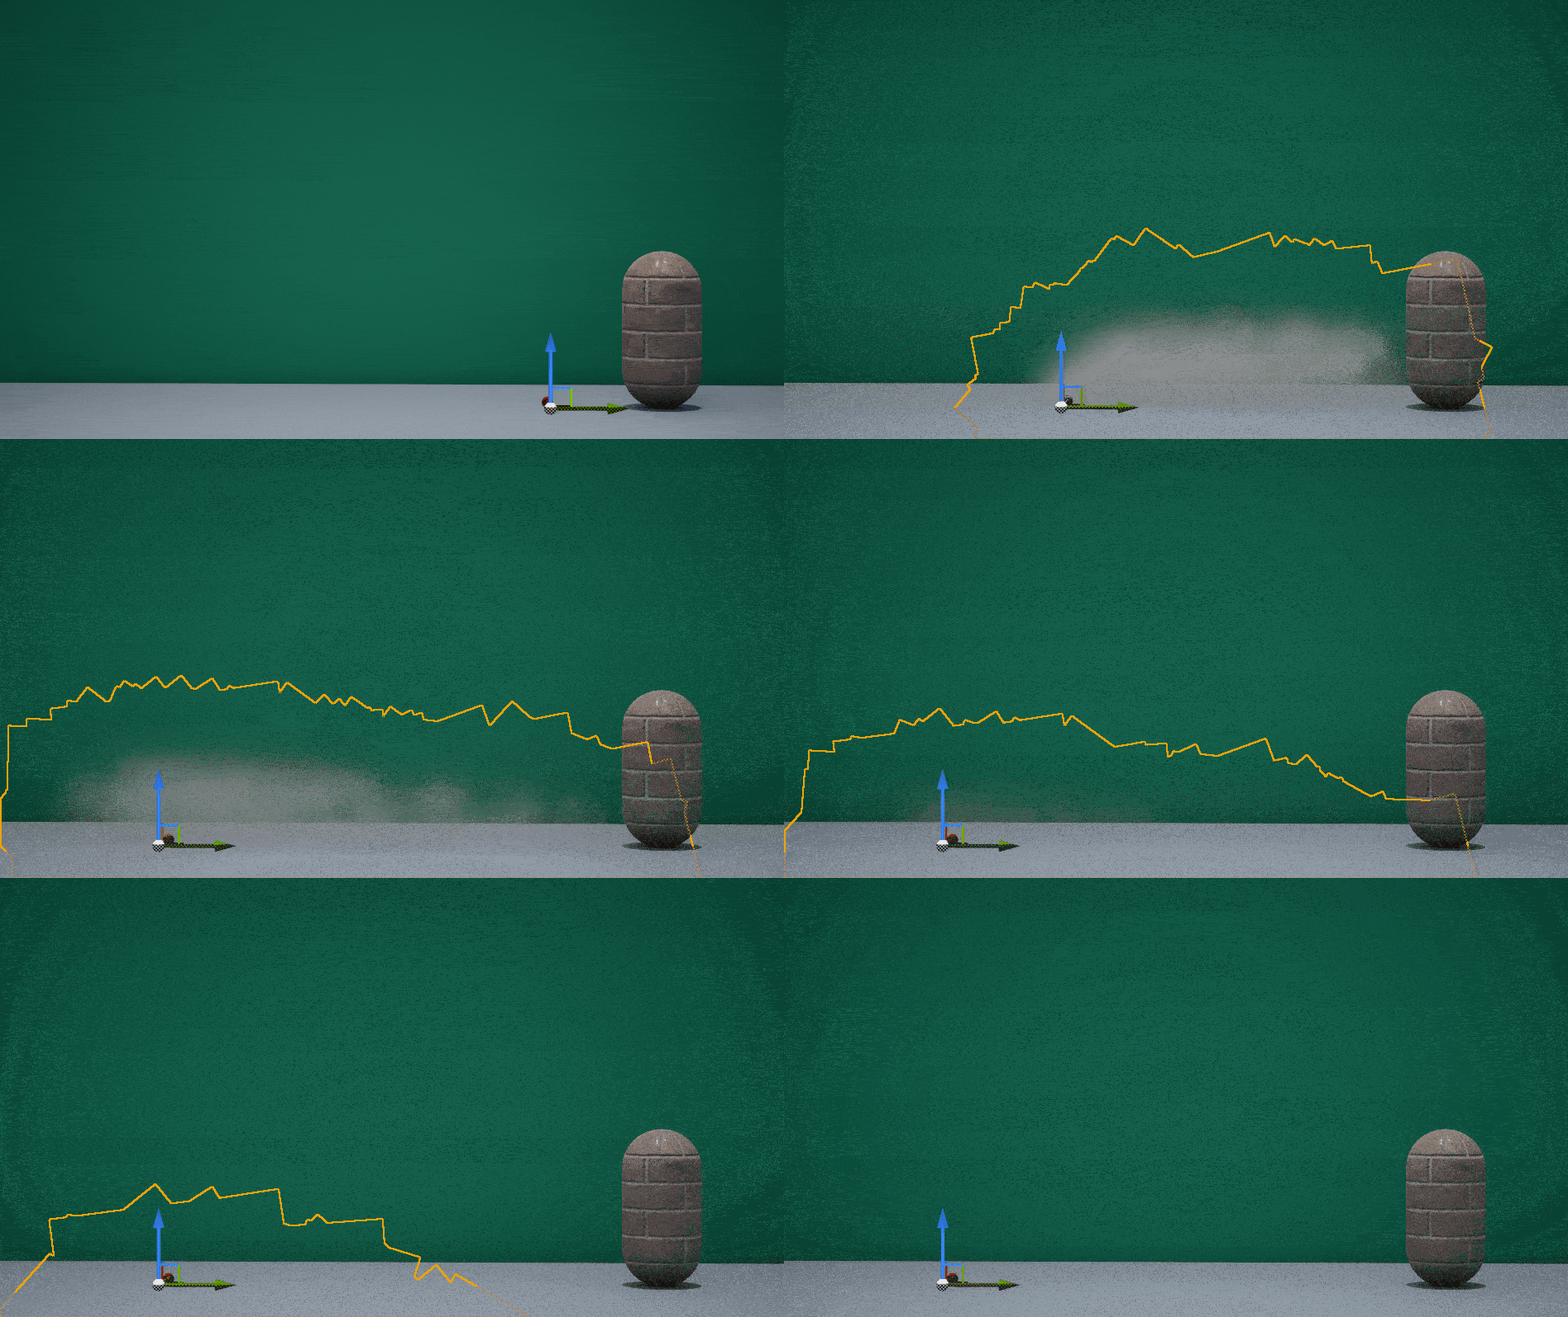
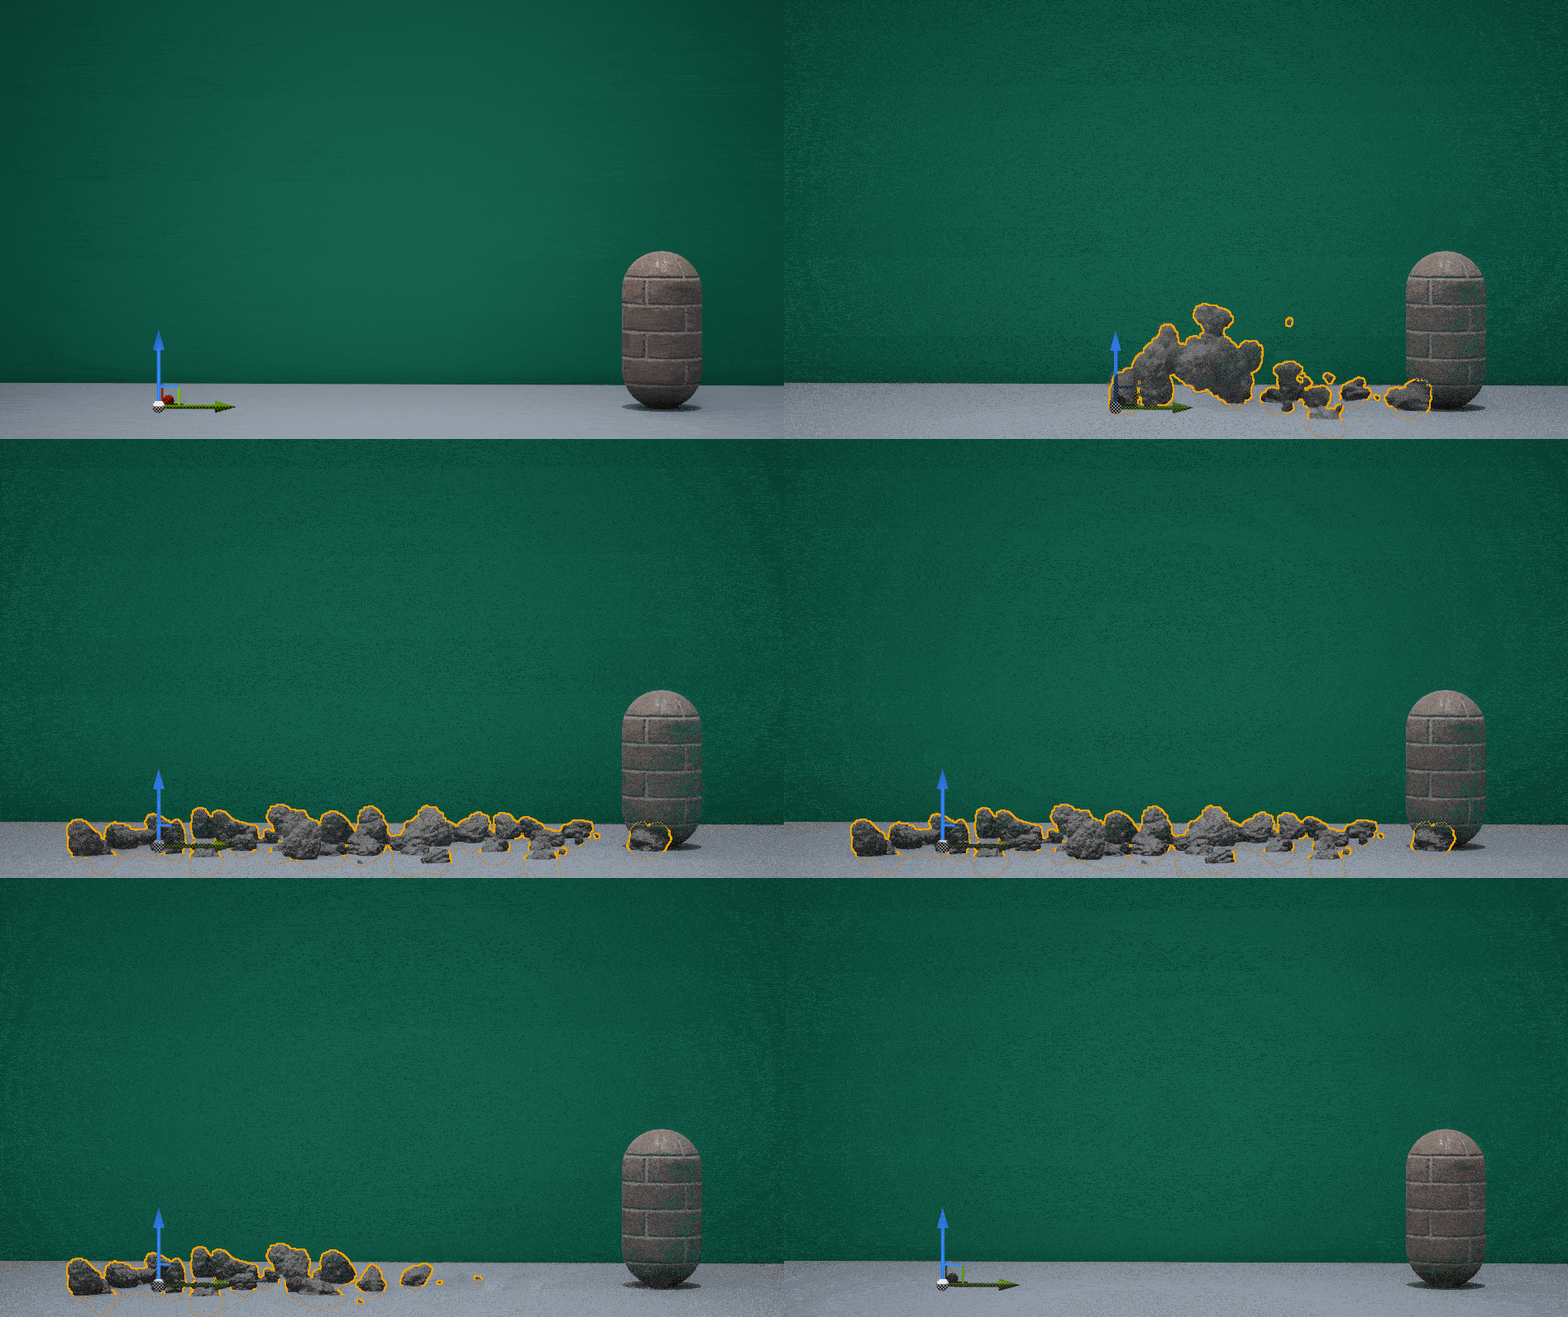
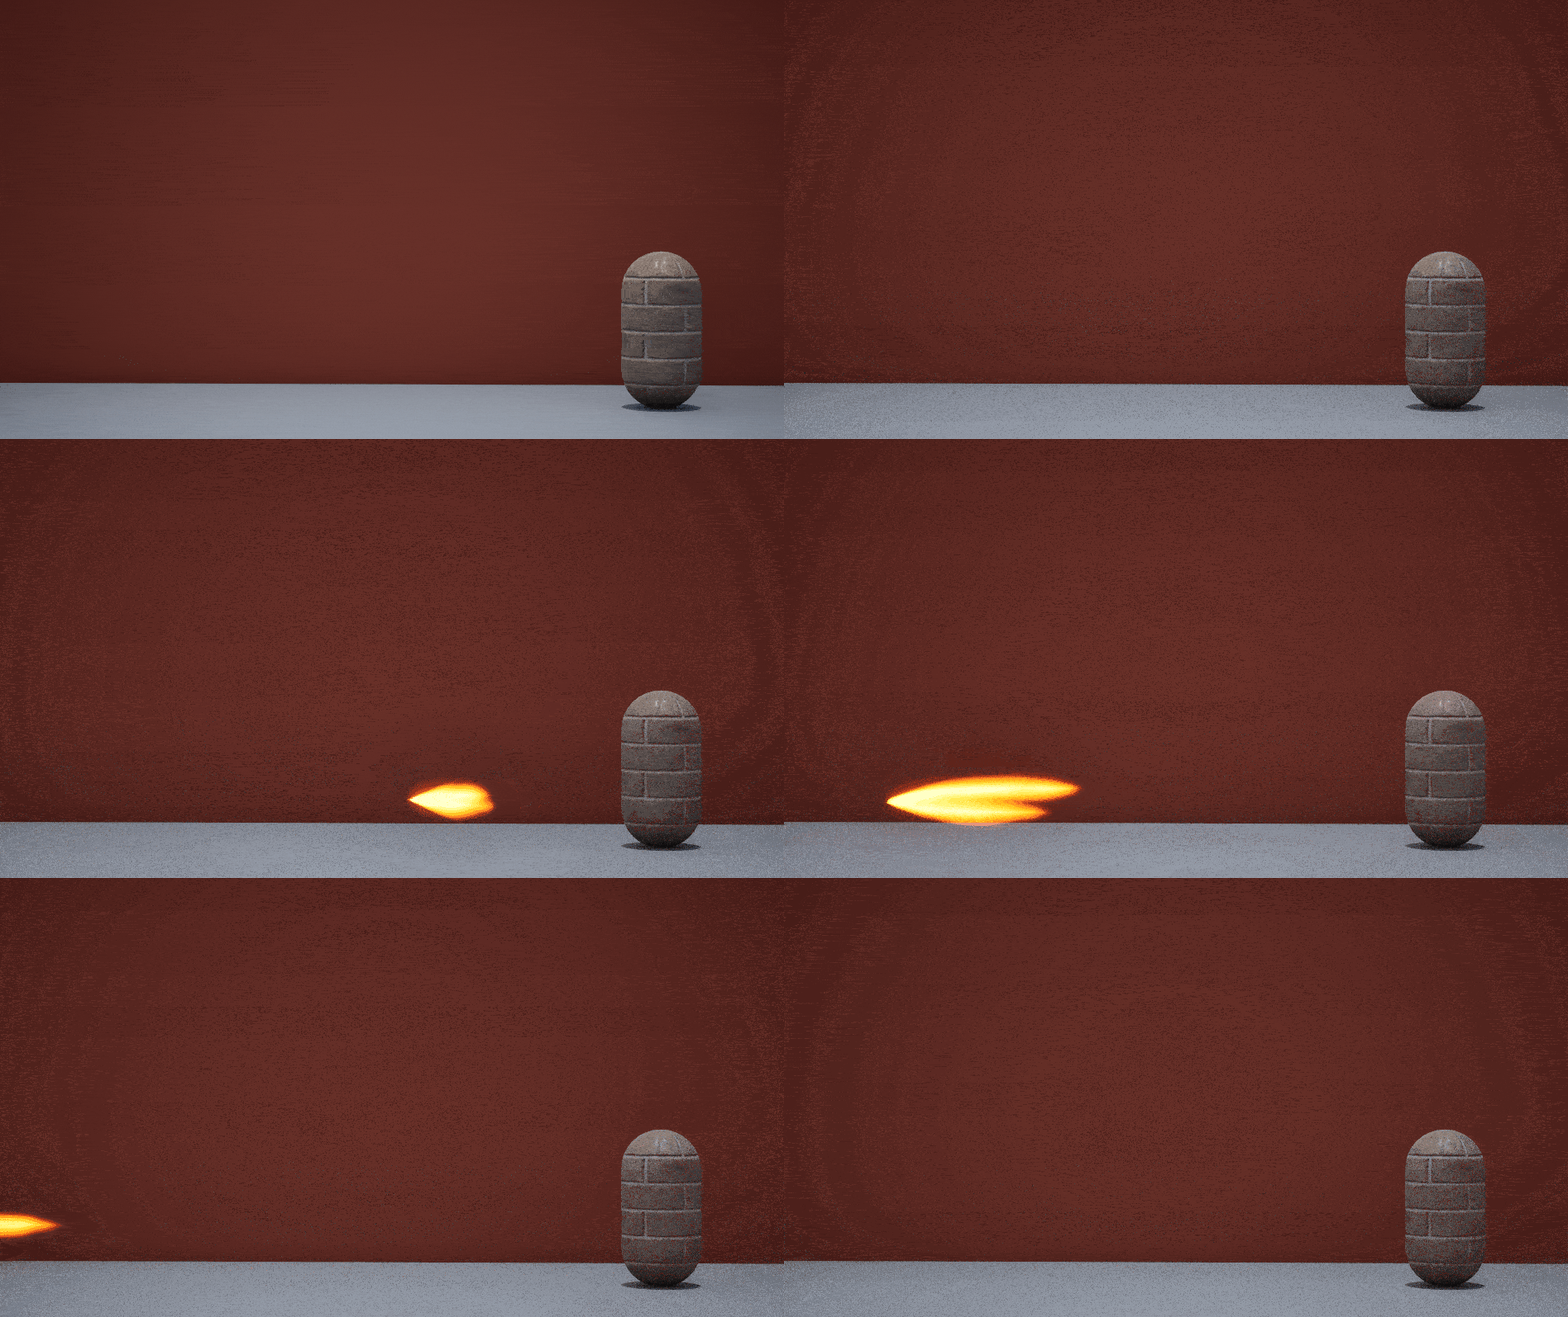
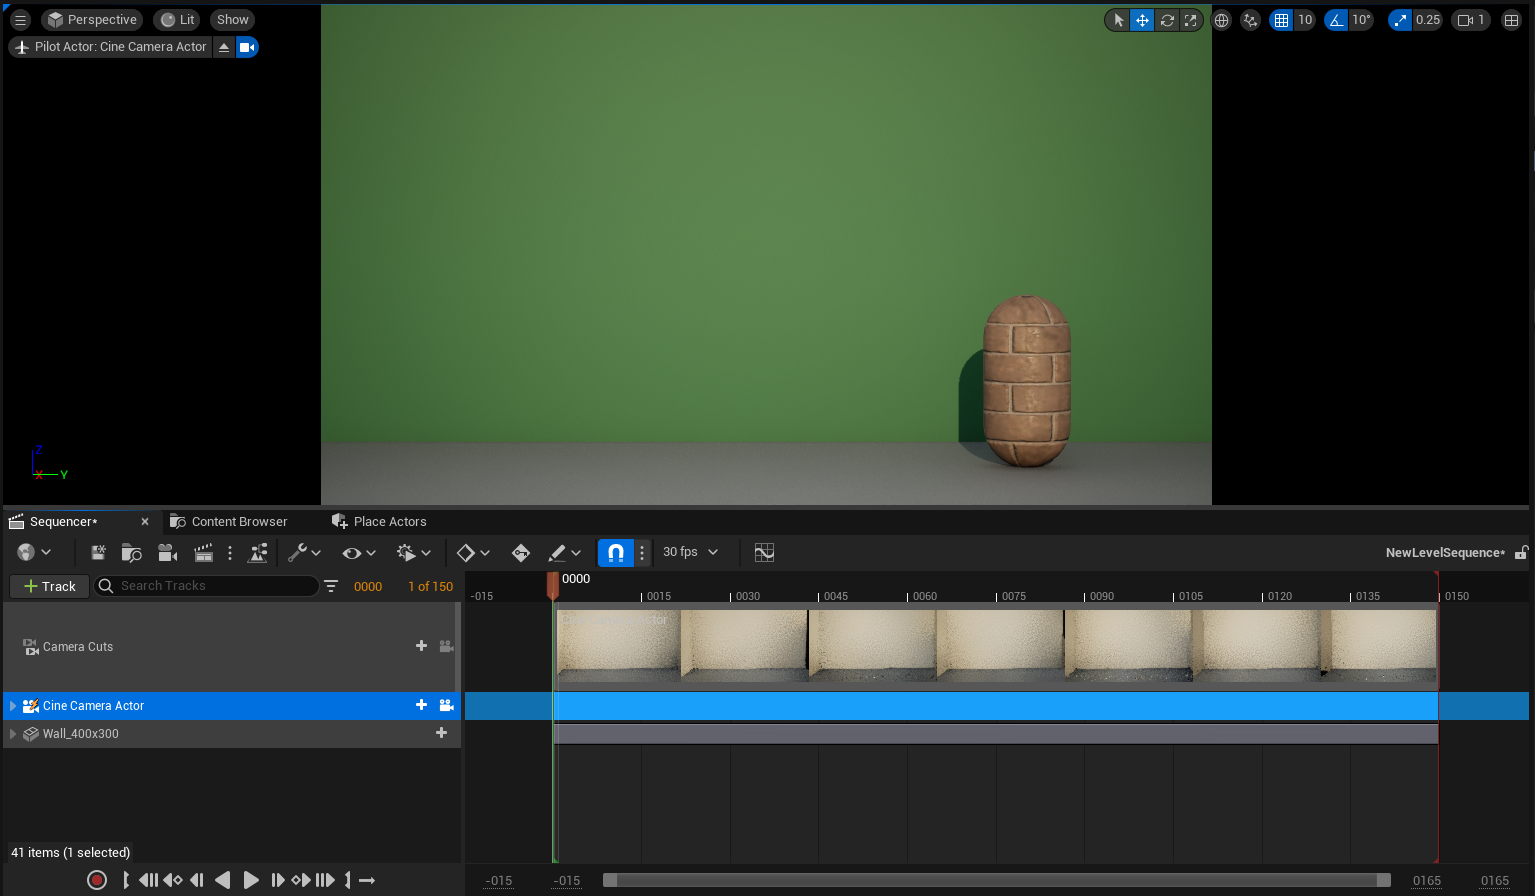
To get started with my VFX tests in Unreal, I added a Level Sequence and set up my window to show the Sequencer. I then added and positioned a Cinematic Camera, a wall and floor, and a cylinder to represent the character; providing a layout similar to some of my references. I set up a track for the camera and the wall so that I could change the colour of the wall as the sequence goes through each element. To start with, the wall is green for Earth, then it becomes red for Fire, orange for Air, and blue for Water.
Earth
Earth Kick:
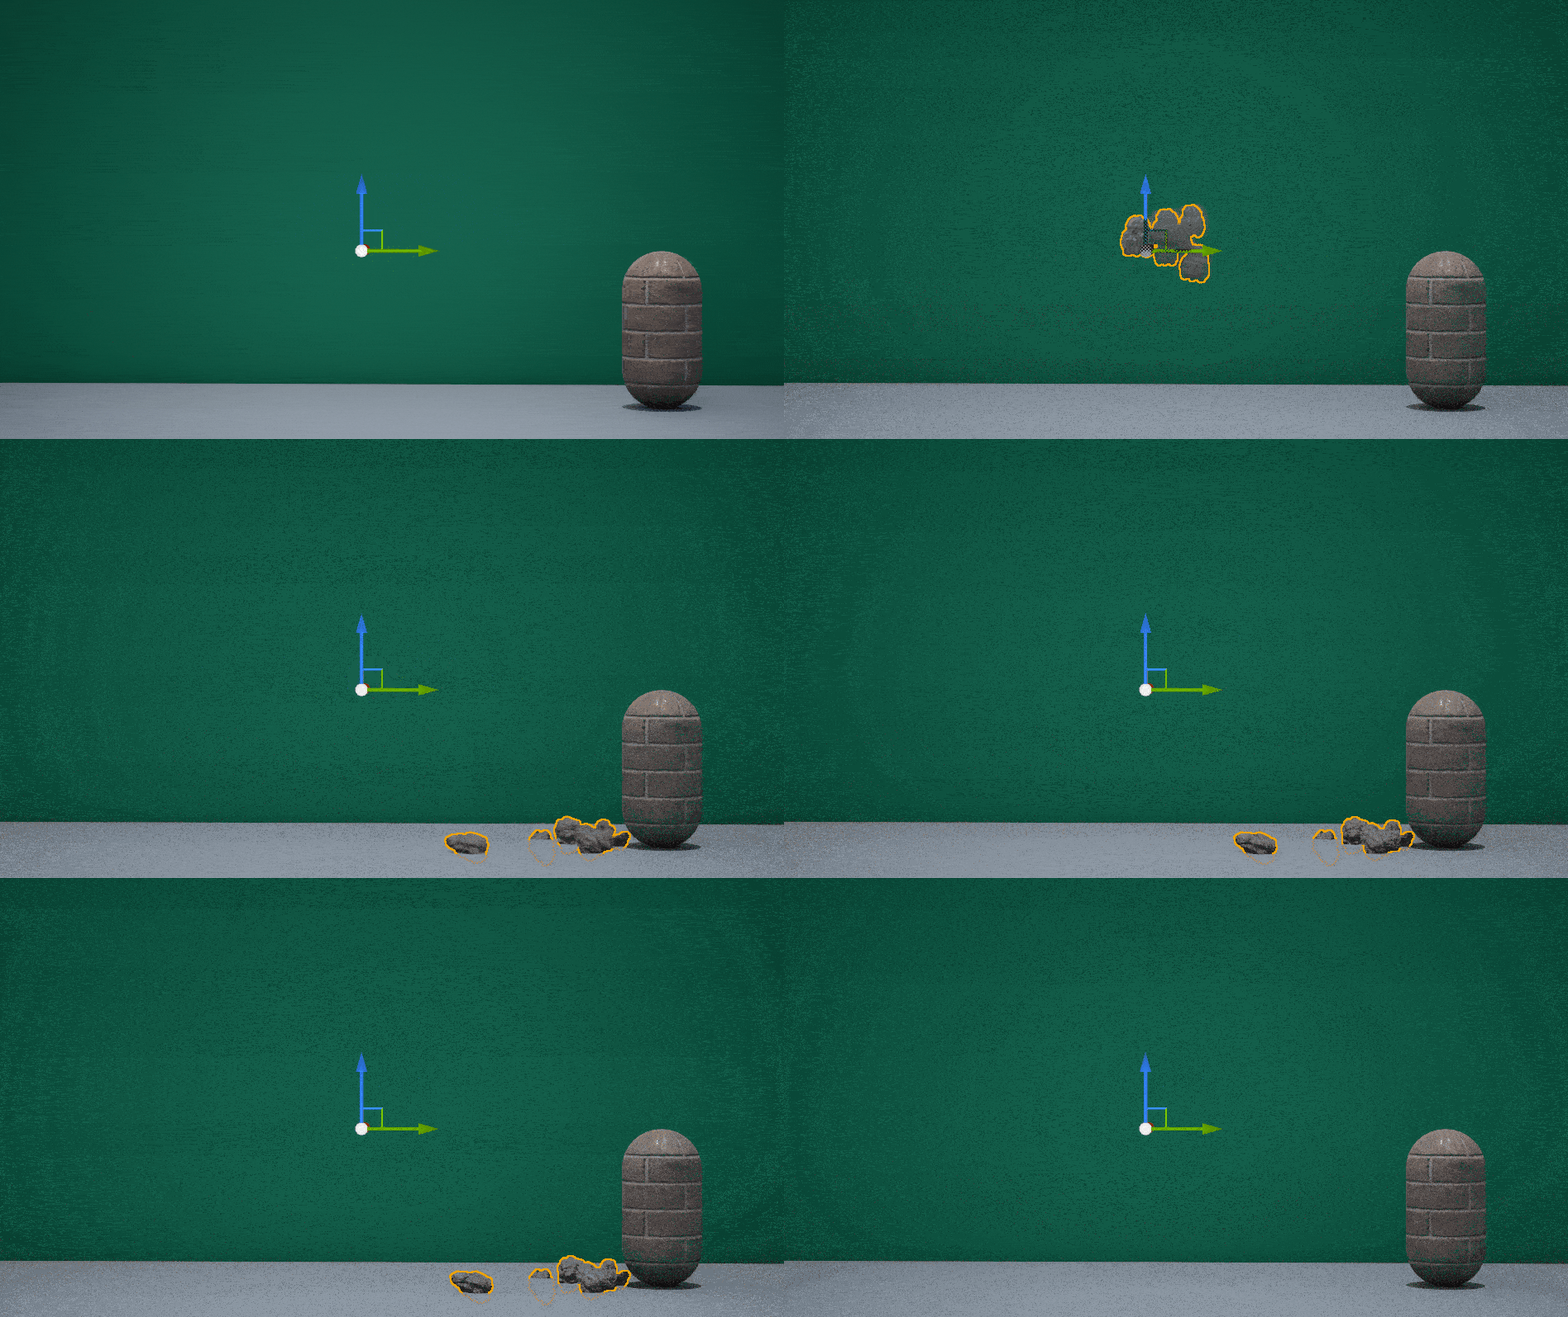
This is the most common attack produced by an Earthbender, and involves levitating a piece of earth or stone and propelling it at foes with punches or kicks. (Earthbending, n.d.)
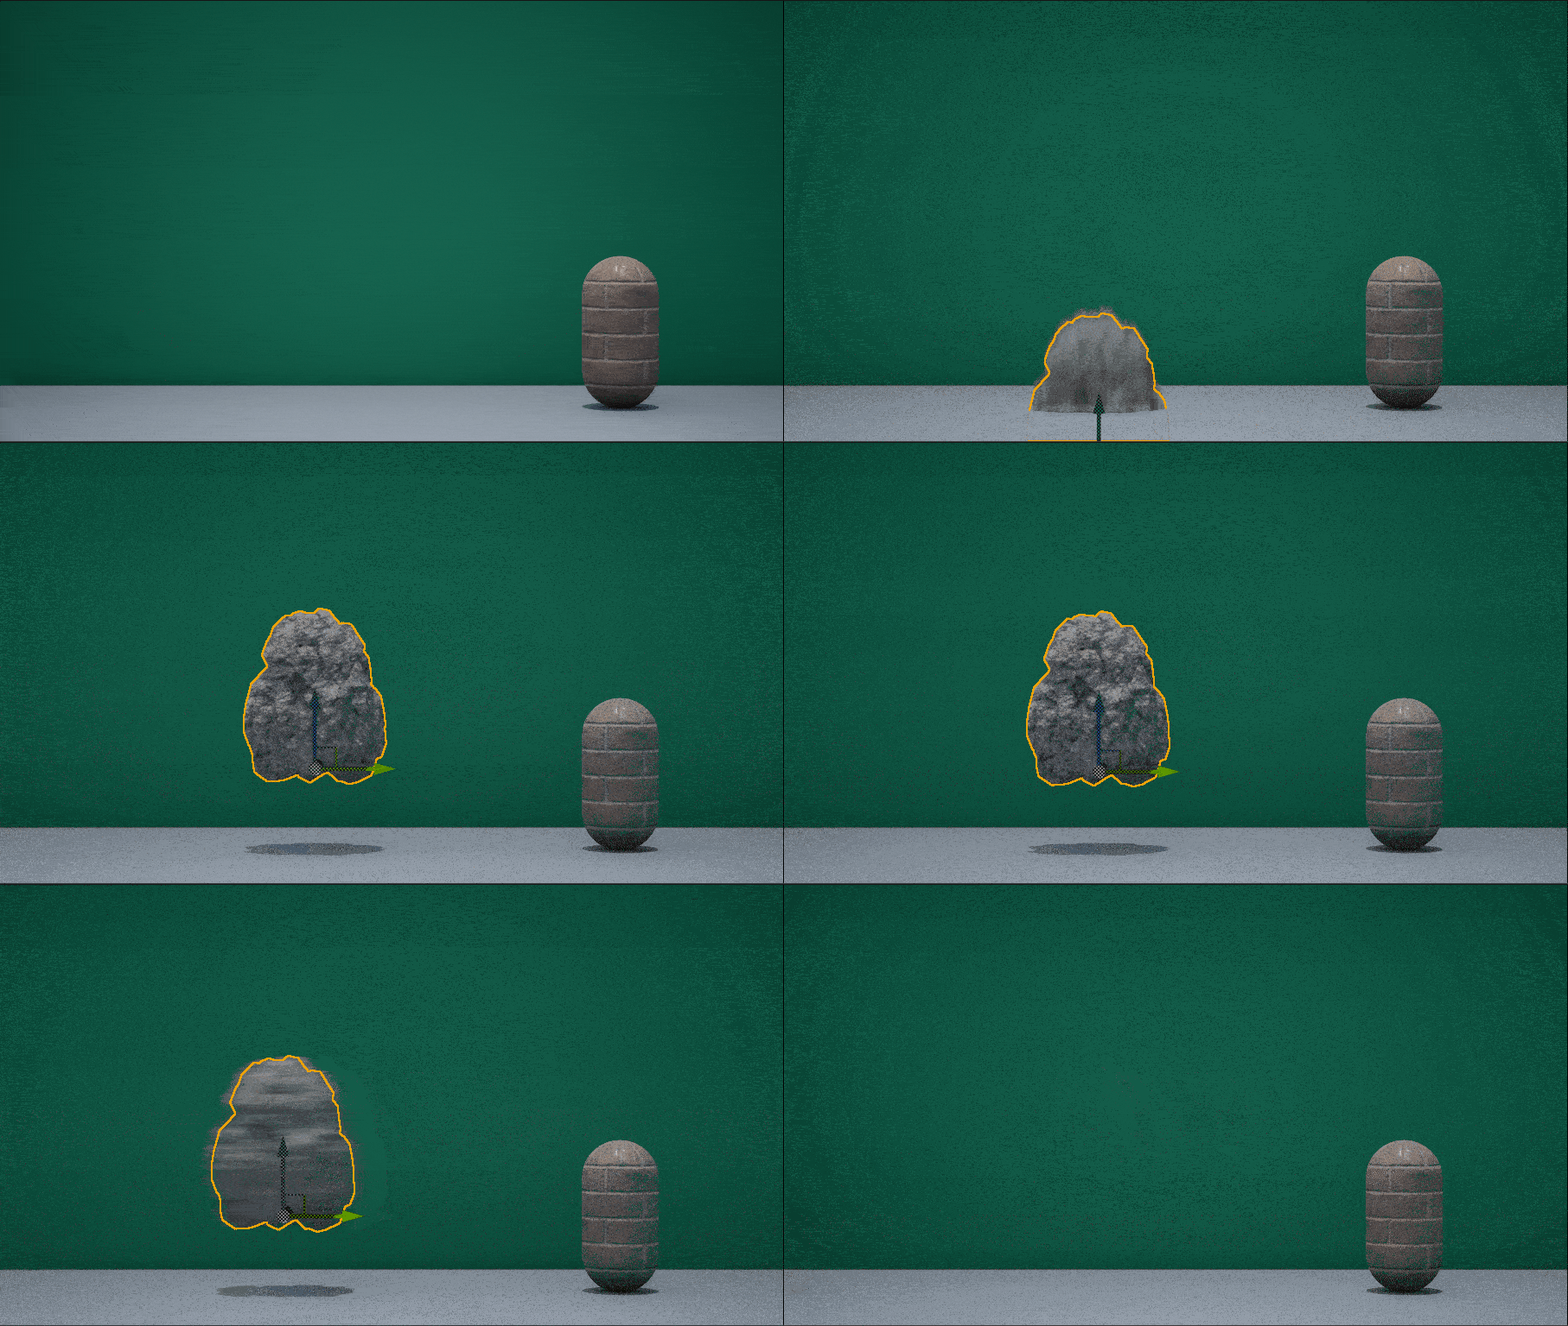
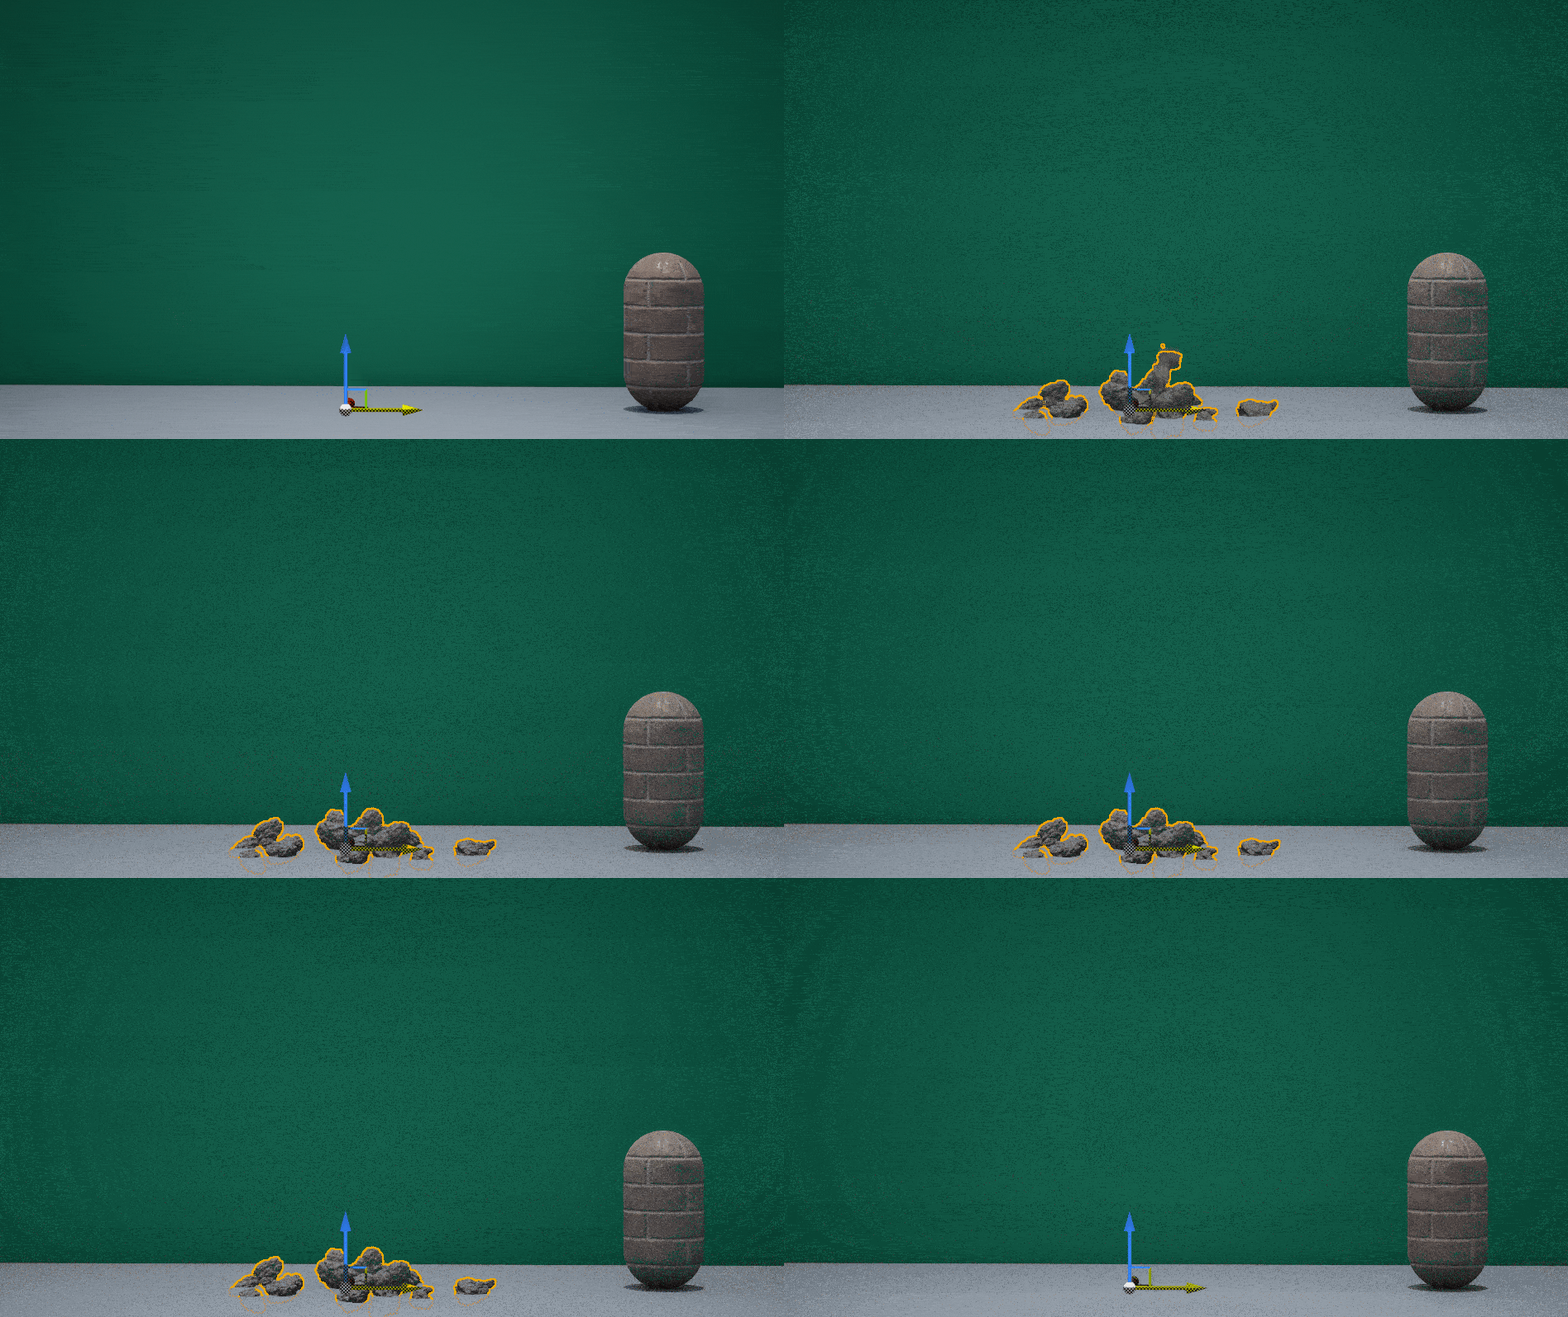
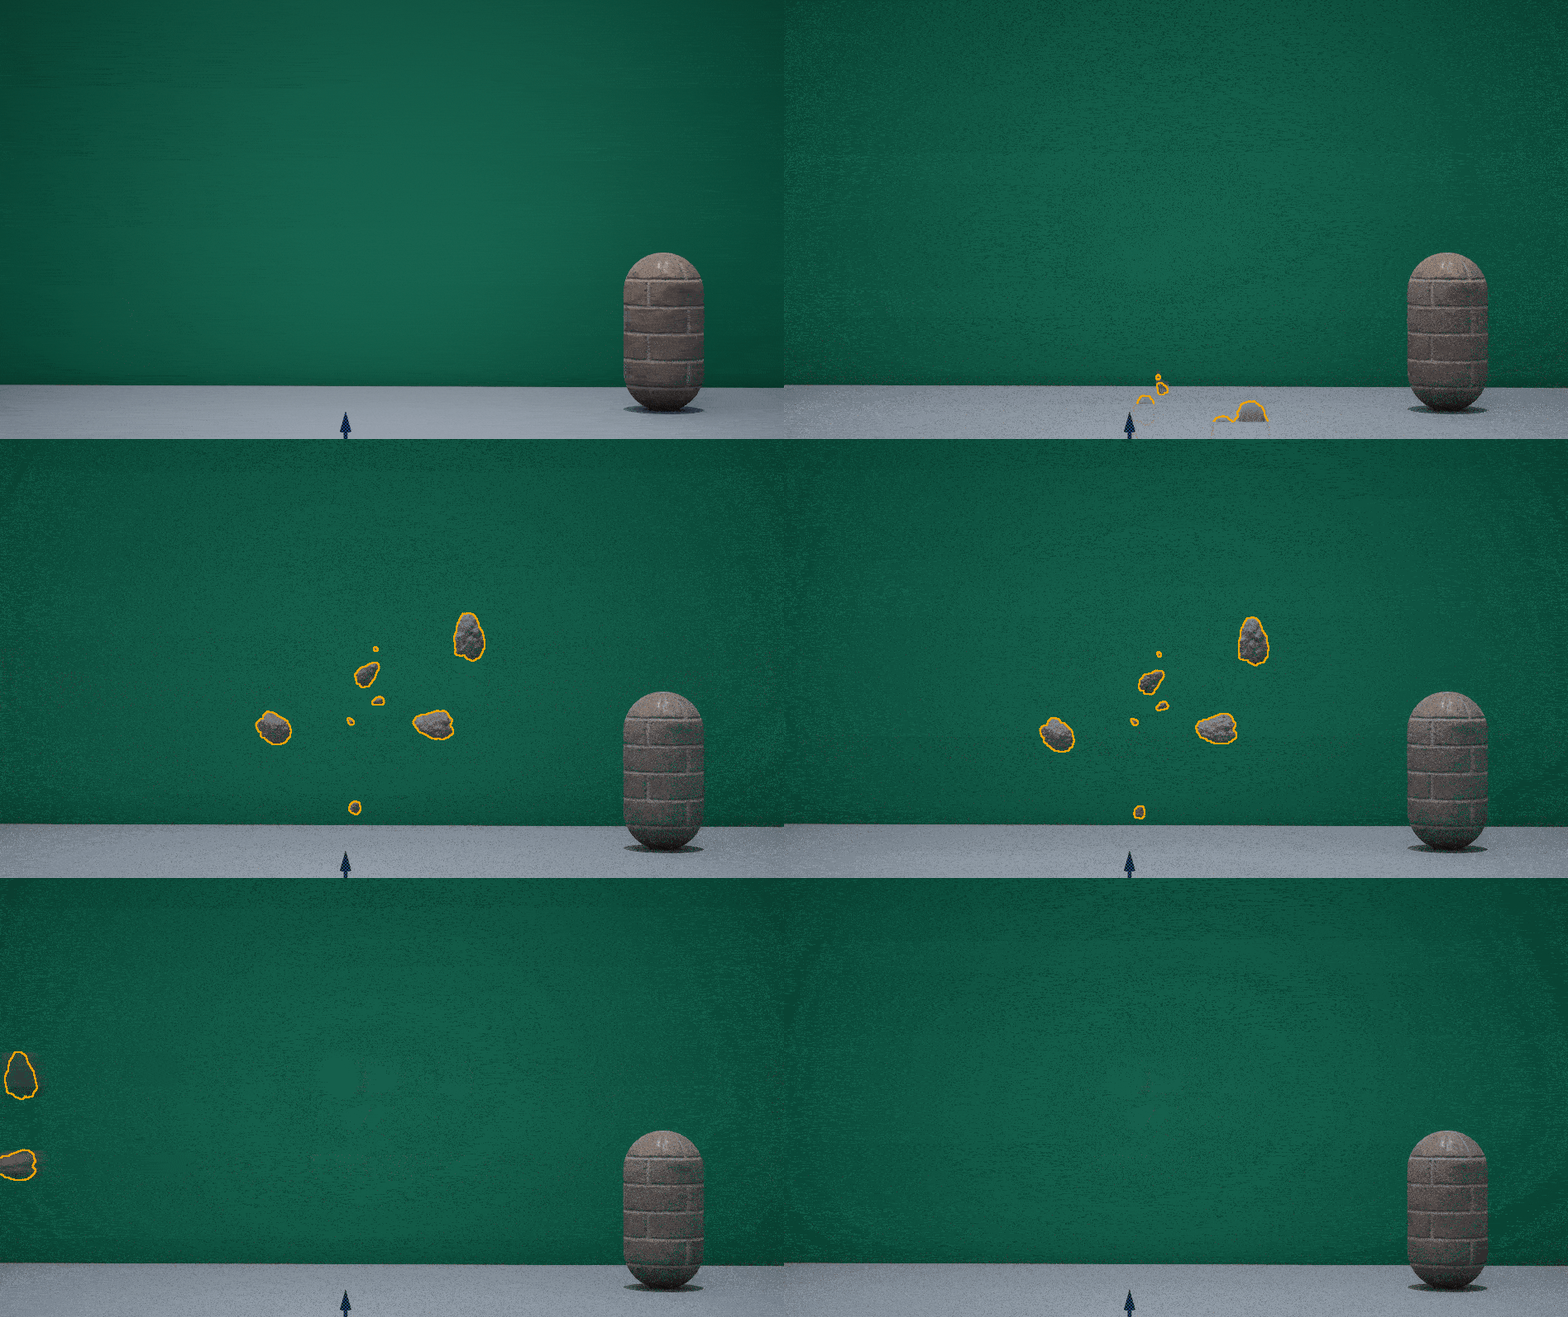
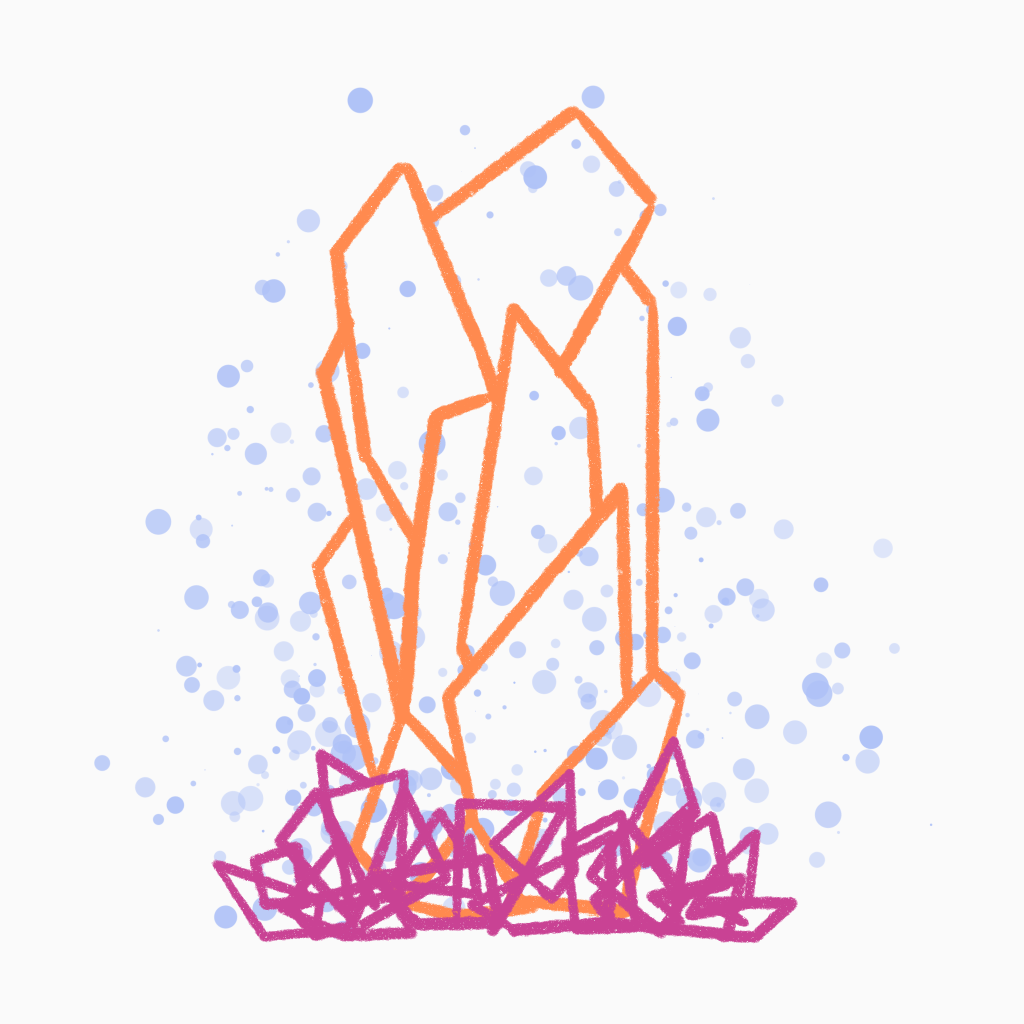
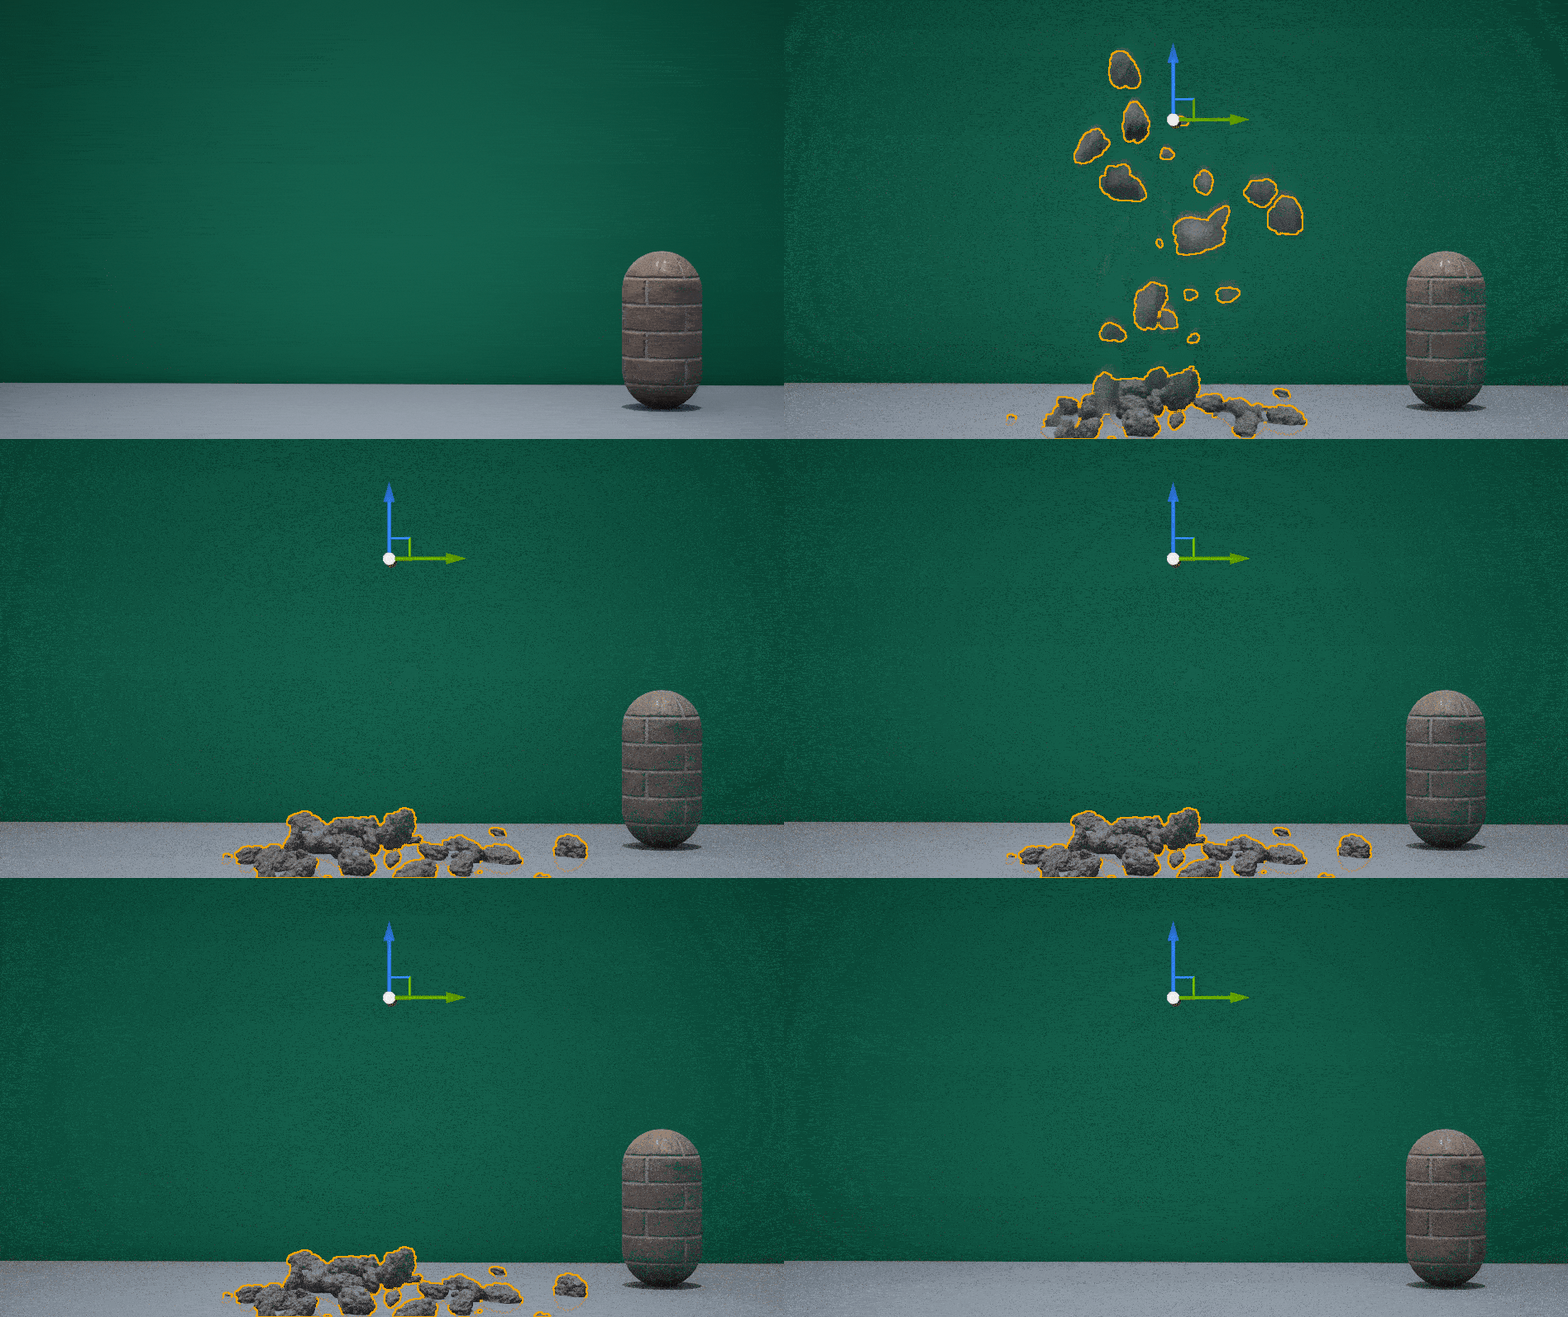
This ability has three main elements: first, a large rock is lifted into the air and kicked away; second, small rocks fall beneath the larger rock; and third, there is a gathering of disrupted ground underneath. In other variations there are sometimes smaller floating rock fragments that get kicked with the larger rock and dust clouds.
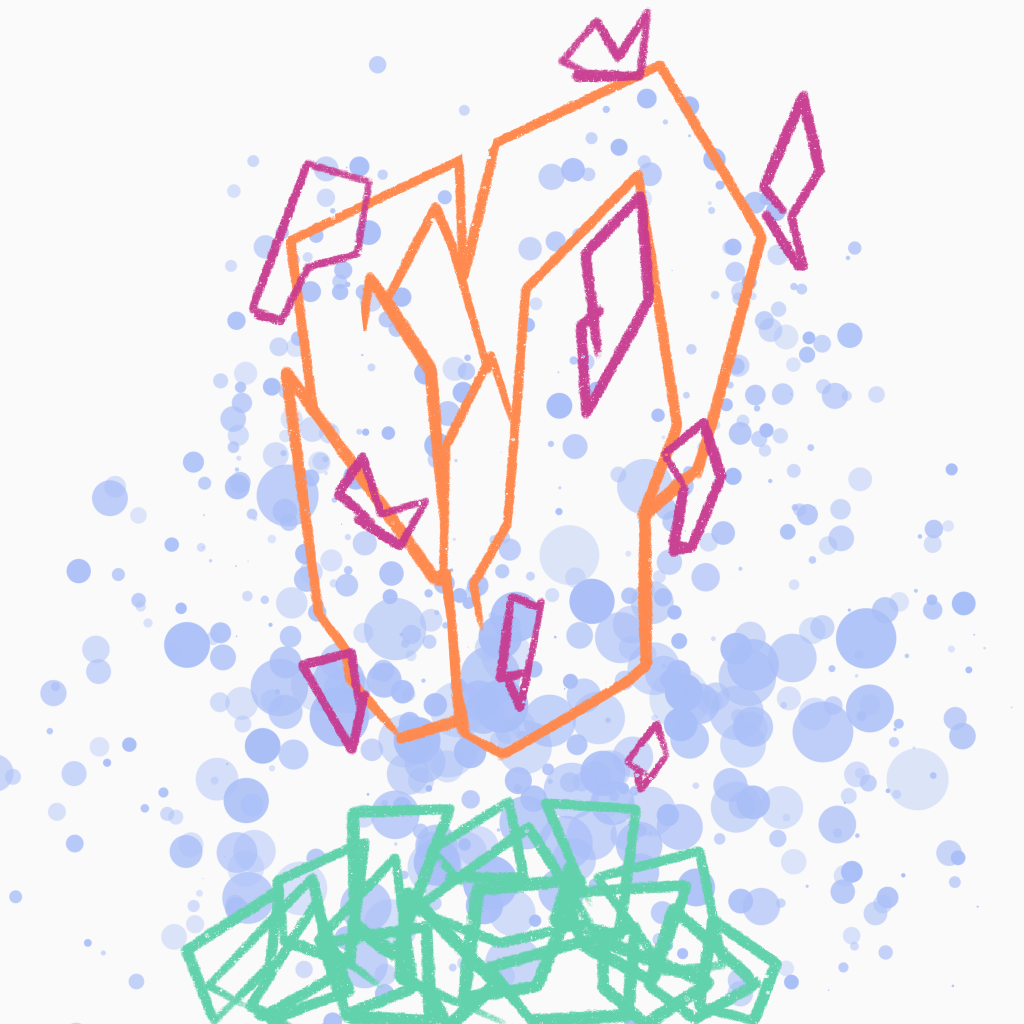
Orange: The central element, a large jagged rock, composed of multiple fragments; the main focus of this earthbending technique. This rock is launched into the air, hovers for a moment, then is kicked away.
Pink: Surrounding the main orange rock are smaller rocks, which will also be floating, adding a small detail to the composition following the design theory of big, medium, small (Teo, 2023).
Green: Small shards of rock dropped or disturbed while the main orange piece was being lifted. These are a medium sized compositional element.
Blue: A dust cloud is produced when the rock is lifted, this serves the dual purpose of giving a slightly more life-like look, while also helping to tie the elements all together.
VFX Component Breakdown:
Final VFX Composition:

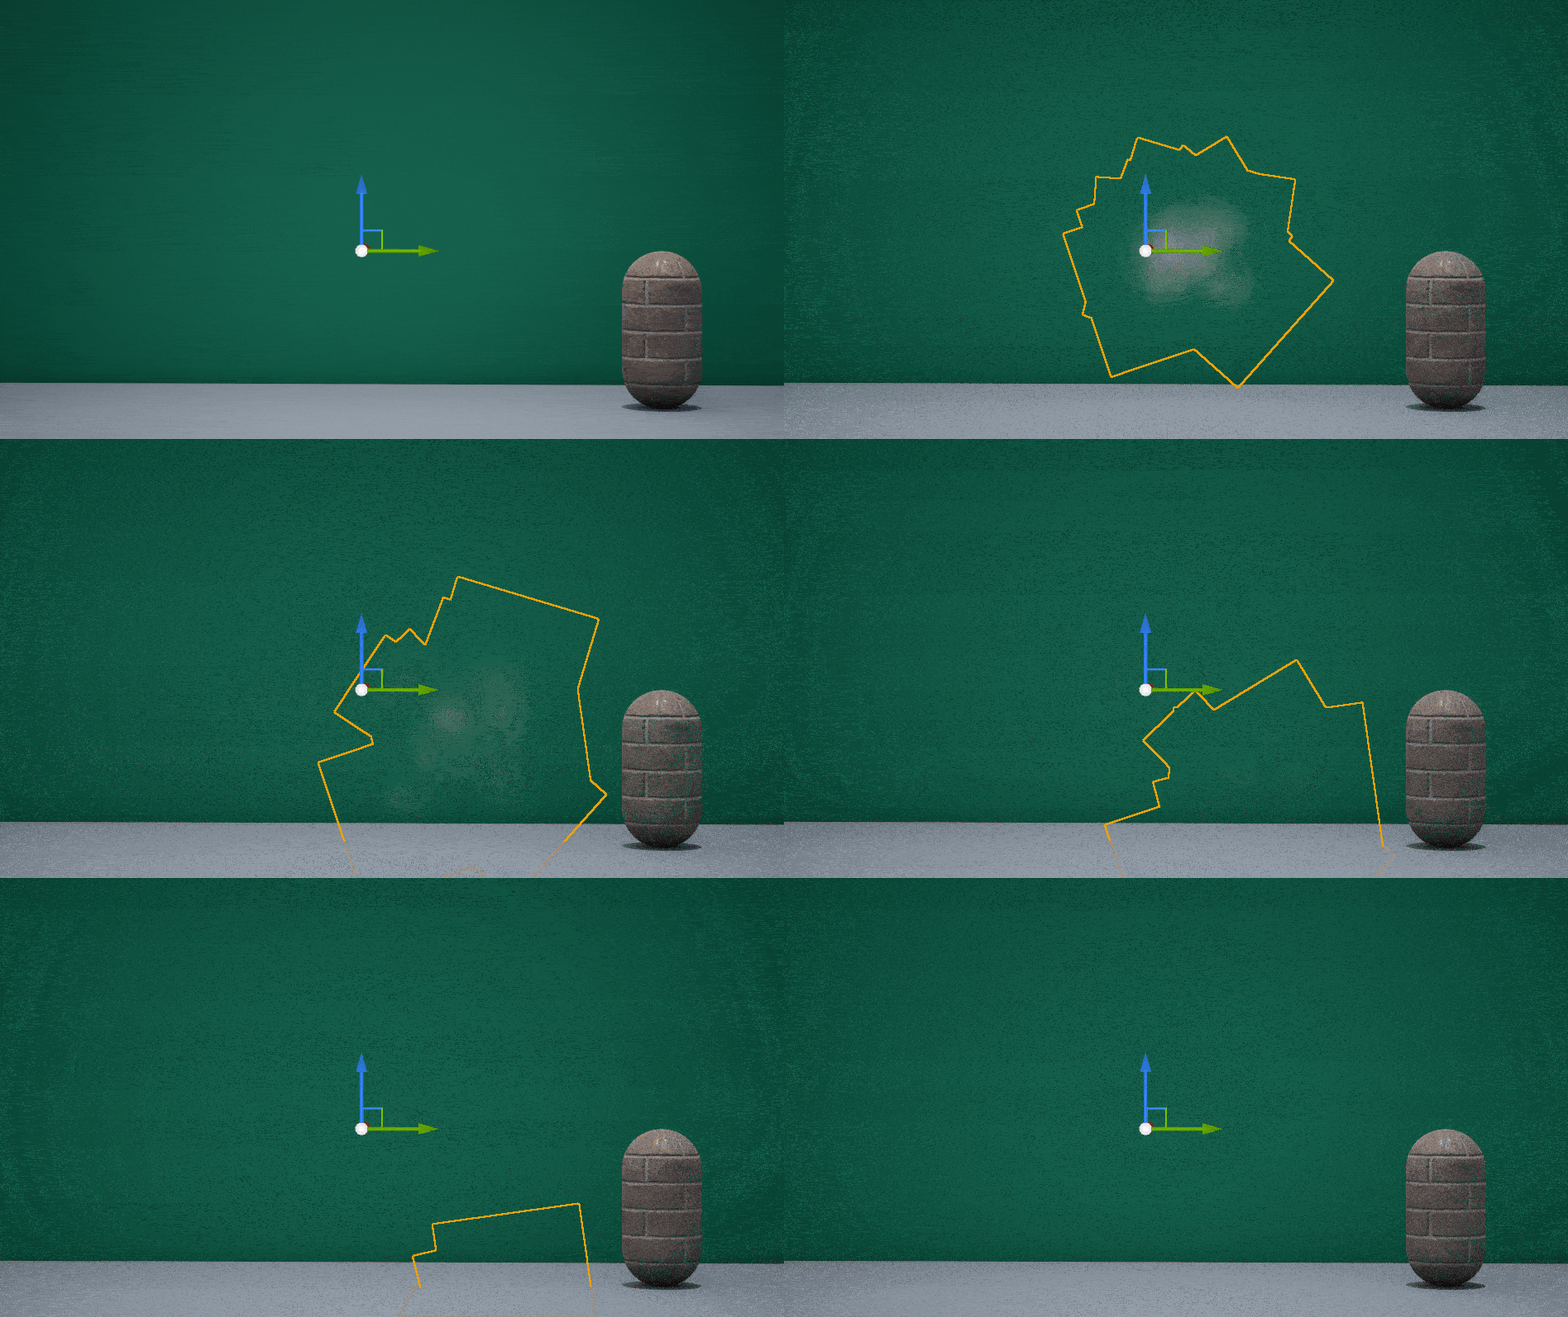
Earth Ridge:
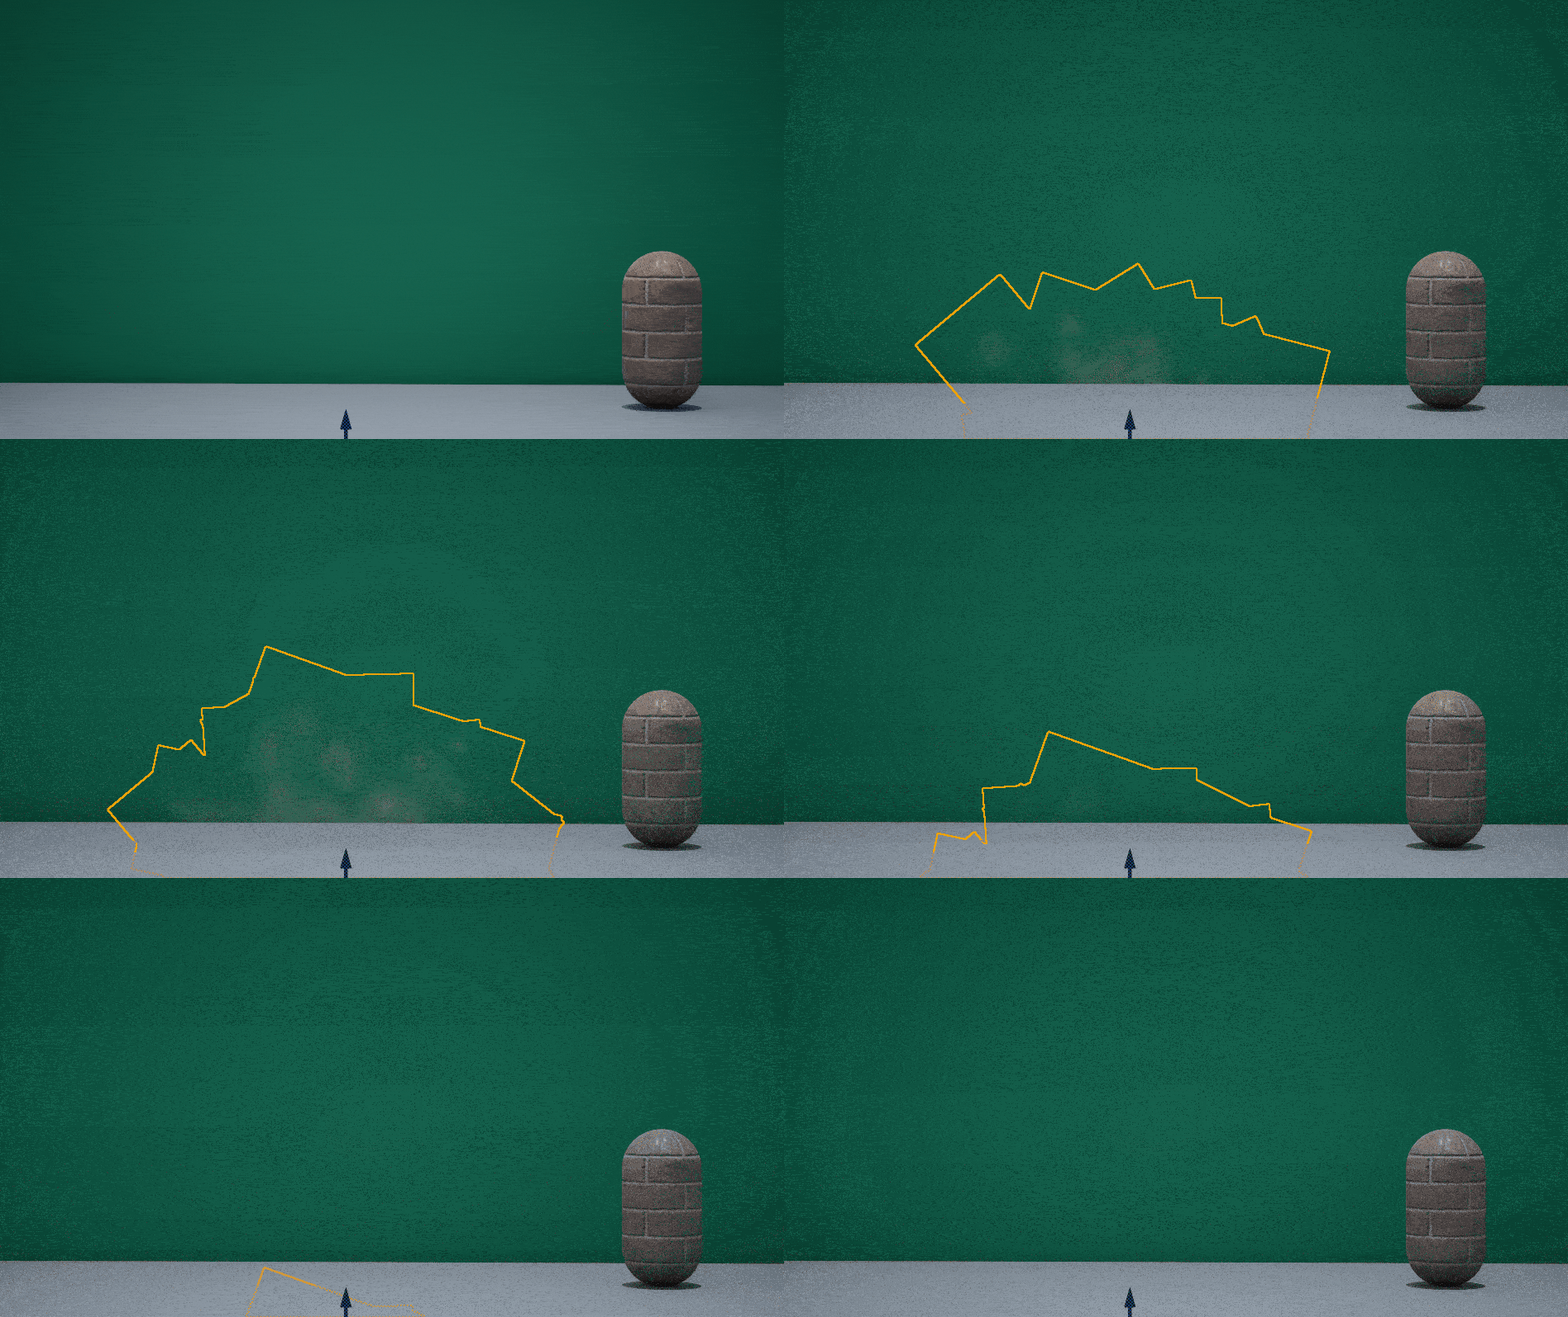
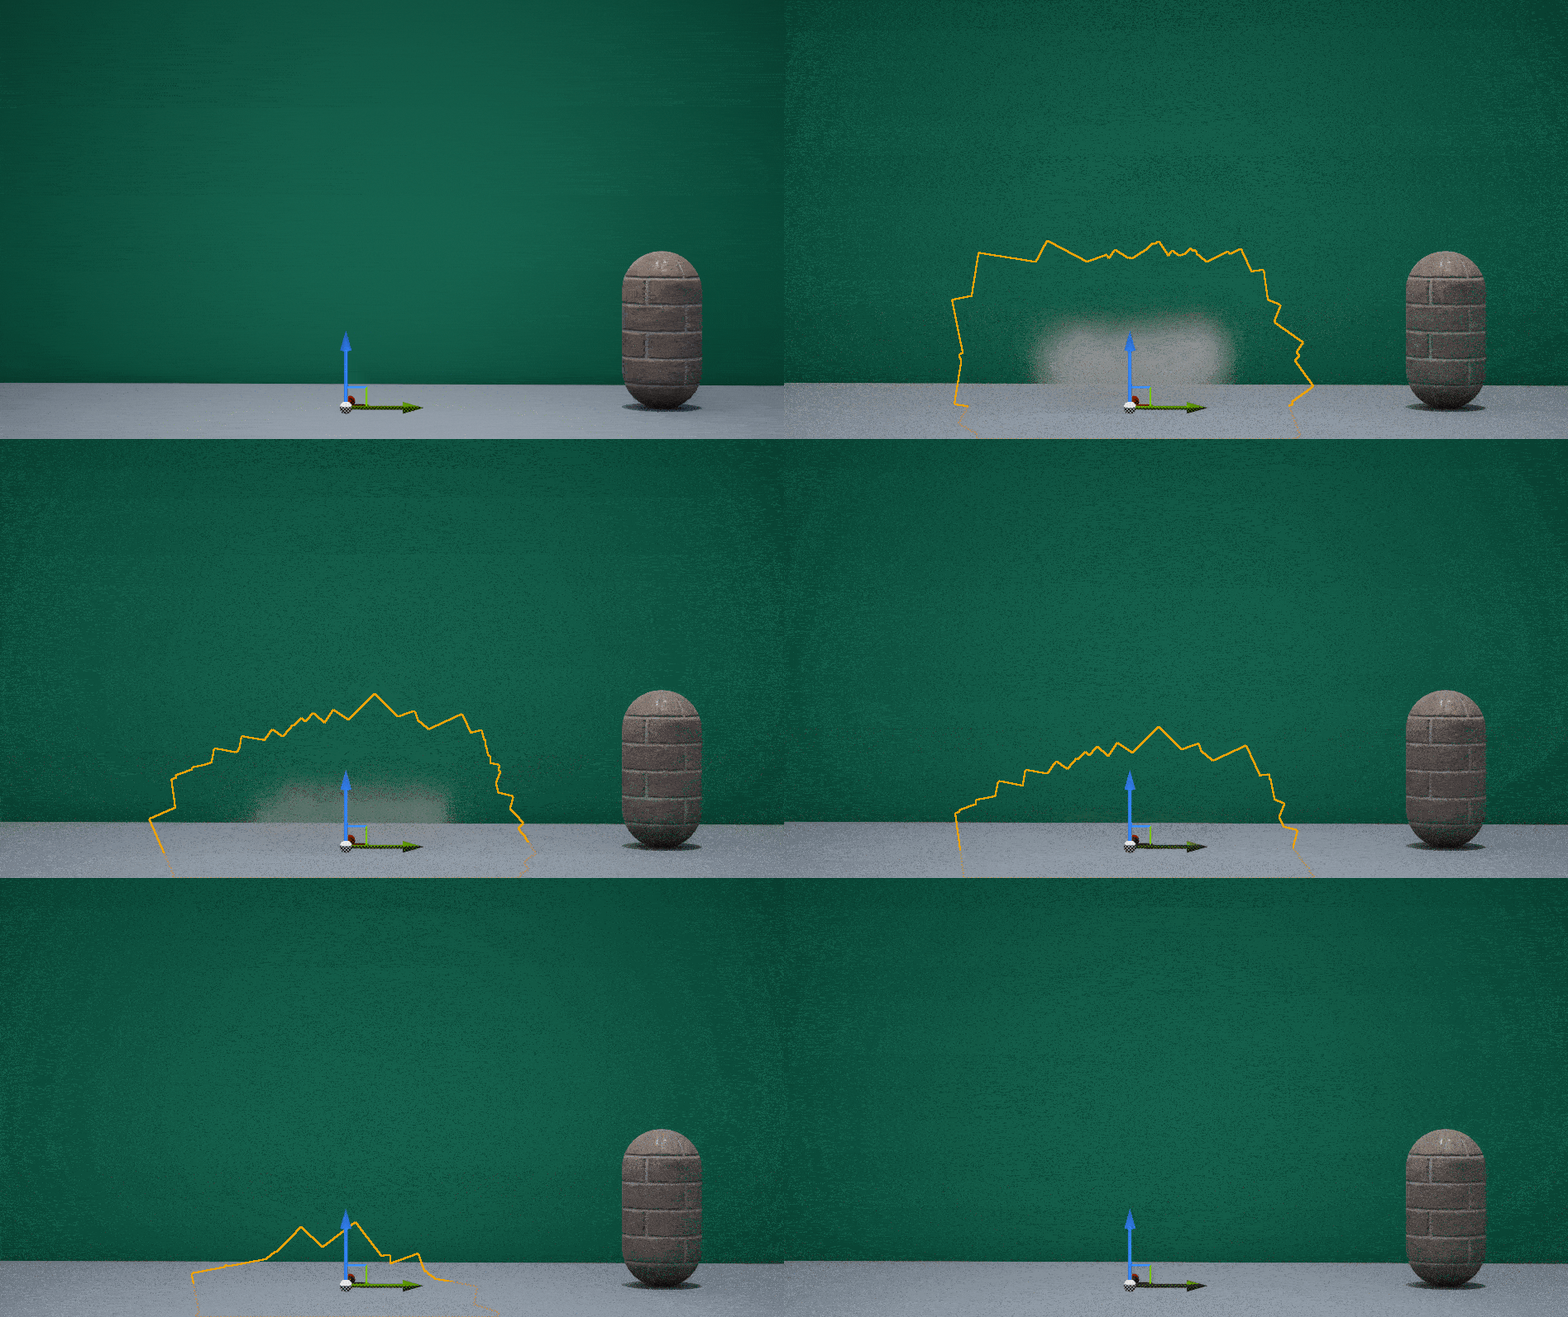
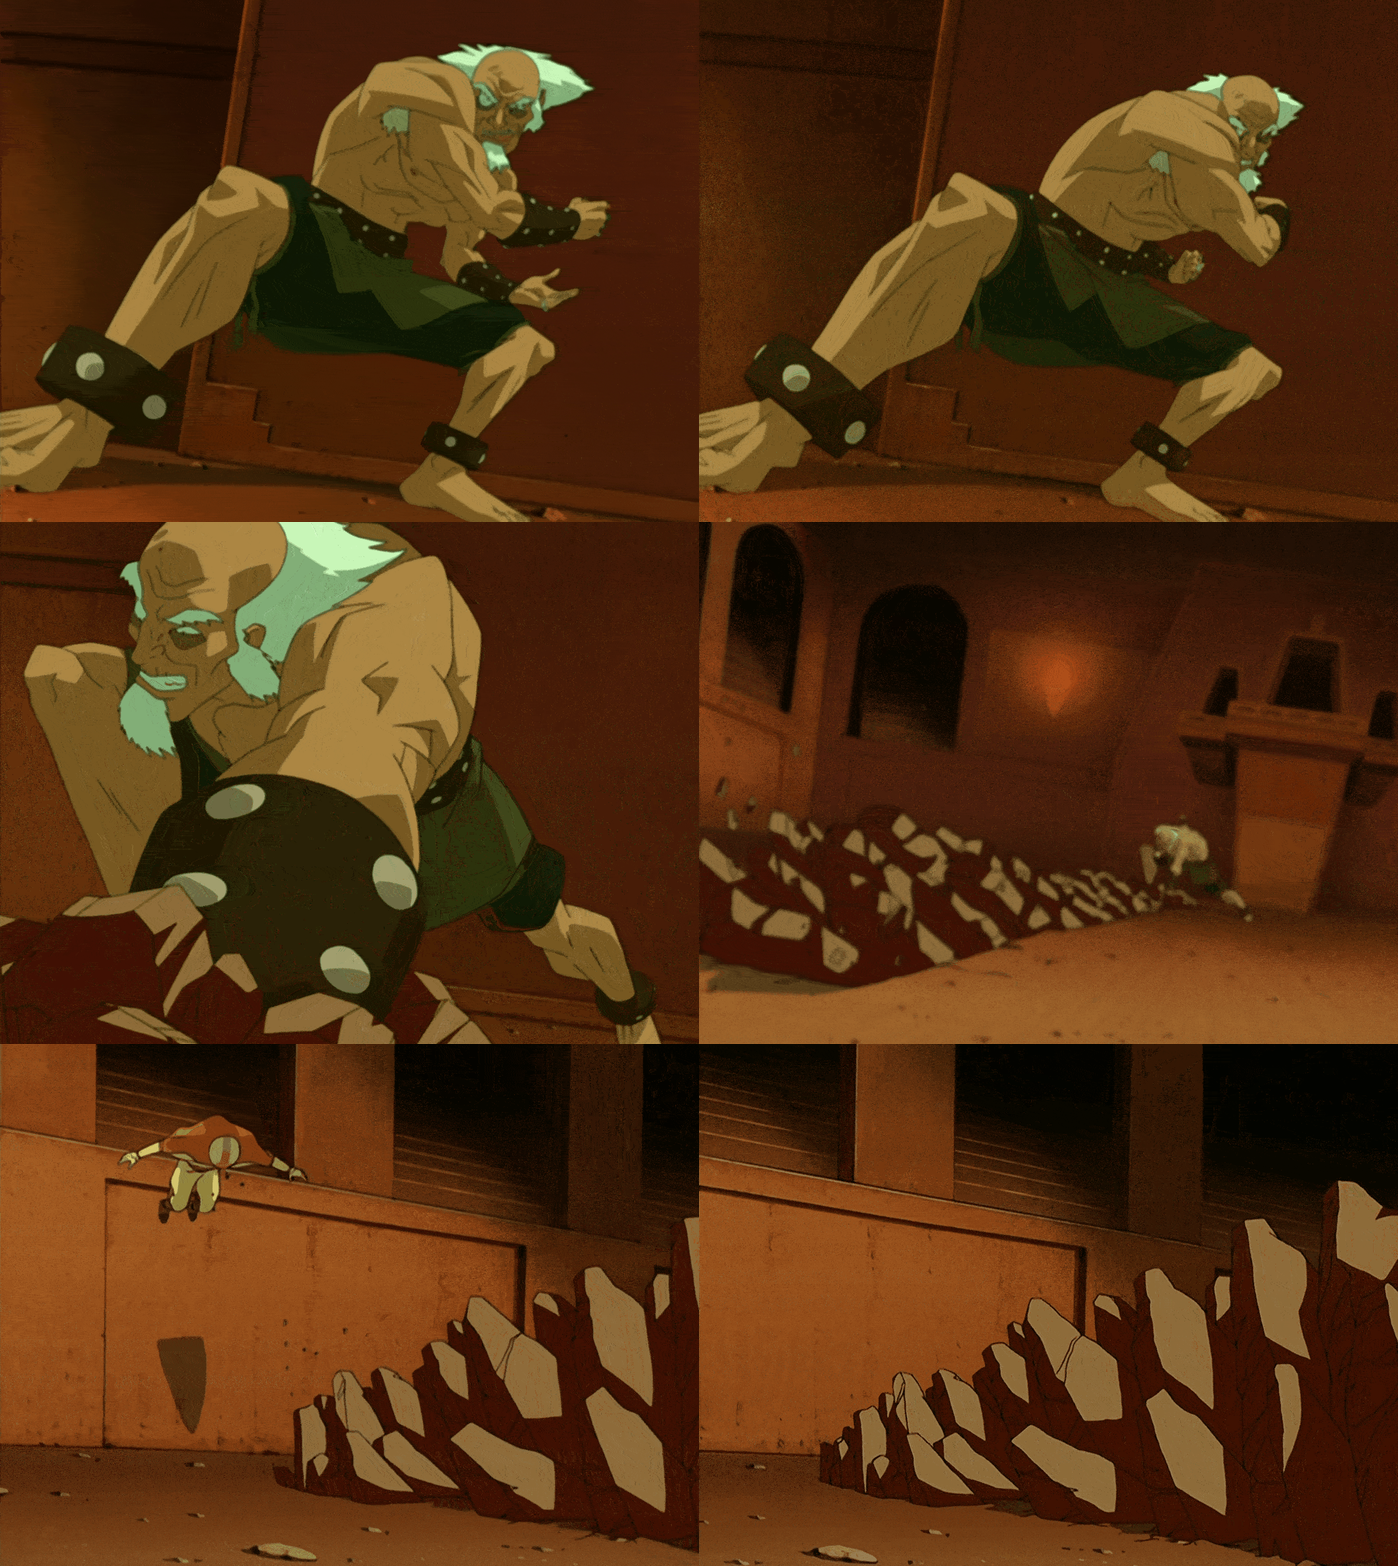
This ability is inspired by an Earthbending ridge ability showcased by King Bumi. This ability is composed of many shards of rock which protrude from the ground in a forward motion towards the target. It also causes smaller shards to be thrown up into the air as the larger pieces of rock appear. (Earthbending, n.d.)
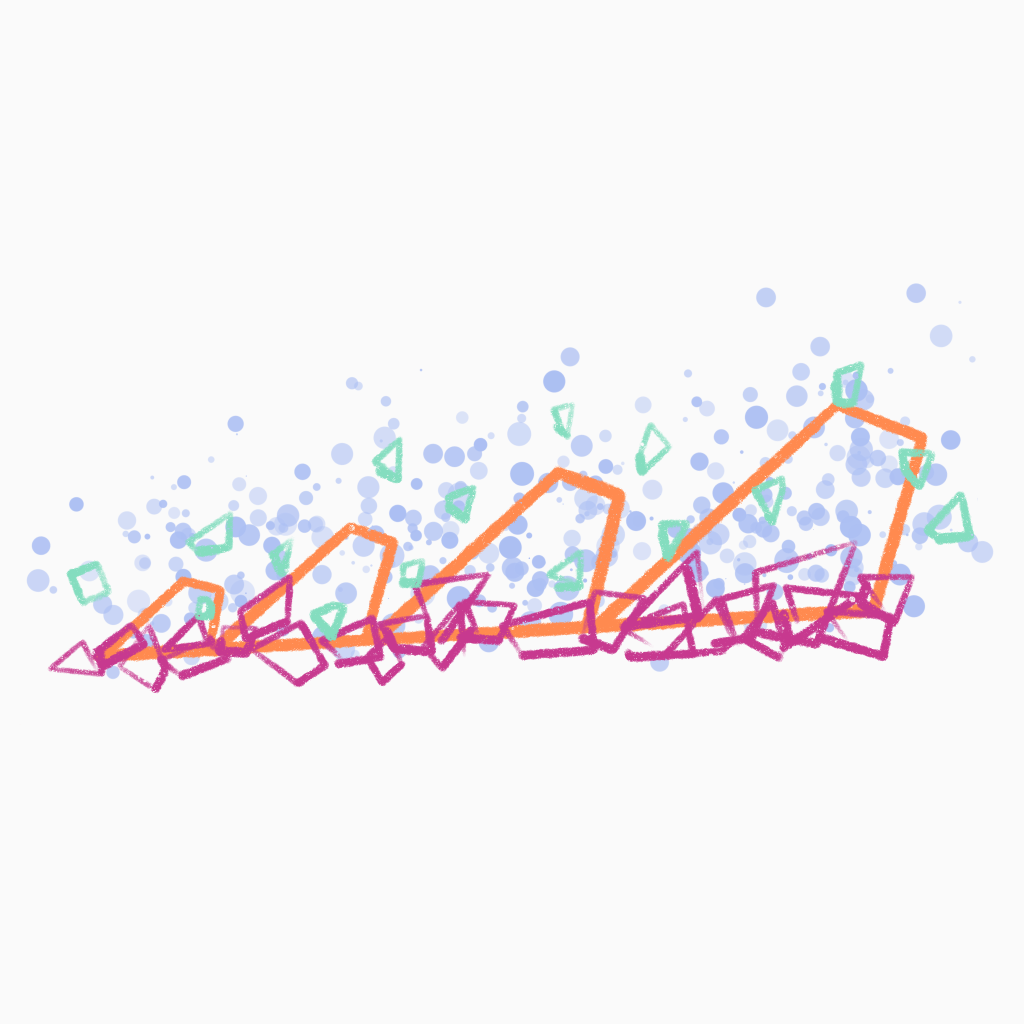
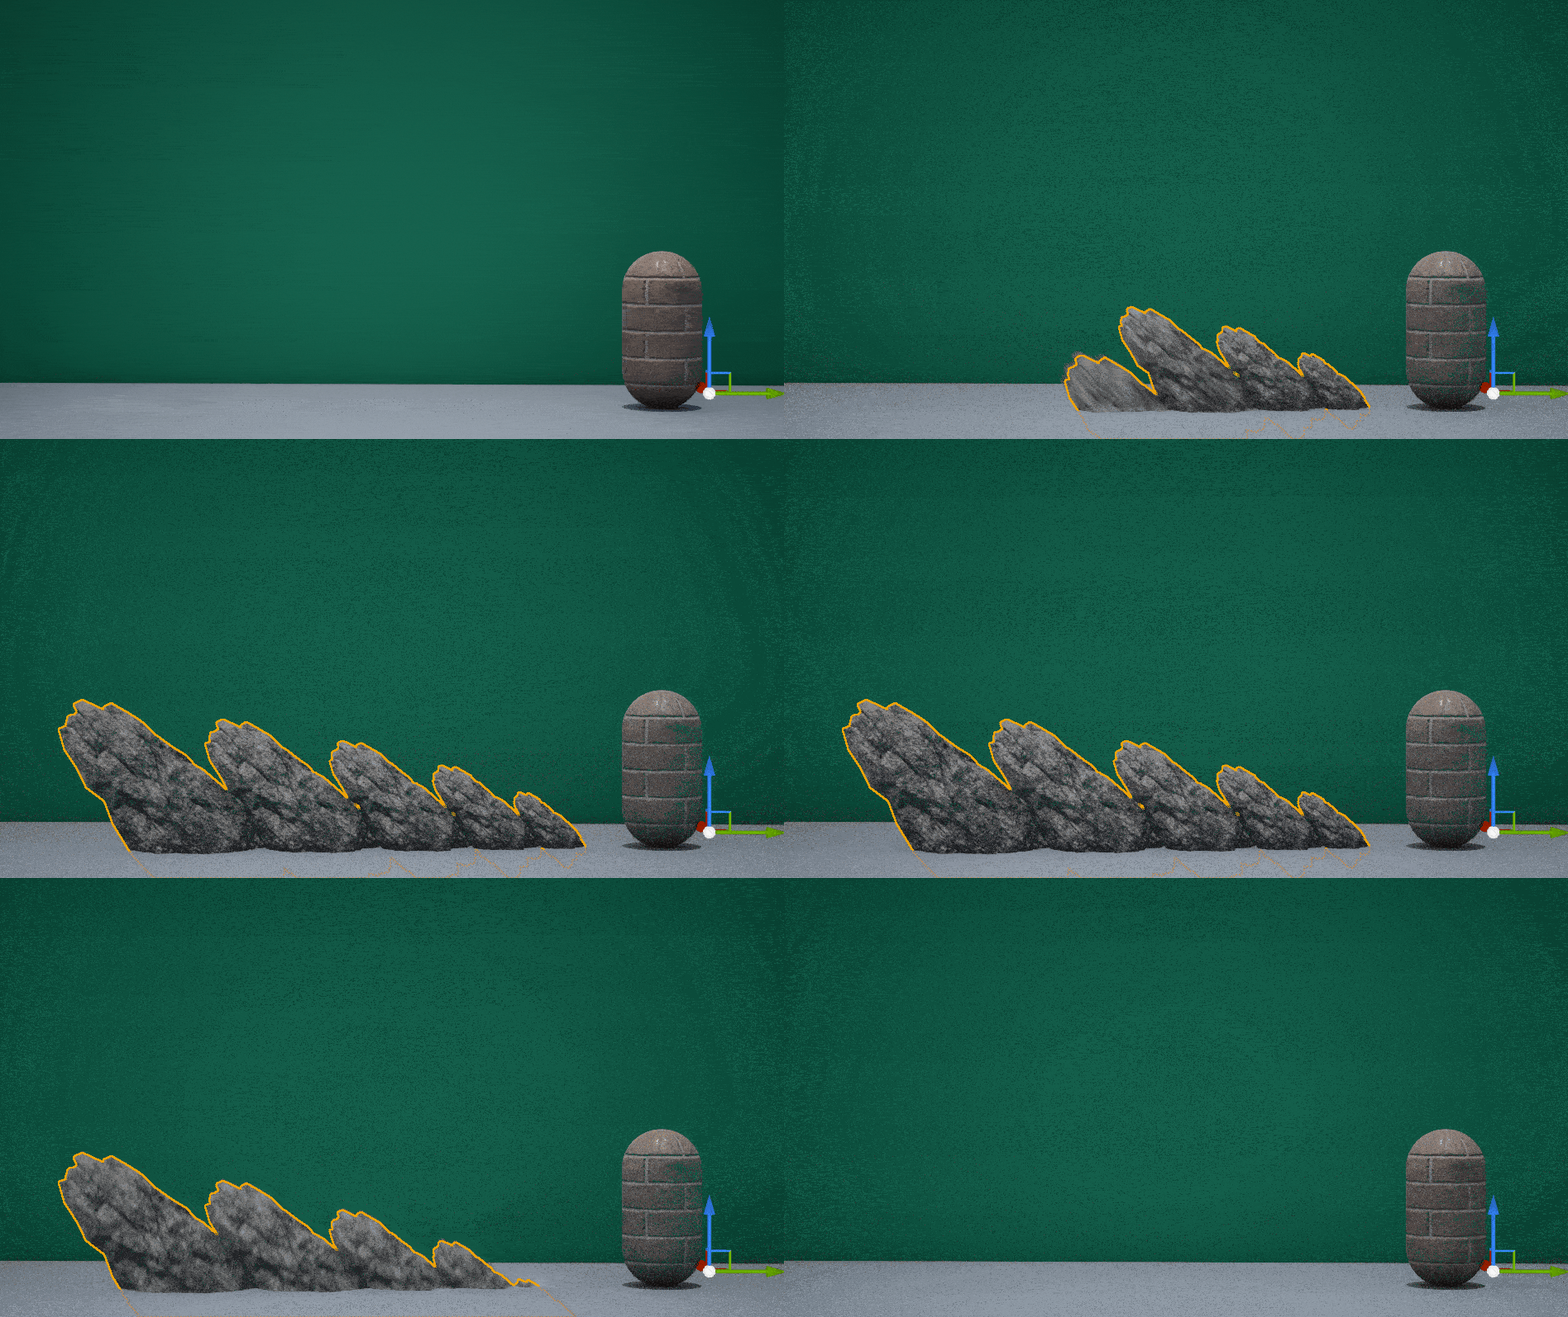
My composition will slightly differ from this, as it will get larger as the animation goes on, and I will also include a dust cloud to help tie the whole thing together.
Orange: The largest compositional element are the rocky ridges. These shards of rock are jagged in shape. They protrude out of the ground one after another in a forward pattern disrupting the ground as they go.
Pink: Surrounding the larger orange rocks are smaller rocks, which get thrown up with a small amount of velocity and then fall. These add a medium sized detail to the composition.
Green: Small shards of rock break away from the larger shards and take longer to fall due to being thrown higher in the air. These pieces could also be mixed with particles of dirt for a slightly different effect.
Blue: The dust cloud produced when the rocks disrupt the earth, which helps to tie the other elements together.
VFX Component Breakdown:
Final VFX Composition:

Earth Barrier:
This technique involves manipulating the earth to form walls, which can be used defensively to protect against incoming attacks, offensively to challenge opponents, and even for practical applications such as construction. The process is somewhat similar to the previous two abilities and can also be seen being used by King Bumi. (Earthbending, n.d.)
In my composition, as the barrier emerges, a dust cloud will envelop the formation, providing an extra visual to tie the three abilities together and making the act of raising an earth barrier more dynamic.
Orange: The main structure is a large rectangular pillar of rock made of large shards of dense rock. I would like it to have a jagged yet stylised appearance. This structure is pulled from the ground in one movement. Camera shake may be added to sell the weight of the pillar more.
Pink: These small shards are debris thrown up by the large pillar. As the pillar collapses when the animation is complete it will break into similar sized chunks.
Green: –
Blue: The dust cloud which ties the elements together. In this case, the dust cloud should be quite sparse and should settle within a matter of seconds but then get kicked up again when the pillar collapses.
VFX Component Breakdown:
Final VFX Composition:

Fire
Fireballs / Fire-Jabs:
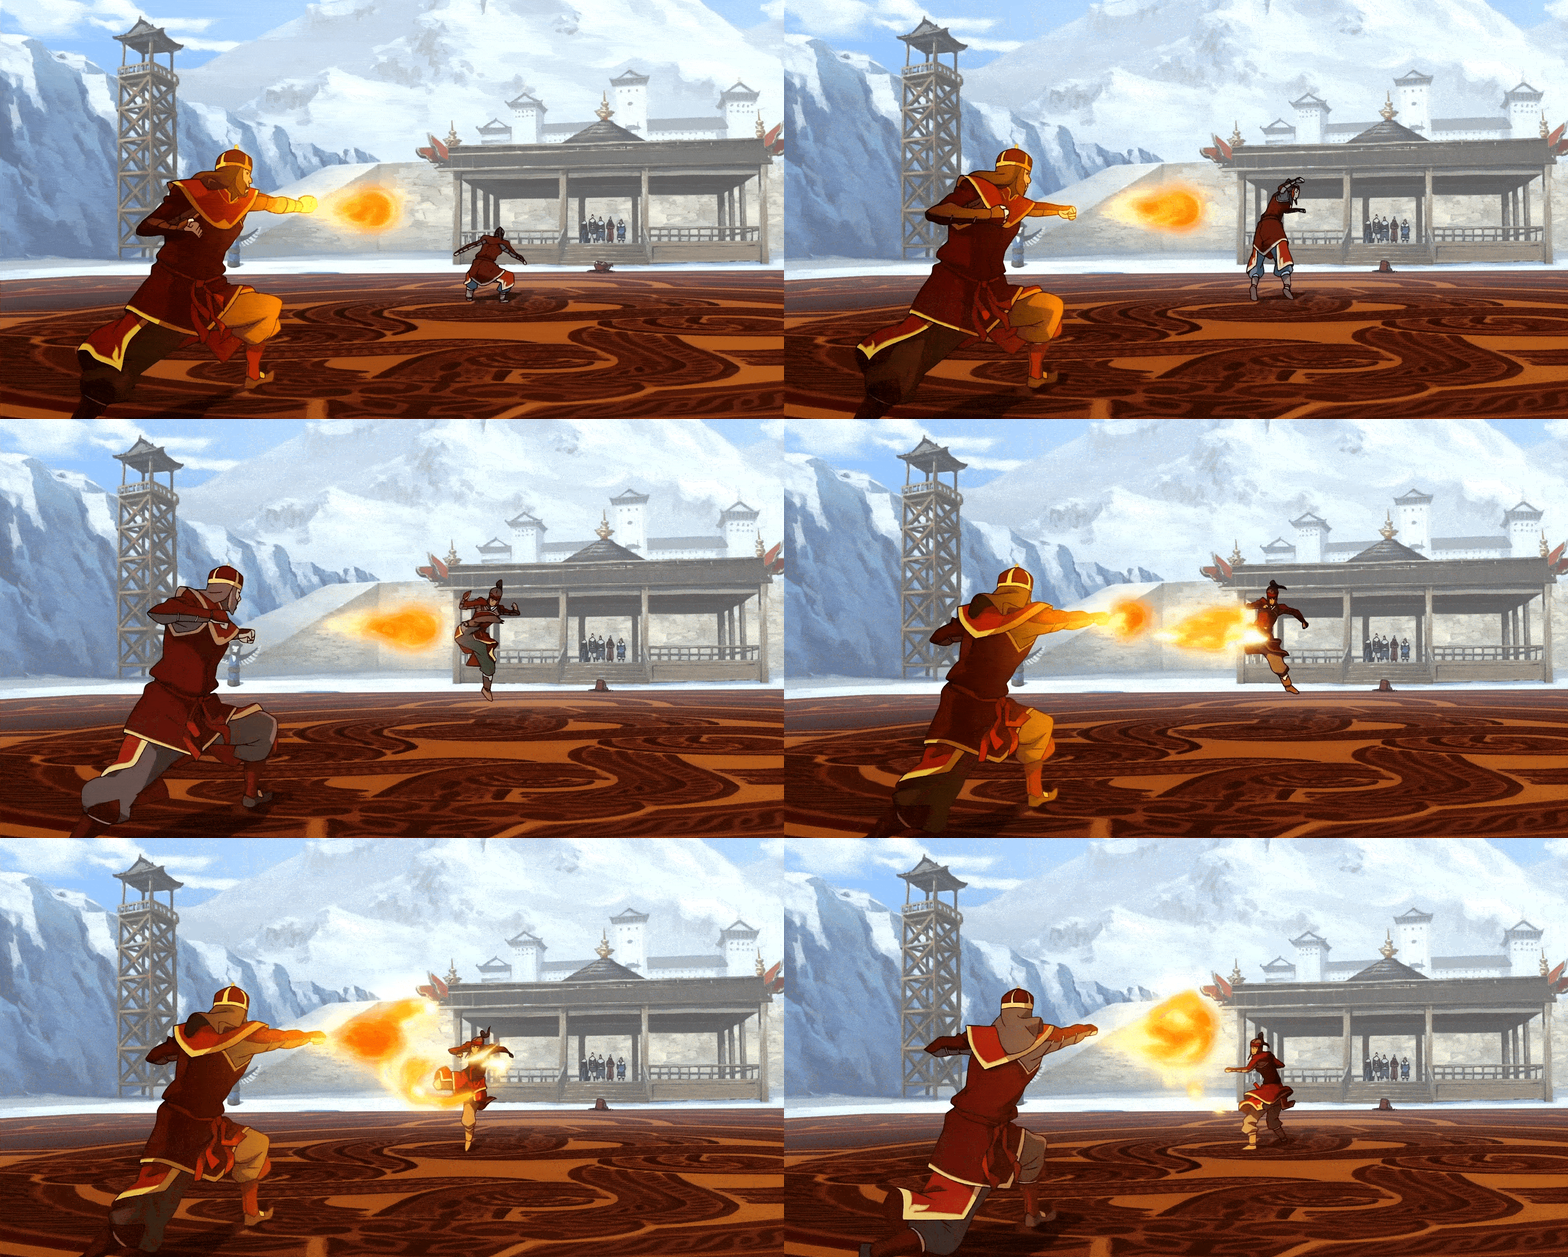
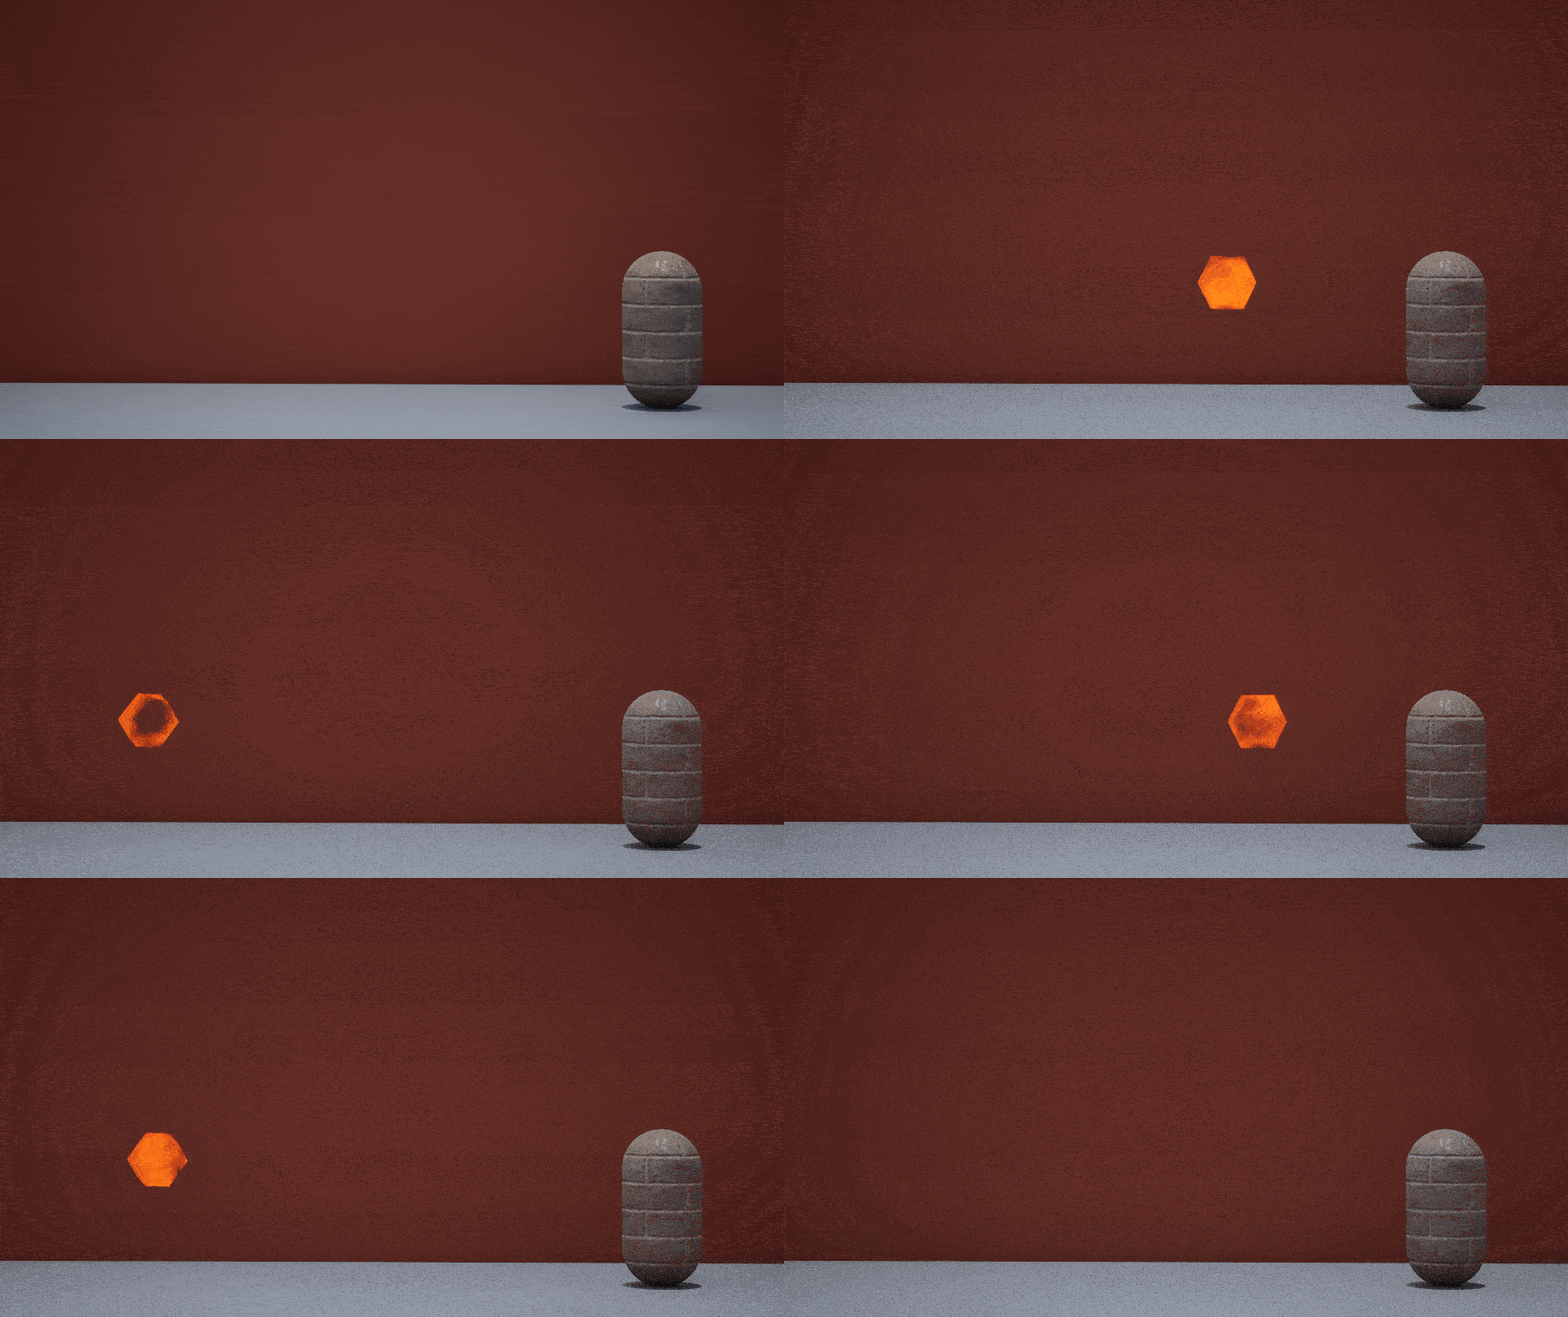
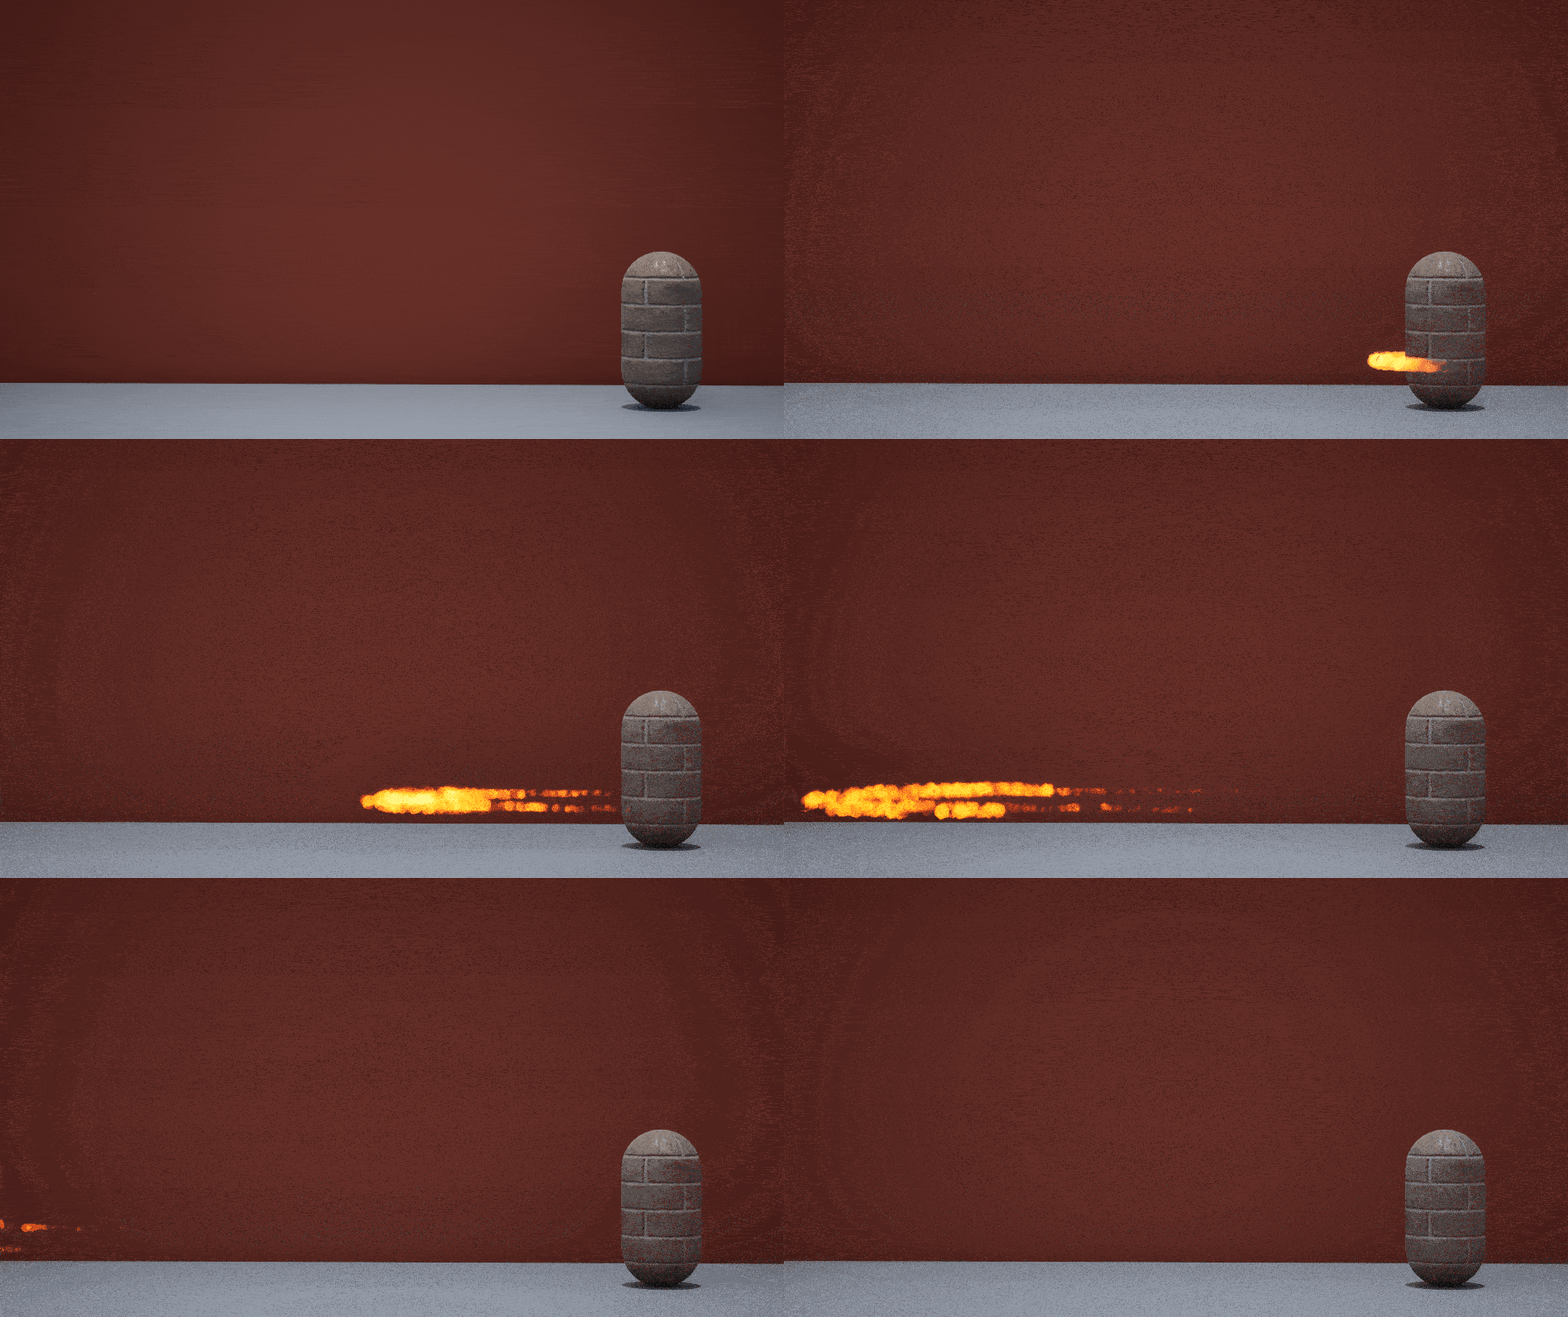
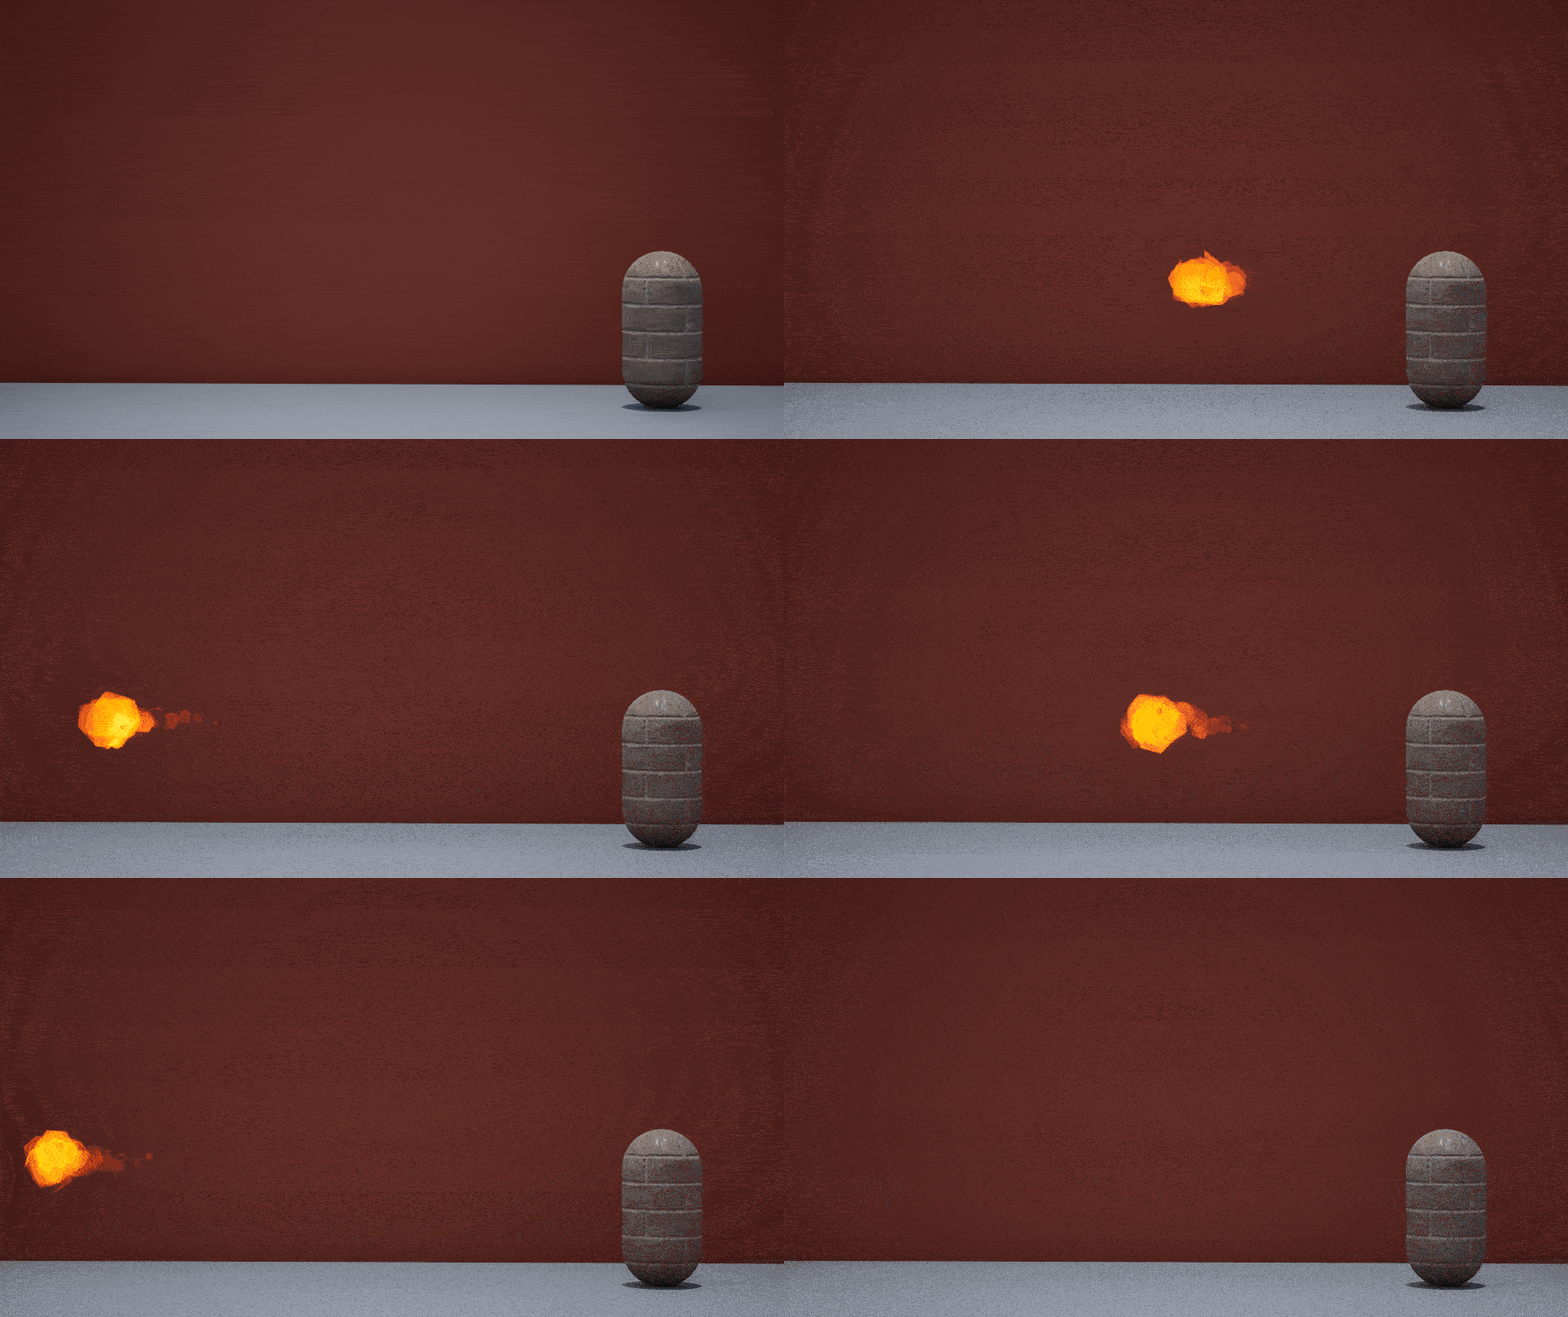
One of the foundational skills of Firebending is the creation of fireballs, also known as “fire-jabs”. This technique involves the Firebender executing jabs and punches to launch small fireballs and flames towards their opponent. These elemental projectiles can be enhanced to form larger, more potent bursts of fire, a strategy known as “charged attacks.” Alternatively, Firebenders may opt to release these fireballs rapidly in succession. (Firebending, n.d.)
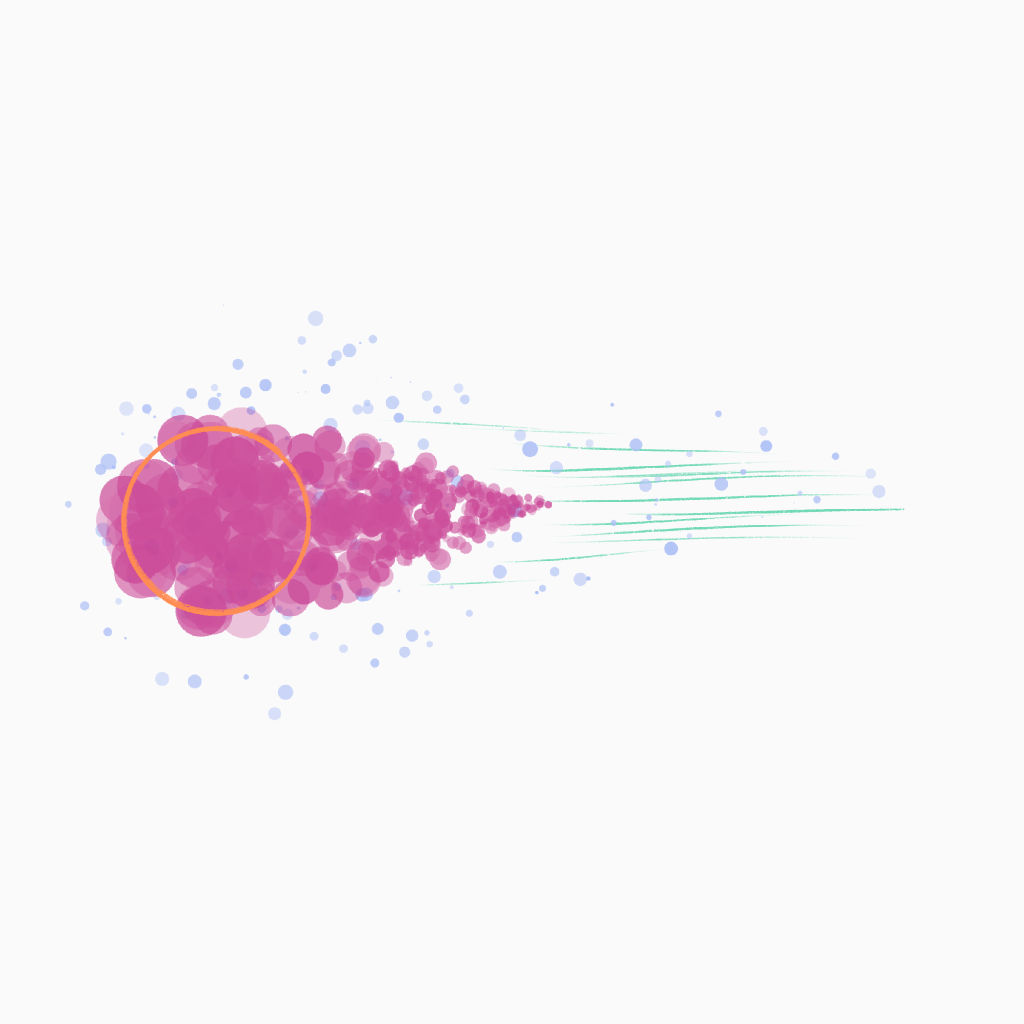
Orange: This ball makes up the core of the fireball. This would be a textured ball with some kind of moving texture that allows the ball to blend with the particle elements. The ball is mostly present to help keep the particles to form.
Pink: These dots represent large particles of stylised flames. These will be lit brightly with an emissive material set high enough that it gives a stylised glowy look.
Green: These speed lines may be added for a stylised effect and to add to the sense of fast motion. They would be created using a ribbon renderer.
Blue: These dots represent embers flying out from the primary shape. They would be created using a vortex and sprite emitter.
VFX Component Breakdown:
Final VFX Composition:

Fire Arc:
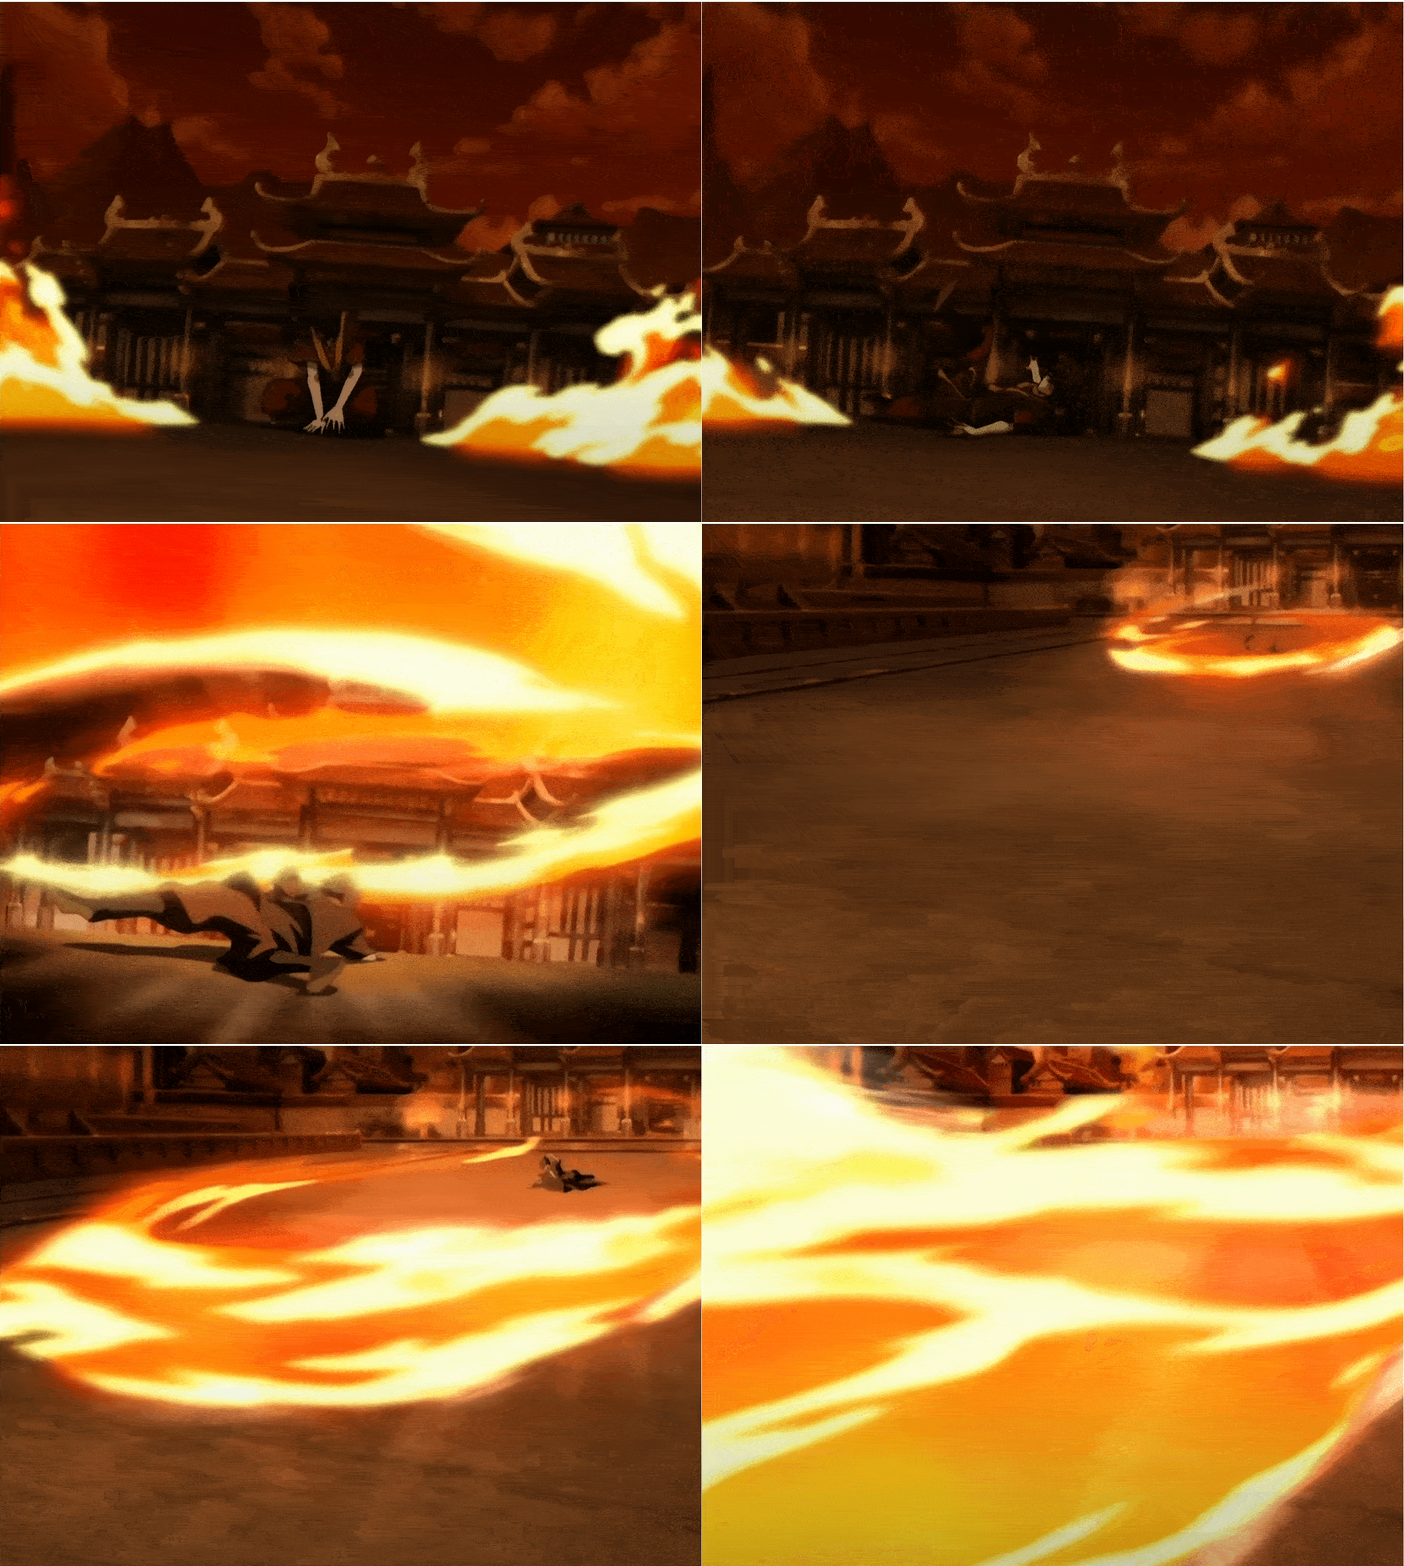
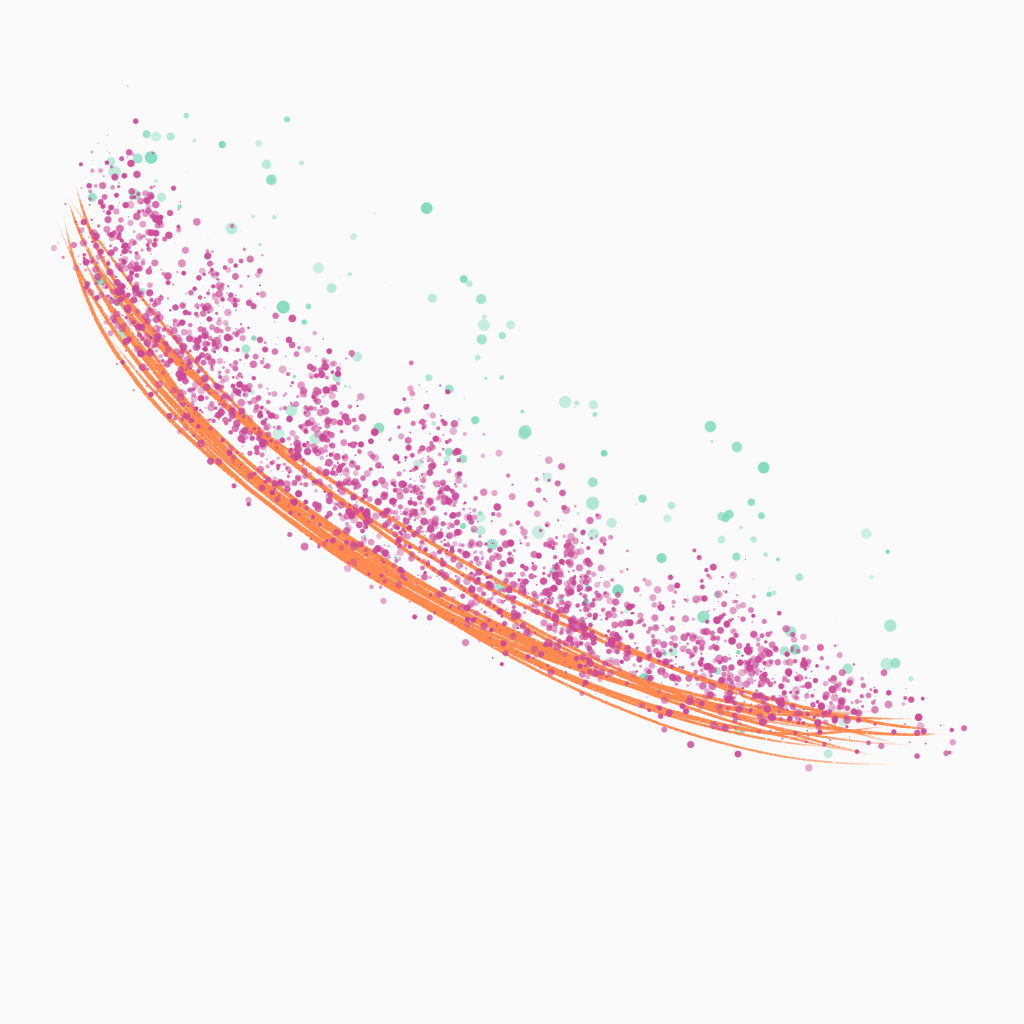
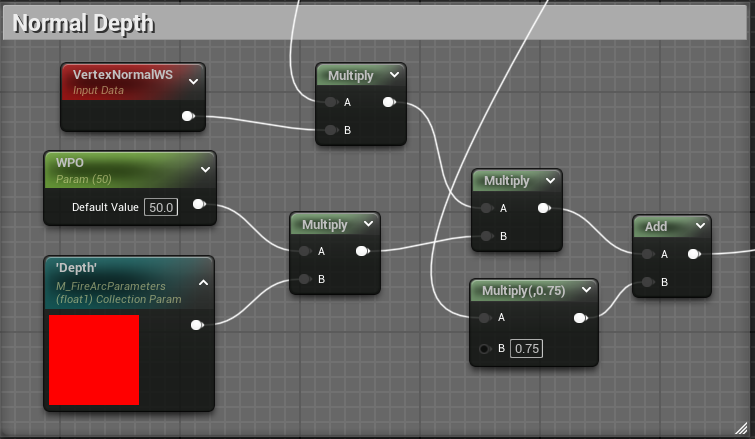
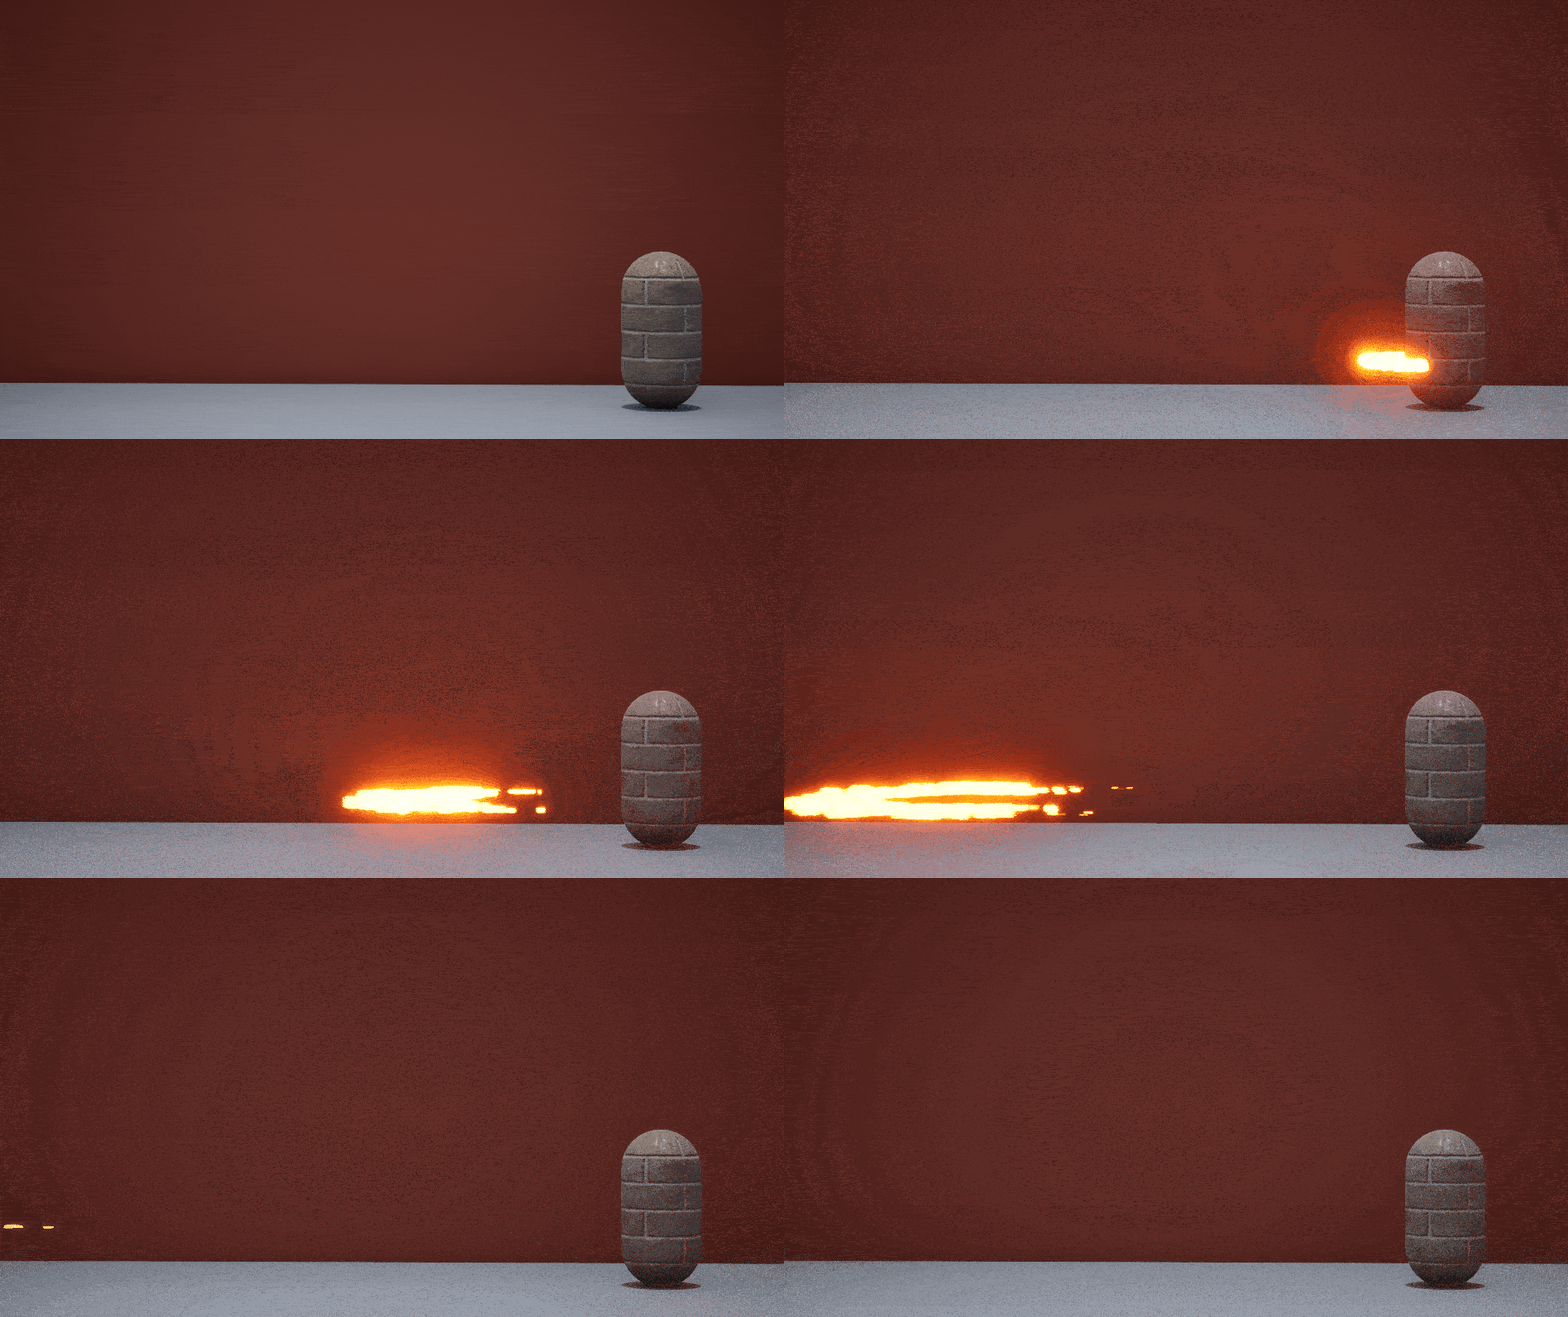
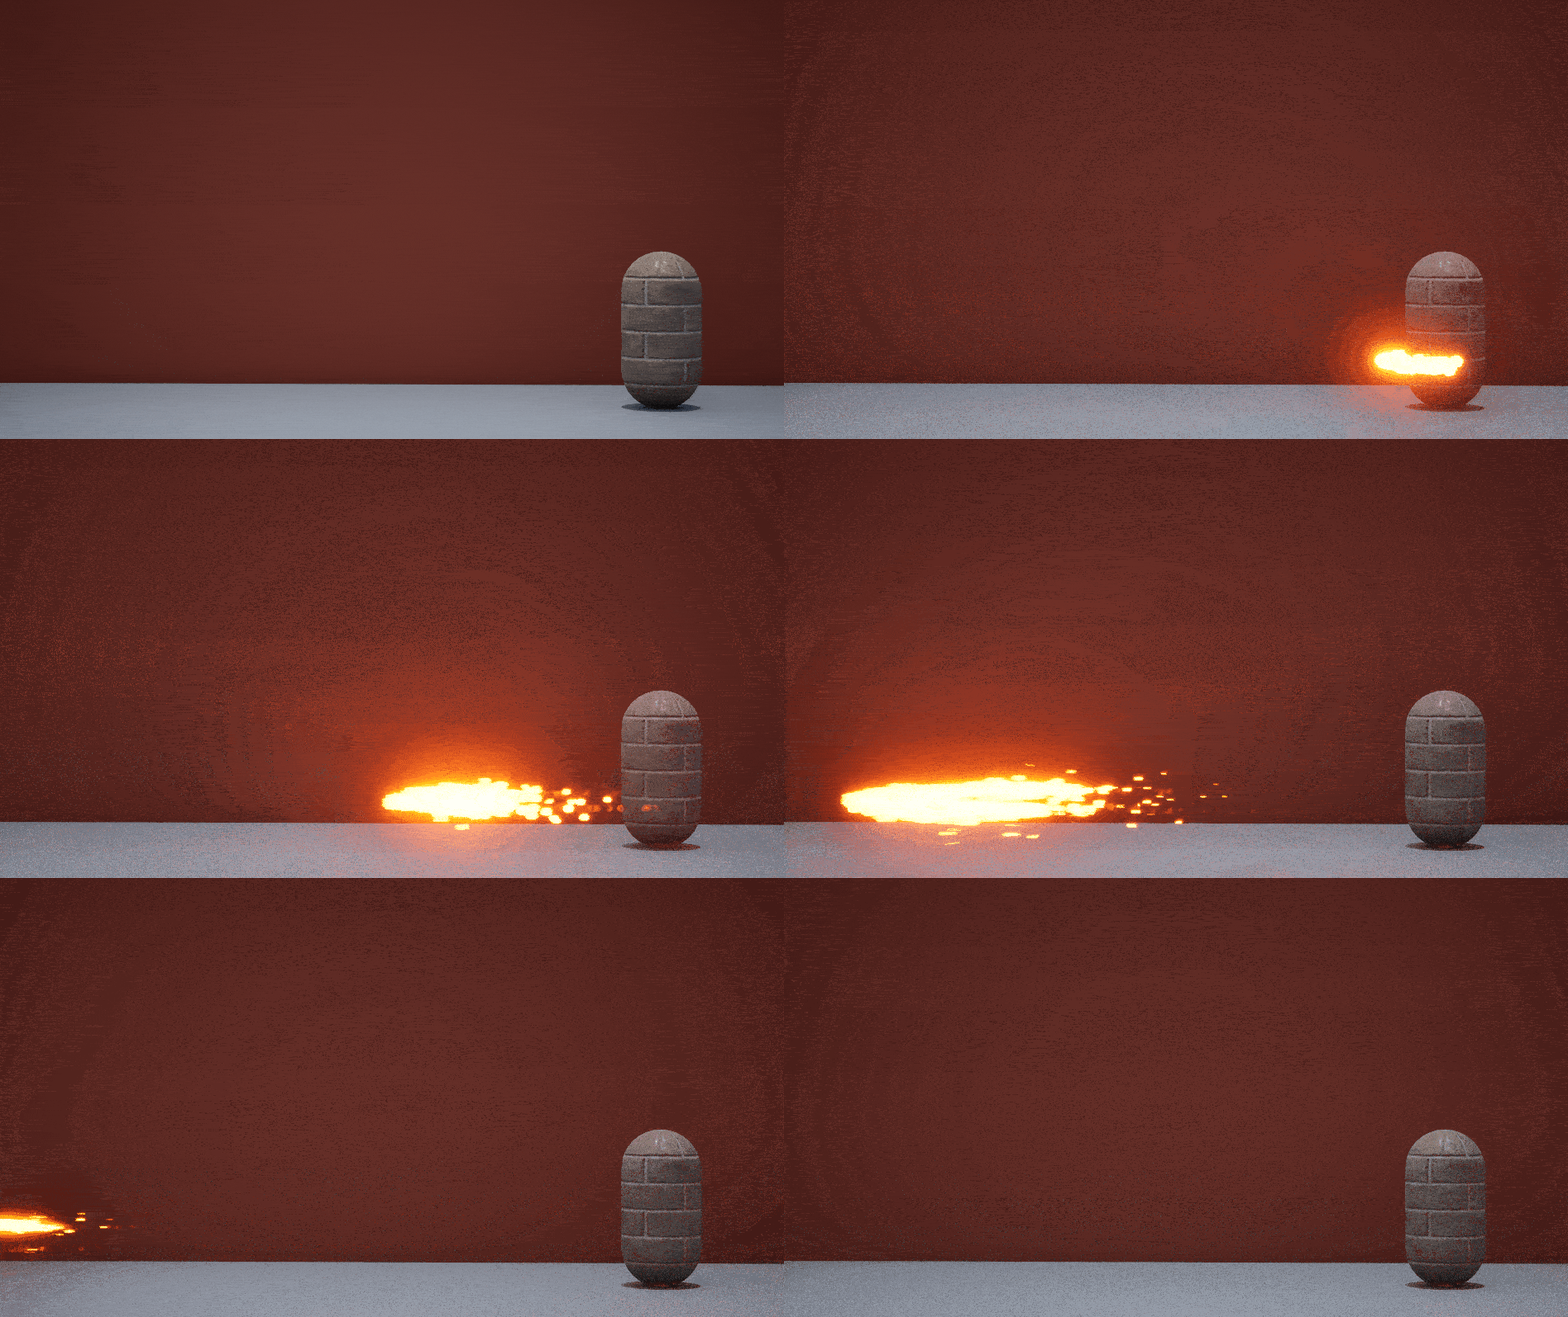
Firebenders have the ability to create blazing rings and arcs. This skill involves using spinning kicks or sweeping arm movements. These actions create fiery shapes that can cut through larger targets, those spread out or moving away. A notable use of this technique was by Zuko. During a crucial battle, known as the Comet-Enhanced Agni Kai, he executed a circular motion with his feet. This motion generated an expanding ring of fire. (Firebending, n.d.)
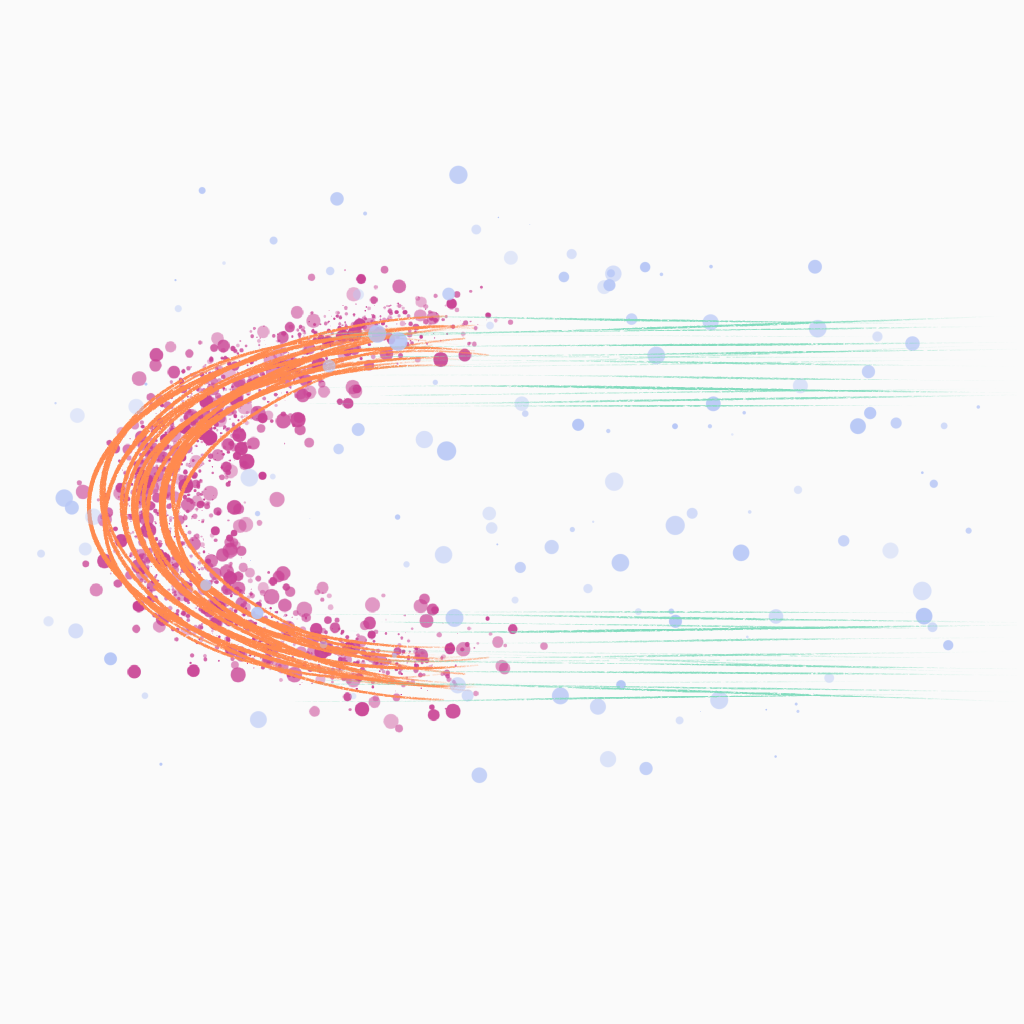
Orange: These strikes make up the primary shape of the arc. They could be made using a repeating ribbon renderer or some type of fluid simulation. The arc should be created from left to right and be oriented horizontally to the ground.
Pink: These dots represent large particles of stylised flames. These will be lit brightly with an emissive material set for a stylised, glowy look.
Green: These speed lines may be added for a stylised effect and to add to the sense of fast motion.
Blue: These dots represent embers flying out from the primary shape. They would be created using a vortex and sprite emitter.
VFX Component Breakdown:


Final VFX Composition:
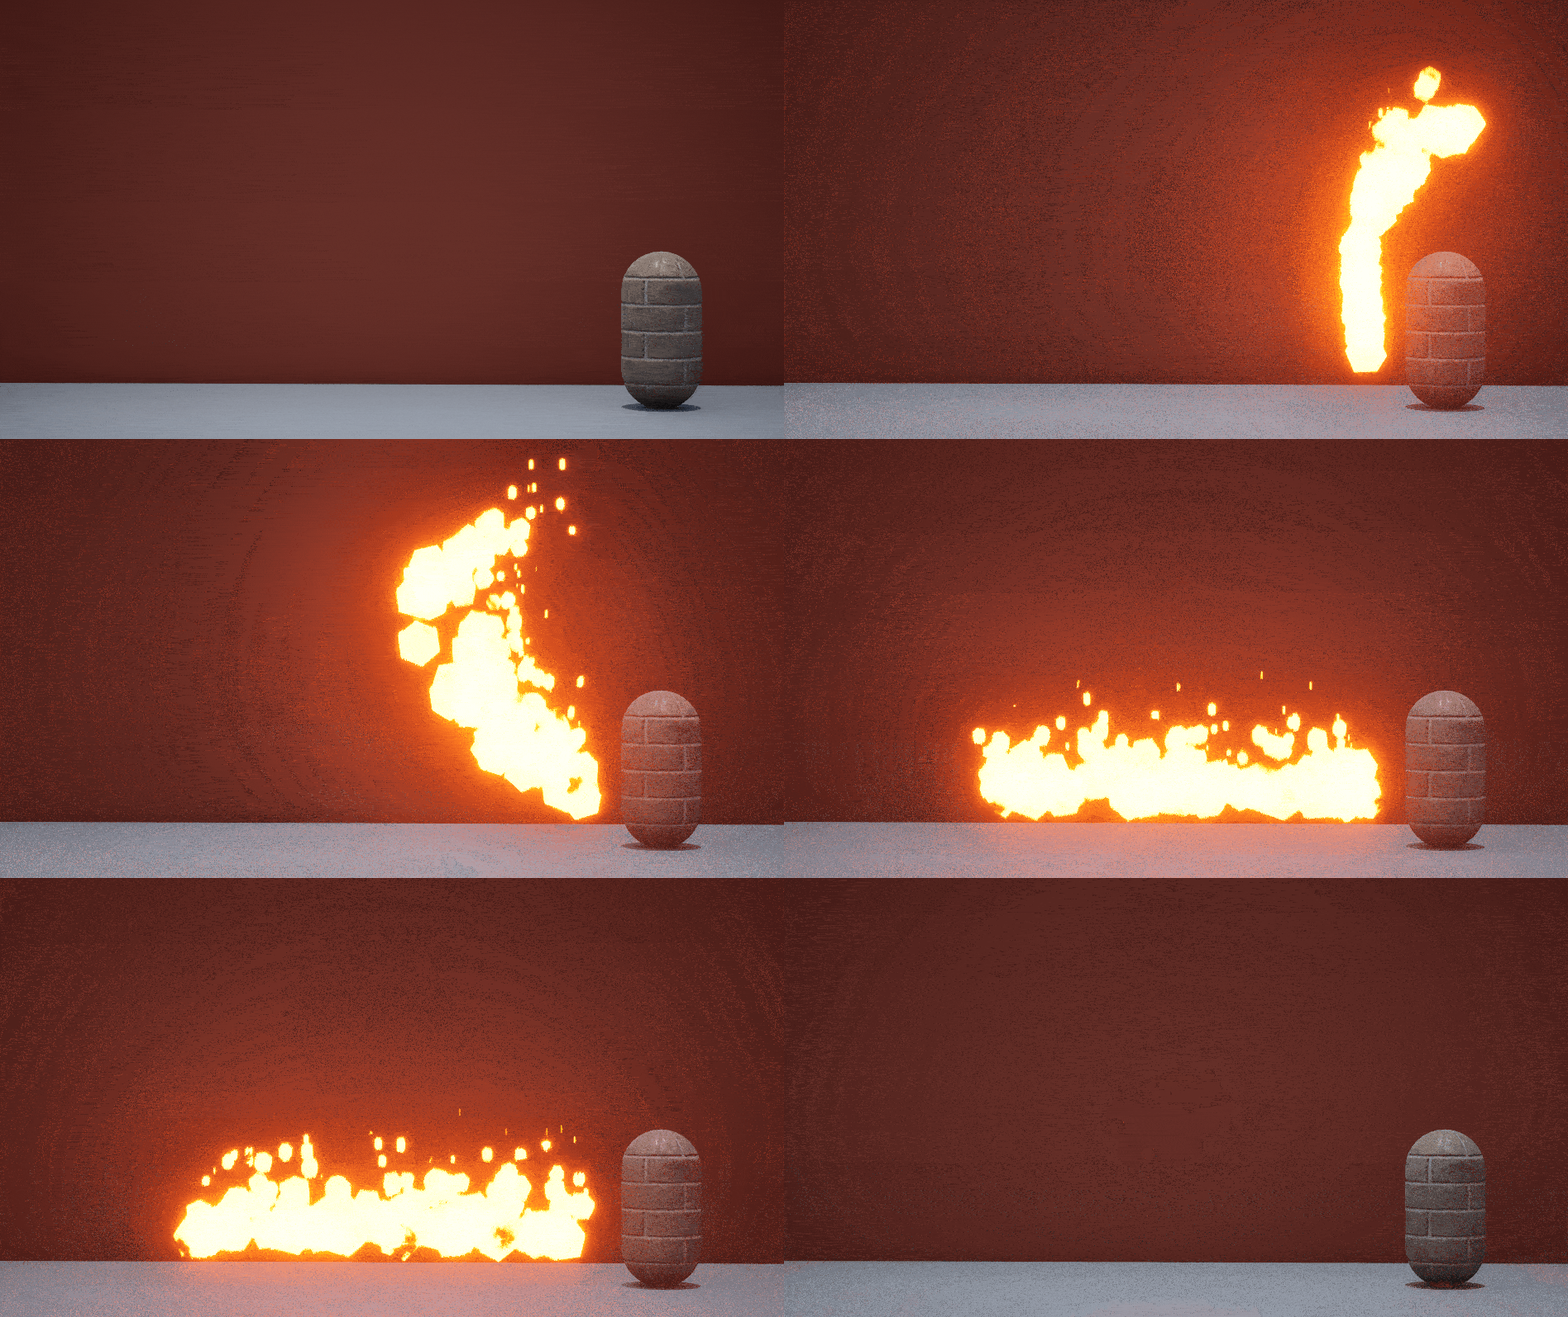
Fire Lash:
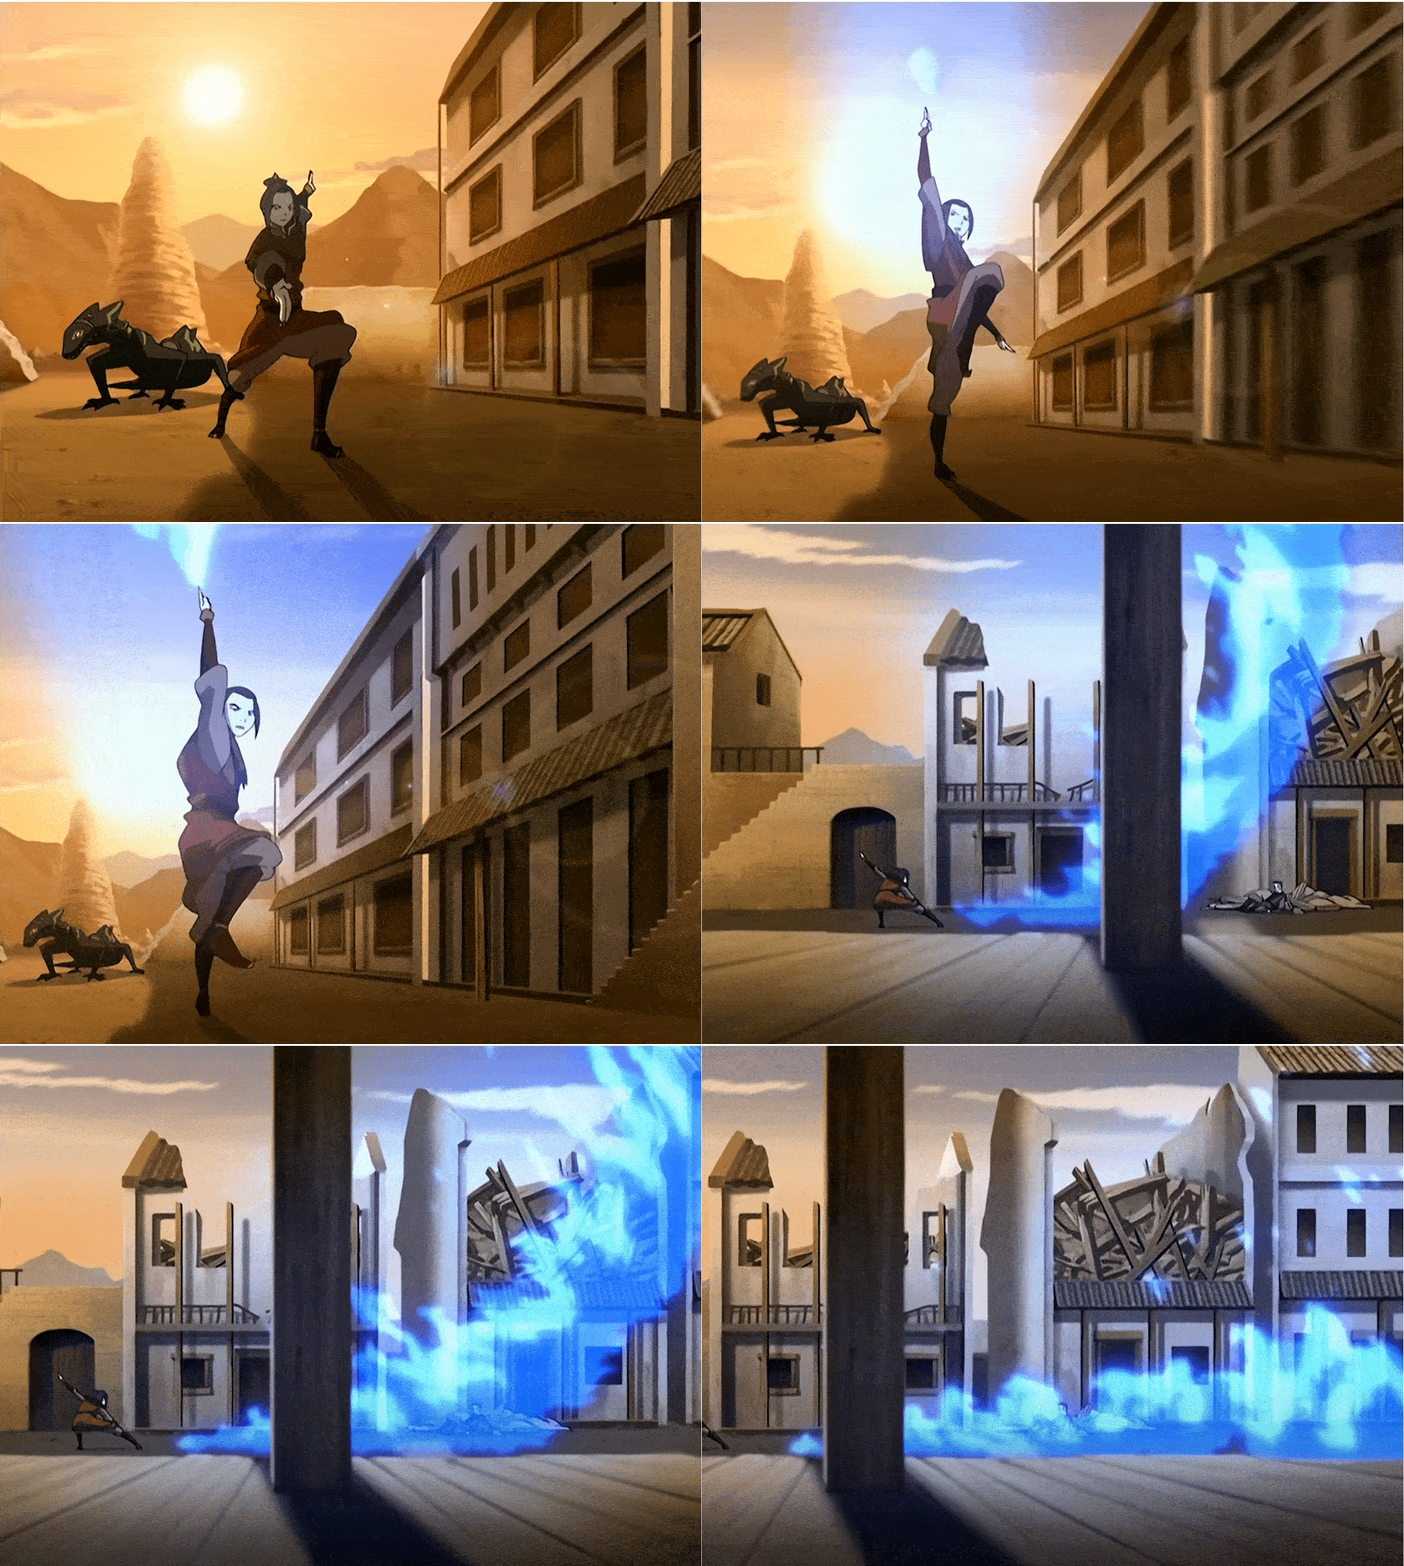
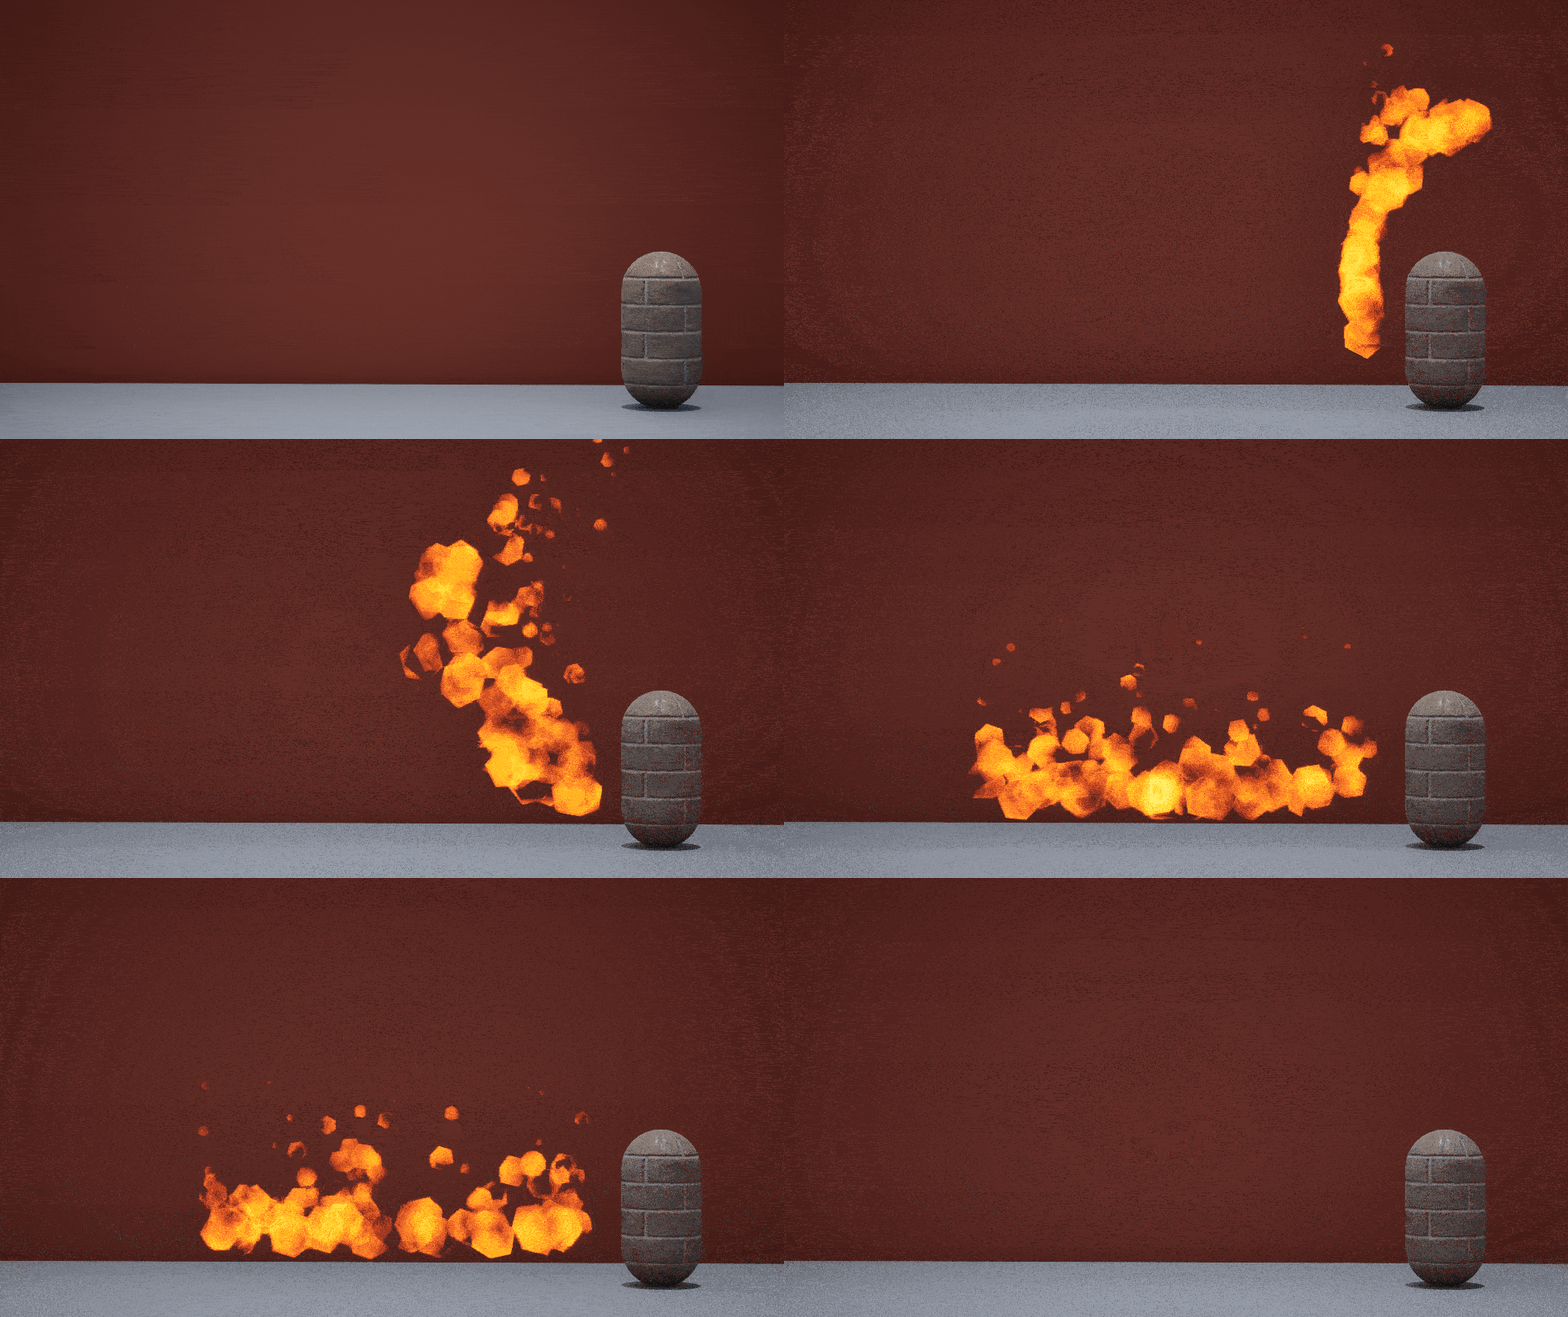
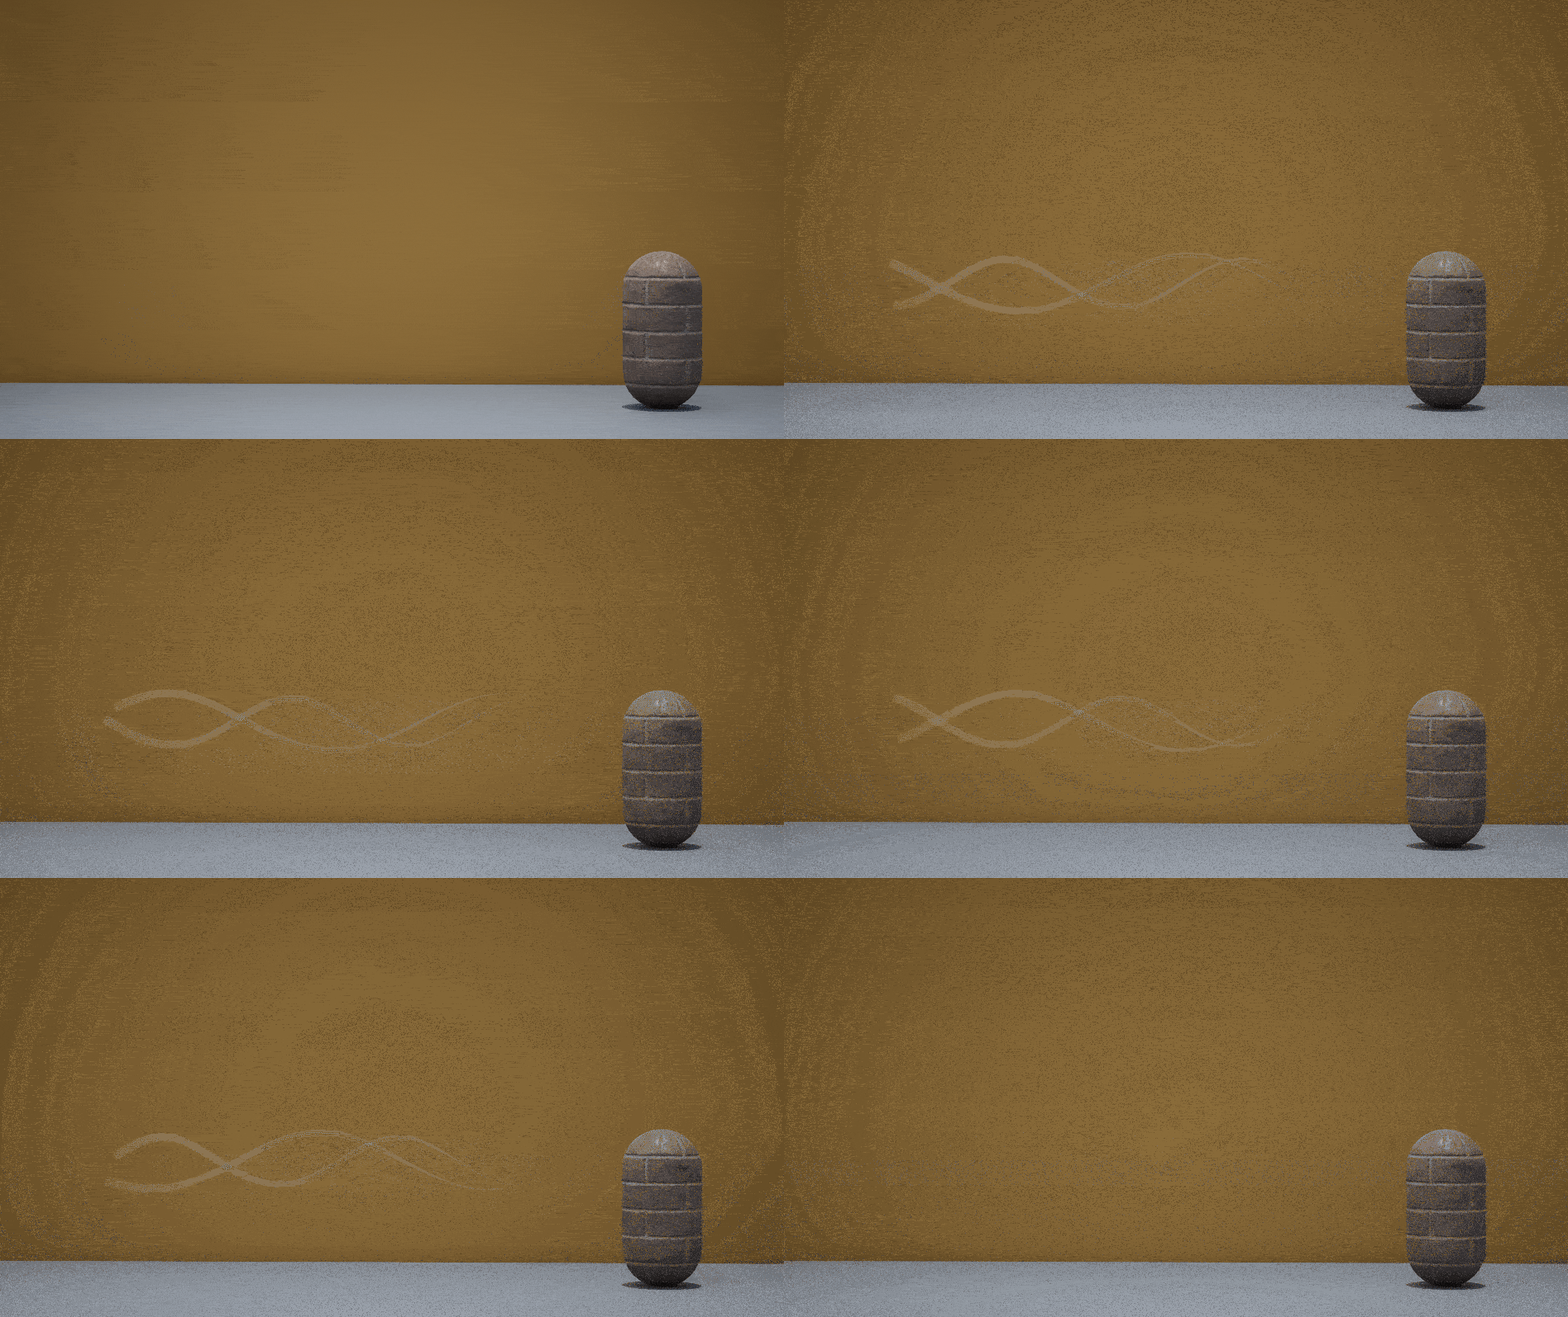
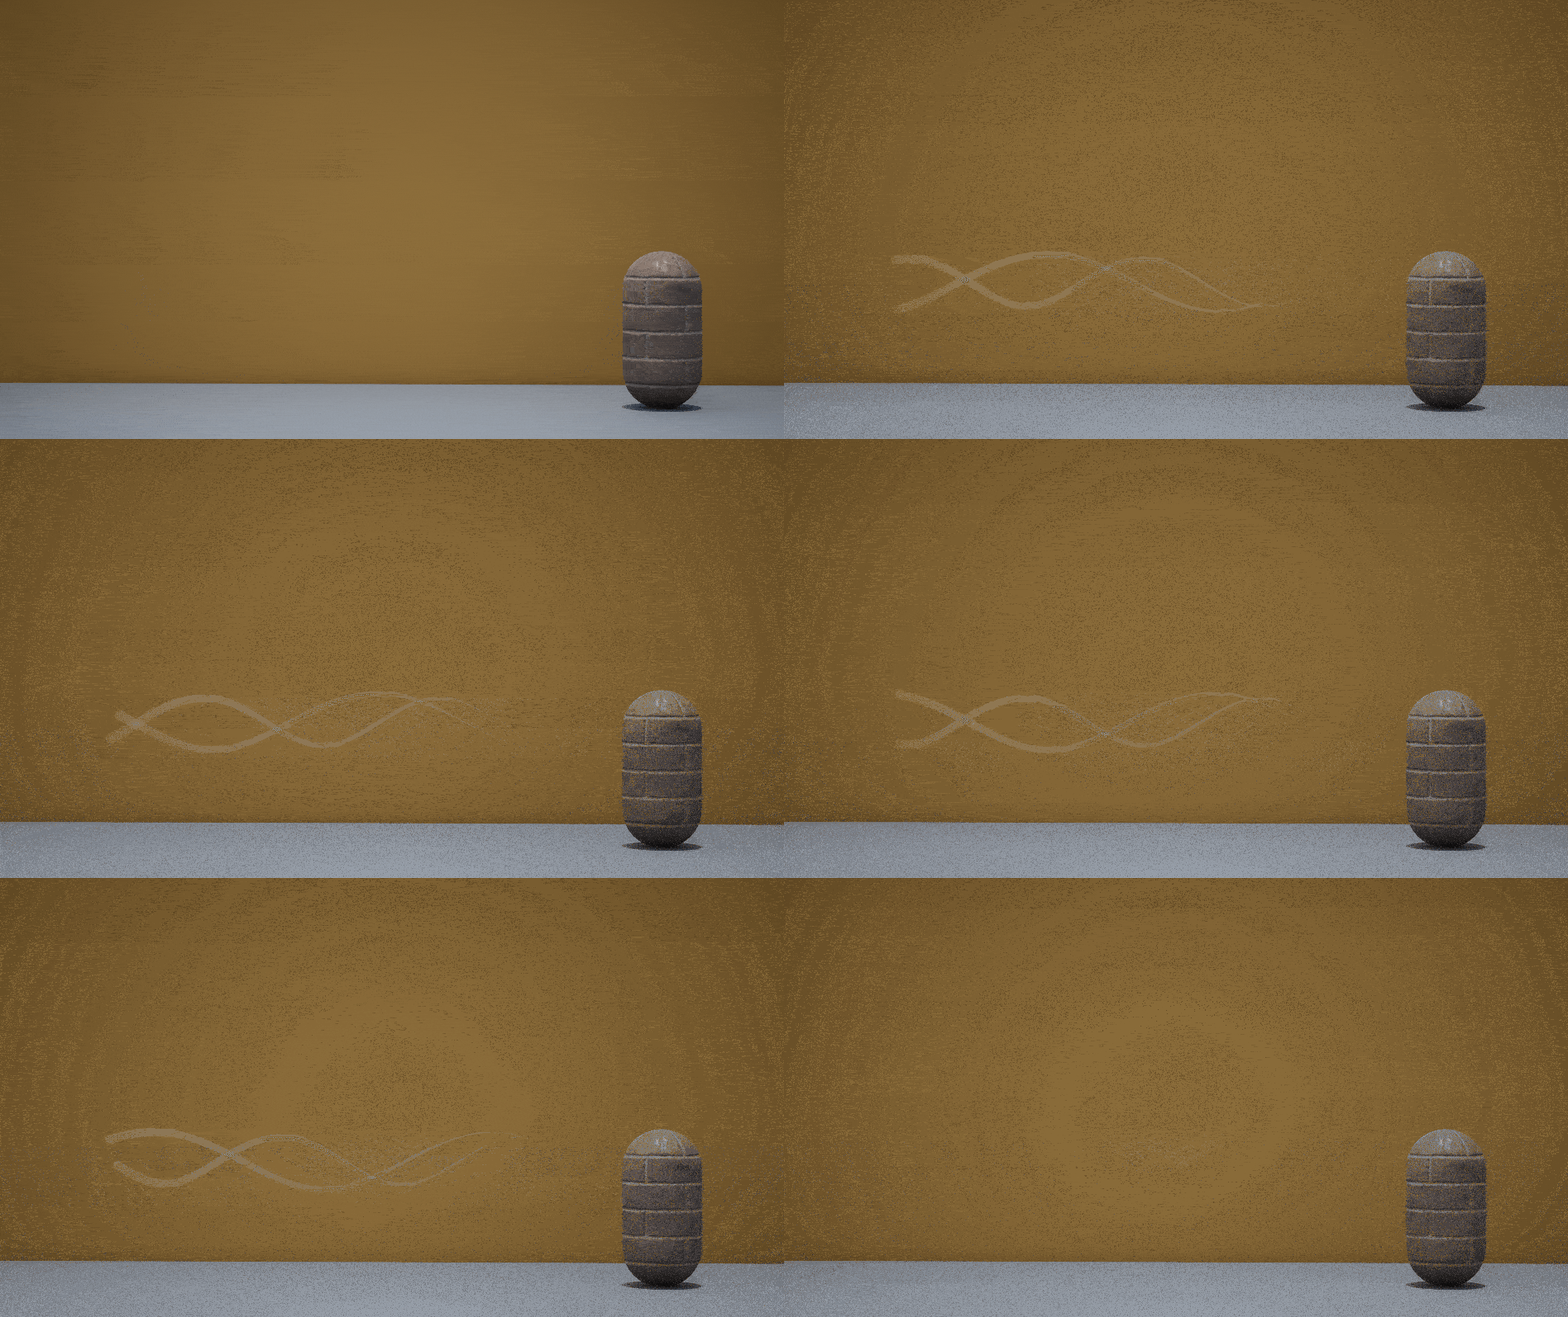
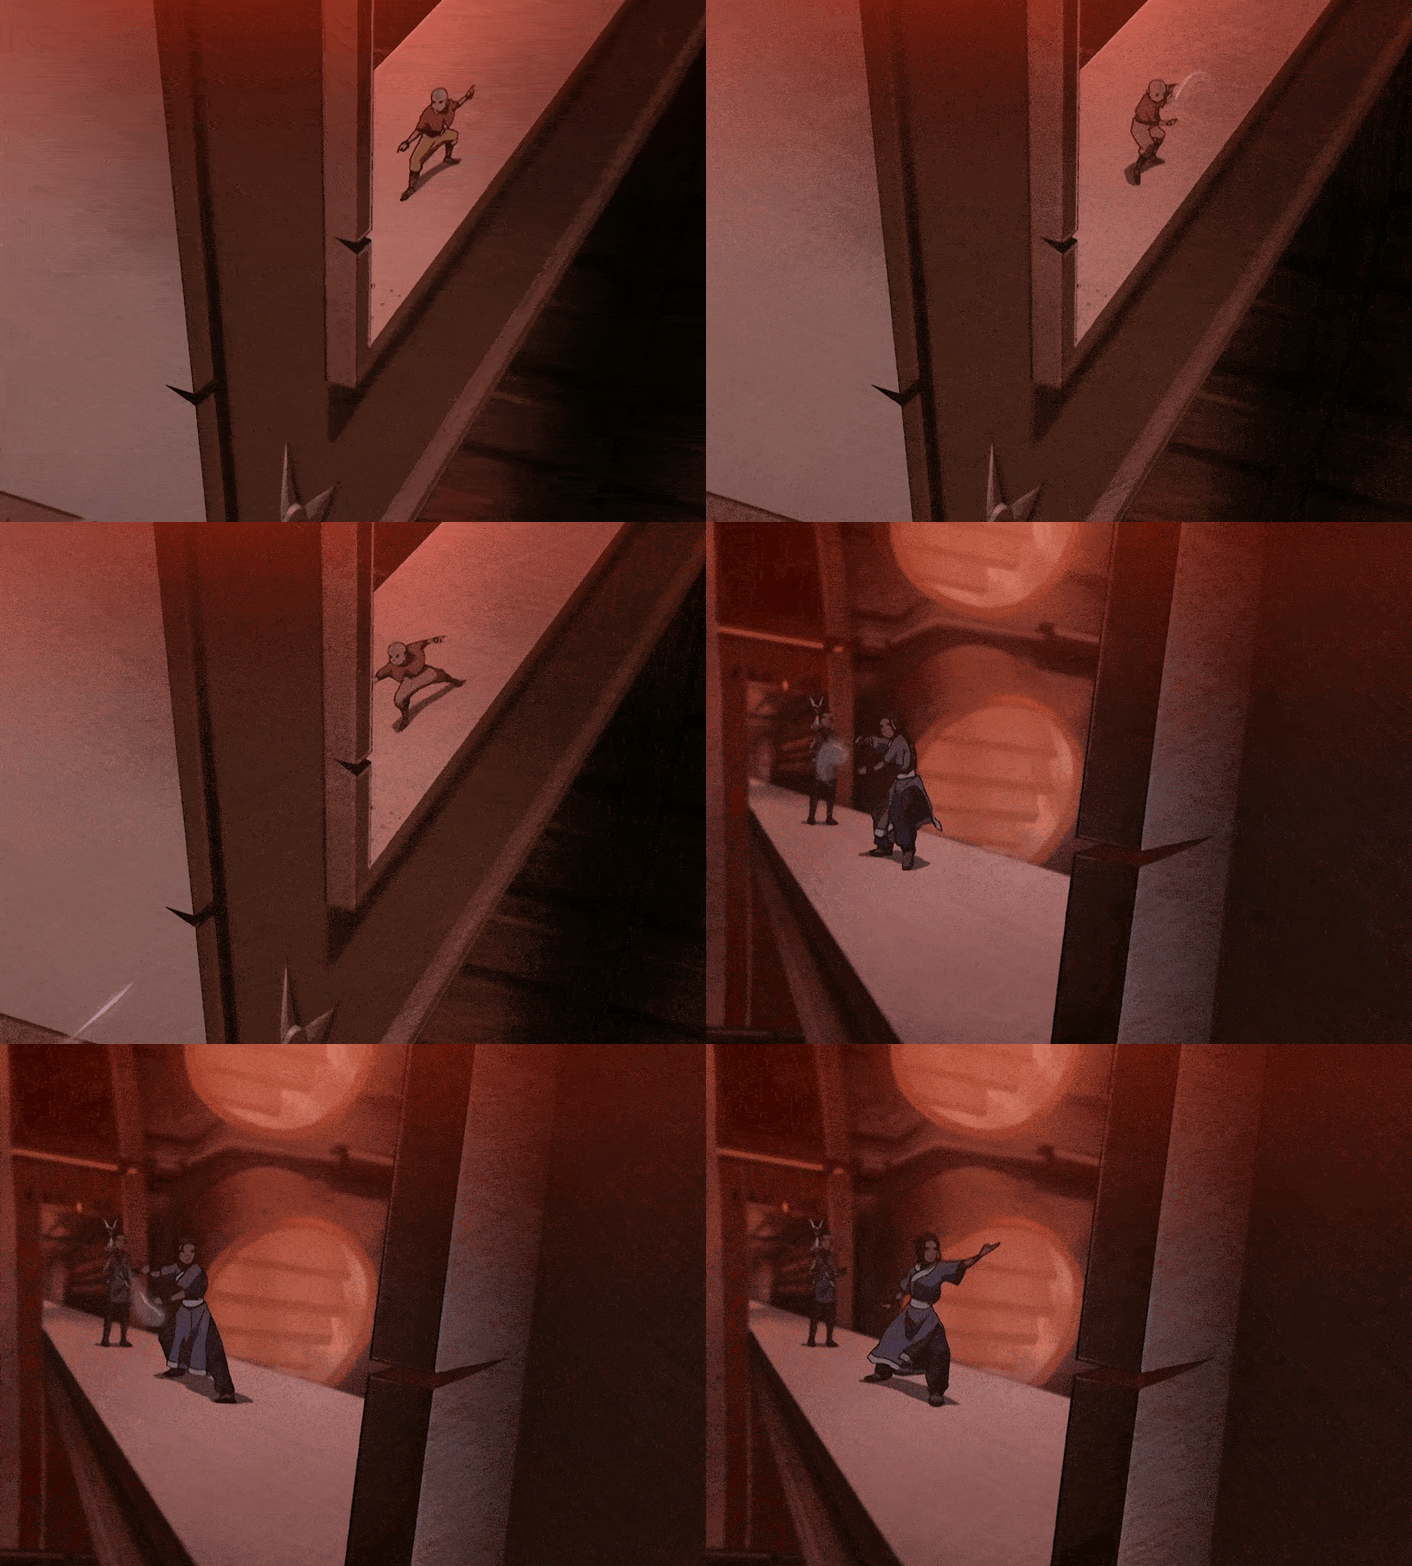
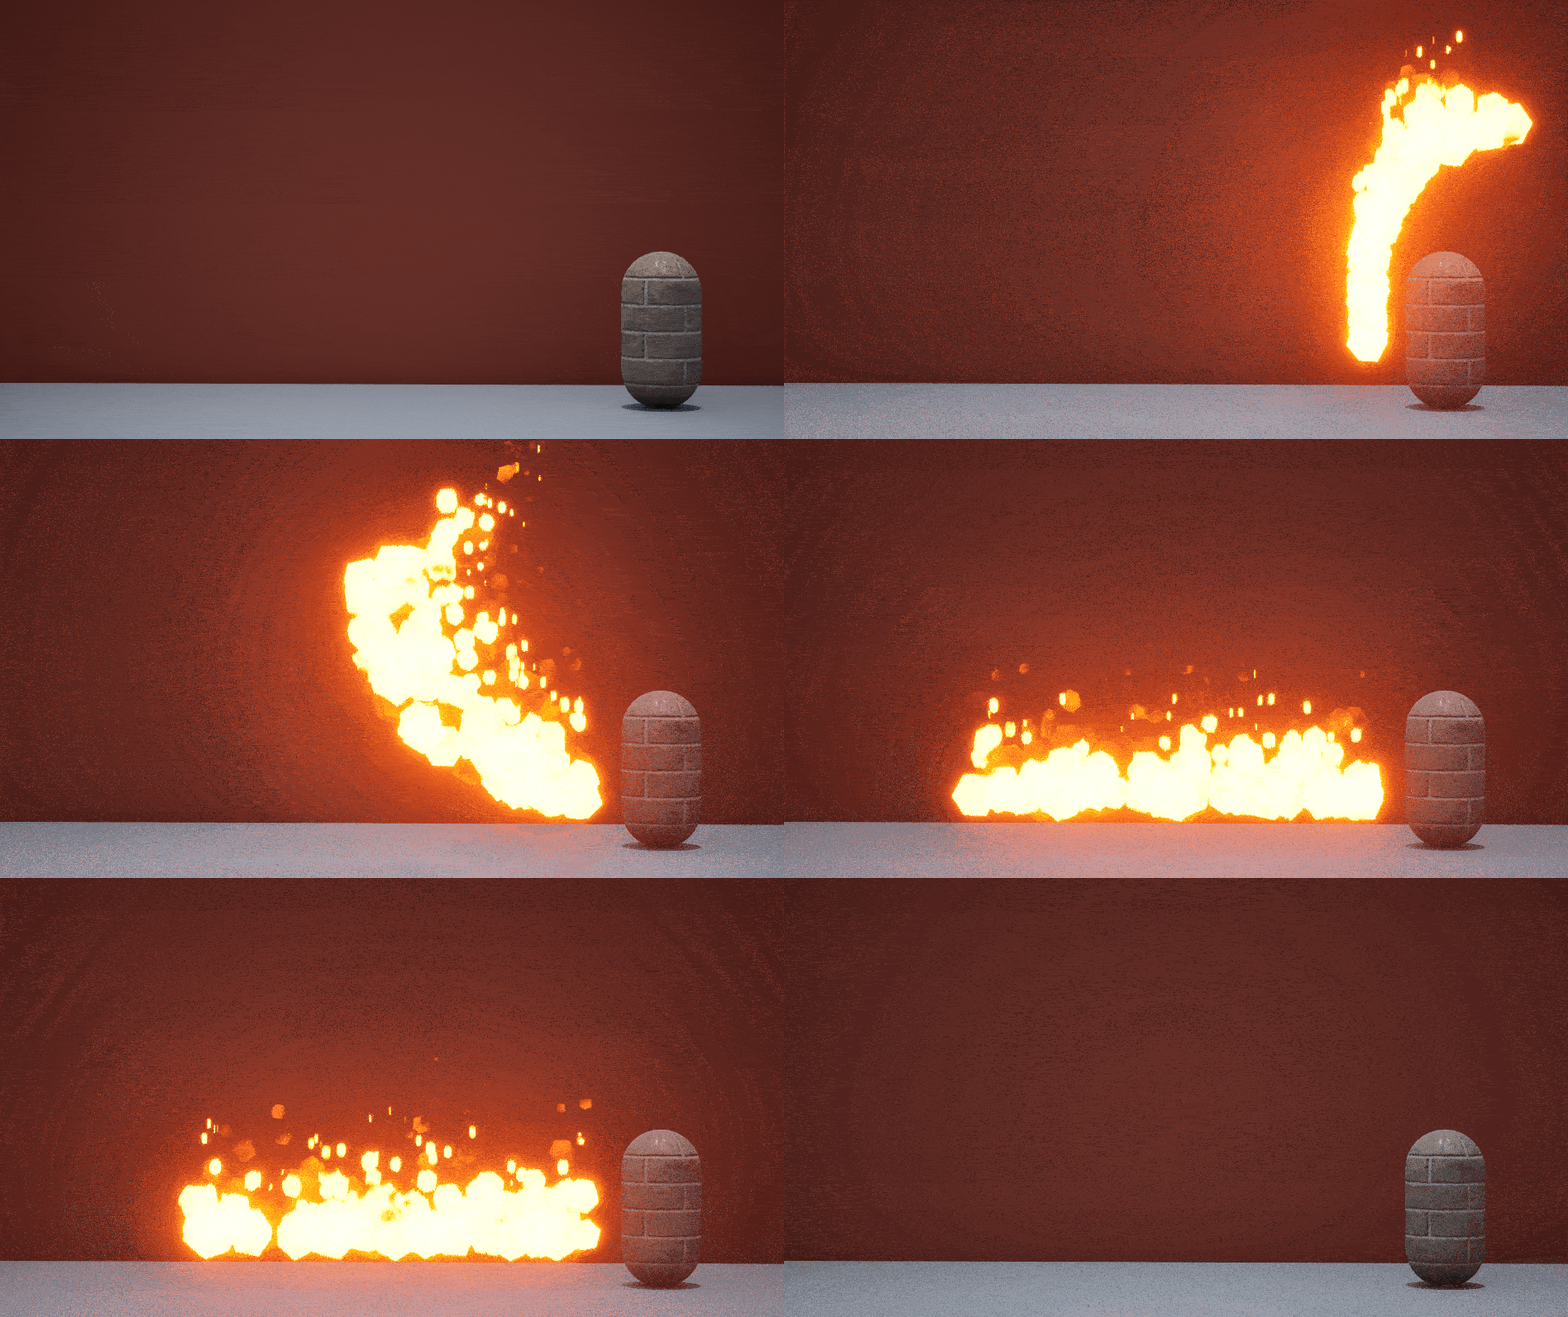
The Fire Lash is an advanced bending technique built upon the Fire Whip or Fire Stream. This ability enables the bender to wield a long lash of fire, which they can then strike down upon their foes. This technique was demonstrated by Azula in her battle with Aang. Some firebenders like Zuko have shown the capability to create not just one, but several smaller fire lashes. (Firebending, n.d.)
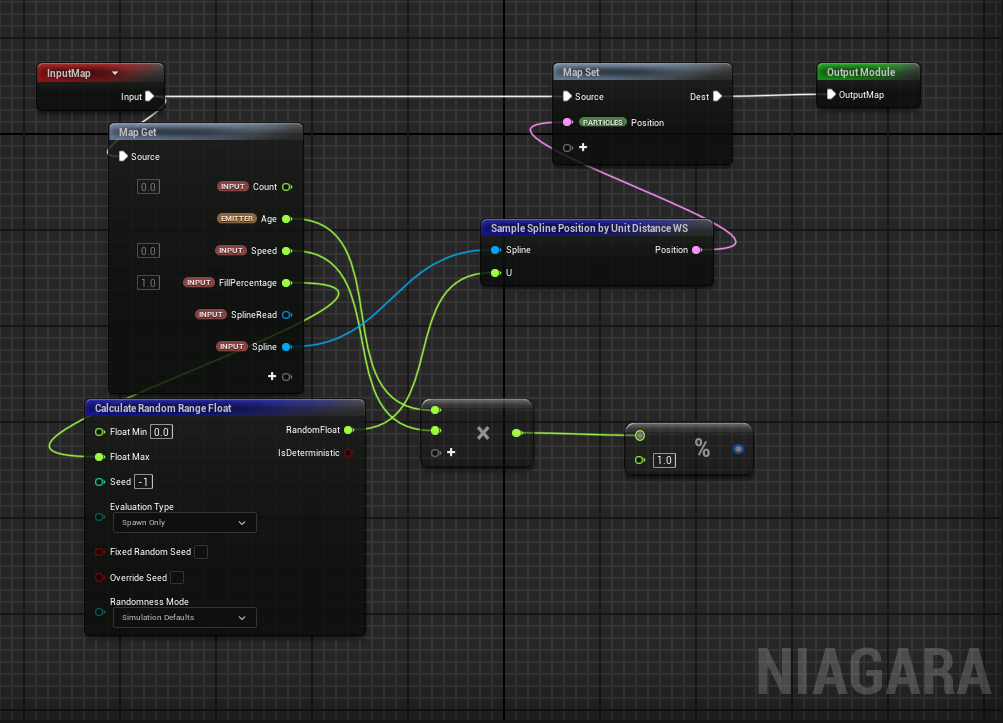
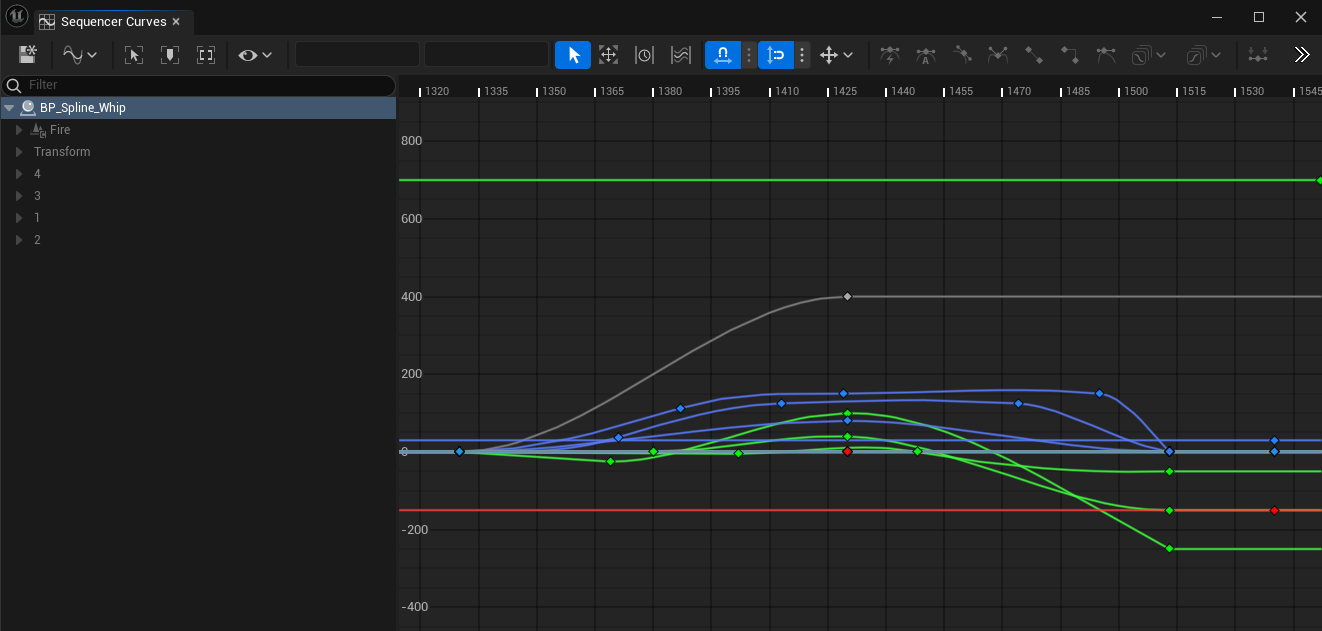
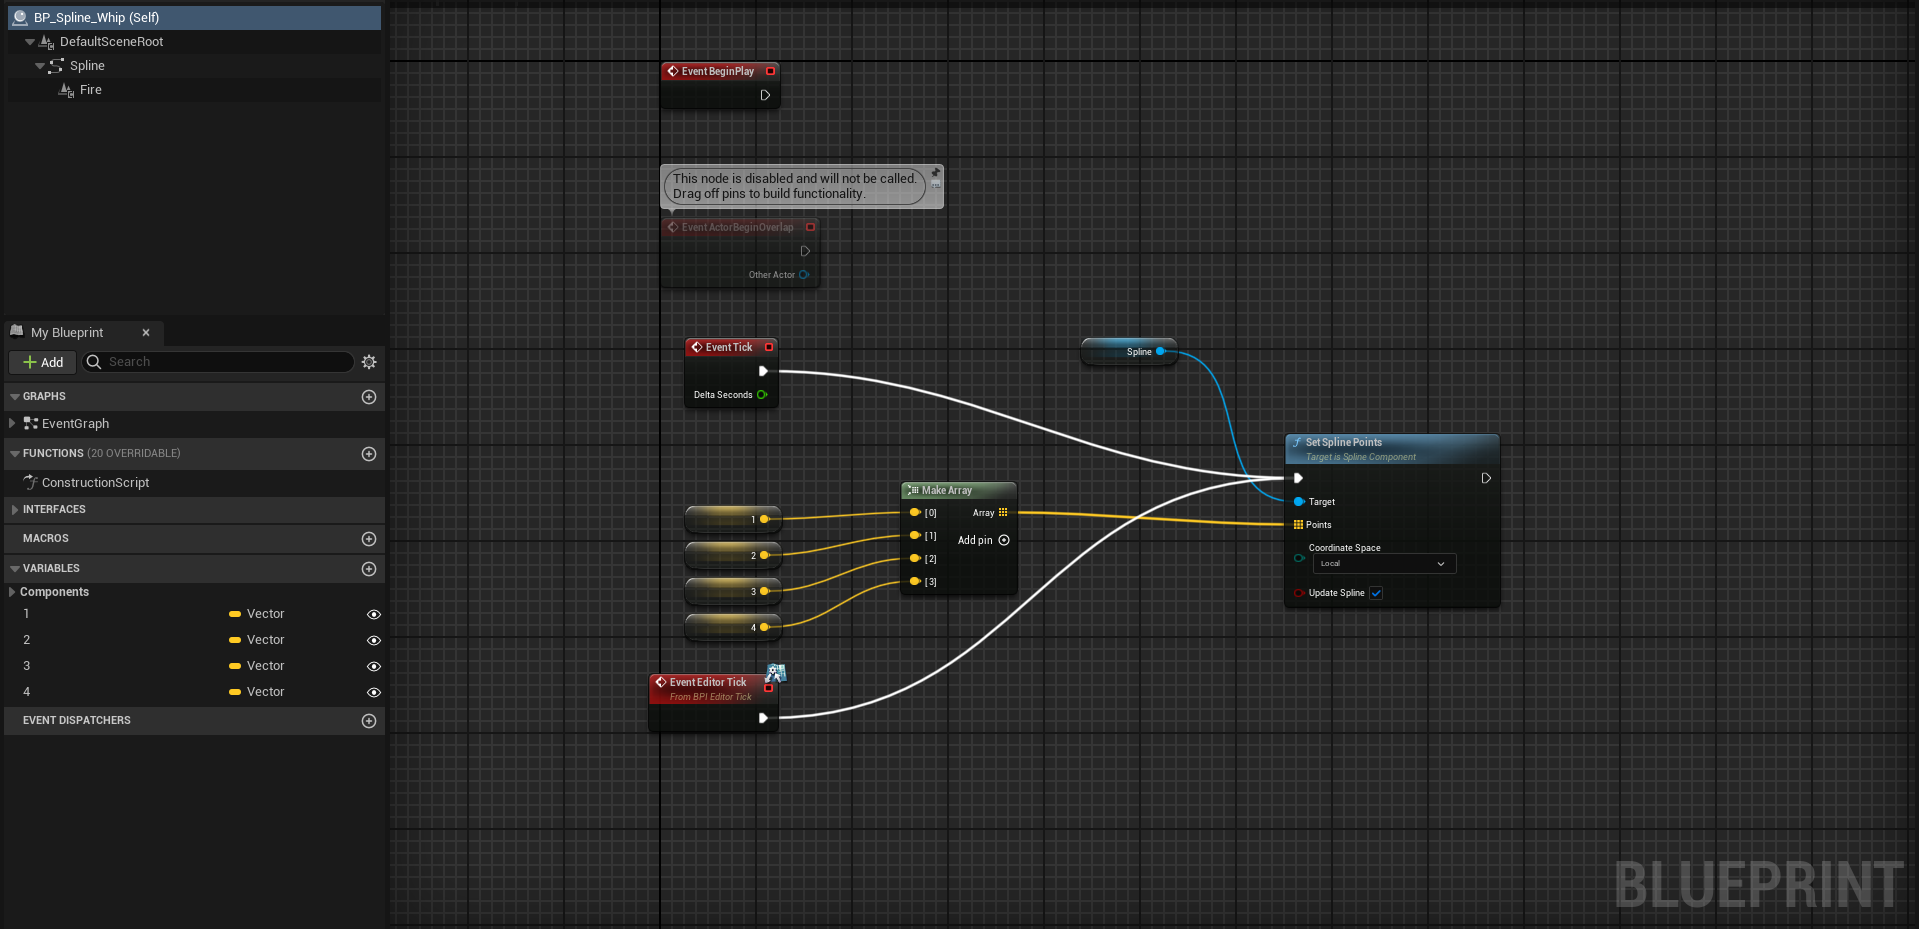
This ability may prove to be one of the most difficult to create in Niagara as I will need to learn how to make the effect follow a spline.
Orange: These strikes make up the primary shape of the lash/whip. They could be made using a repeating ribbon renderer or some type of fluid simulation. This effect begins almost vertically and must protrude from the arm or leg of the bender. As the bender swings their limb down to the ground, the lash responds reflexively. This will likely have to be created to follow a spline.
Pink: These dots represent large particles of stylised flames. These will be lit brightly with an emissive material set for a stylised, glowy look.
Green: These dots represent embers flying out from the primary shape. They would be given motion using a mix of noise generators and velocity.
Blue: –
VFX Component Breakdown:
Final VFX Composition:
Air
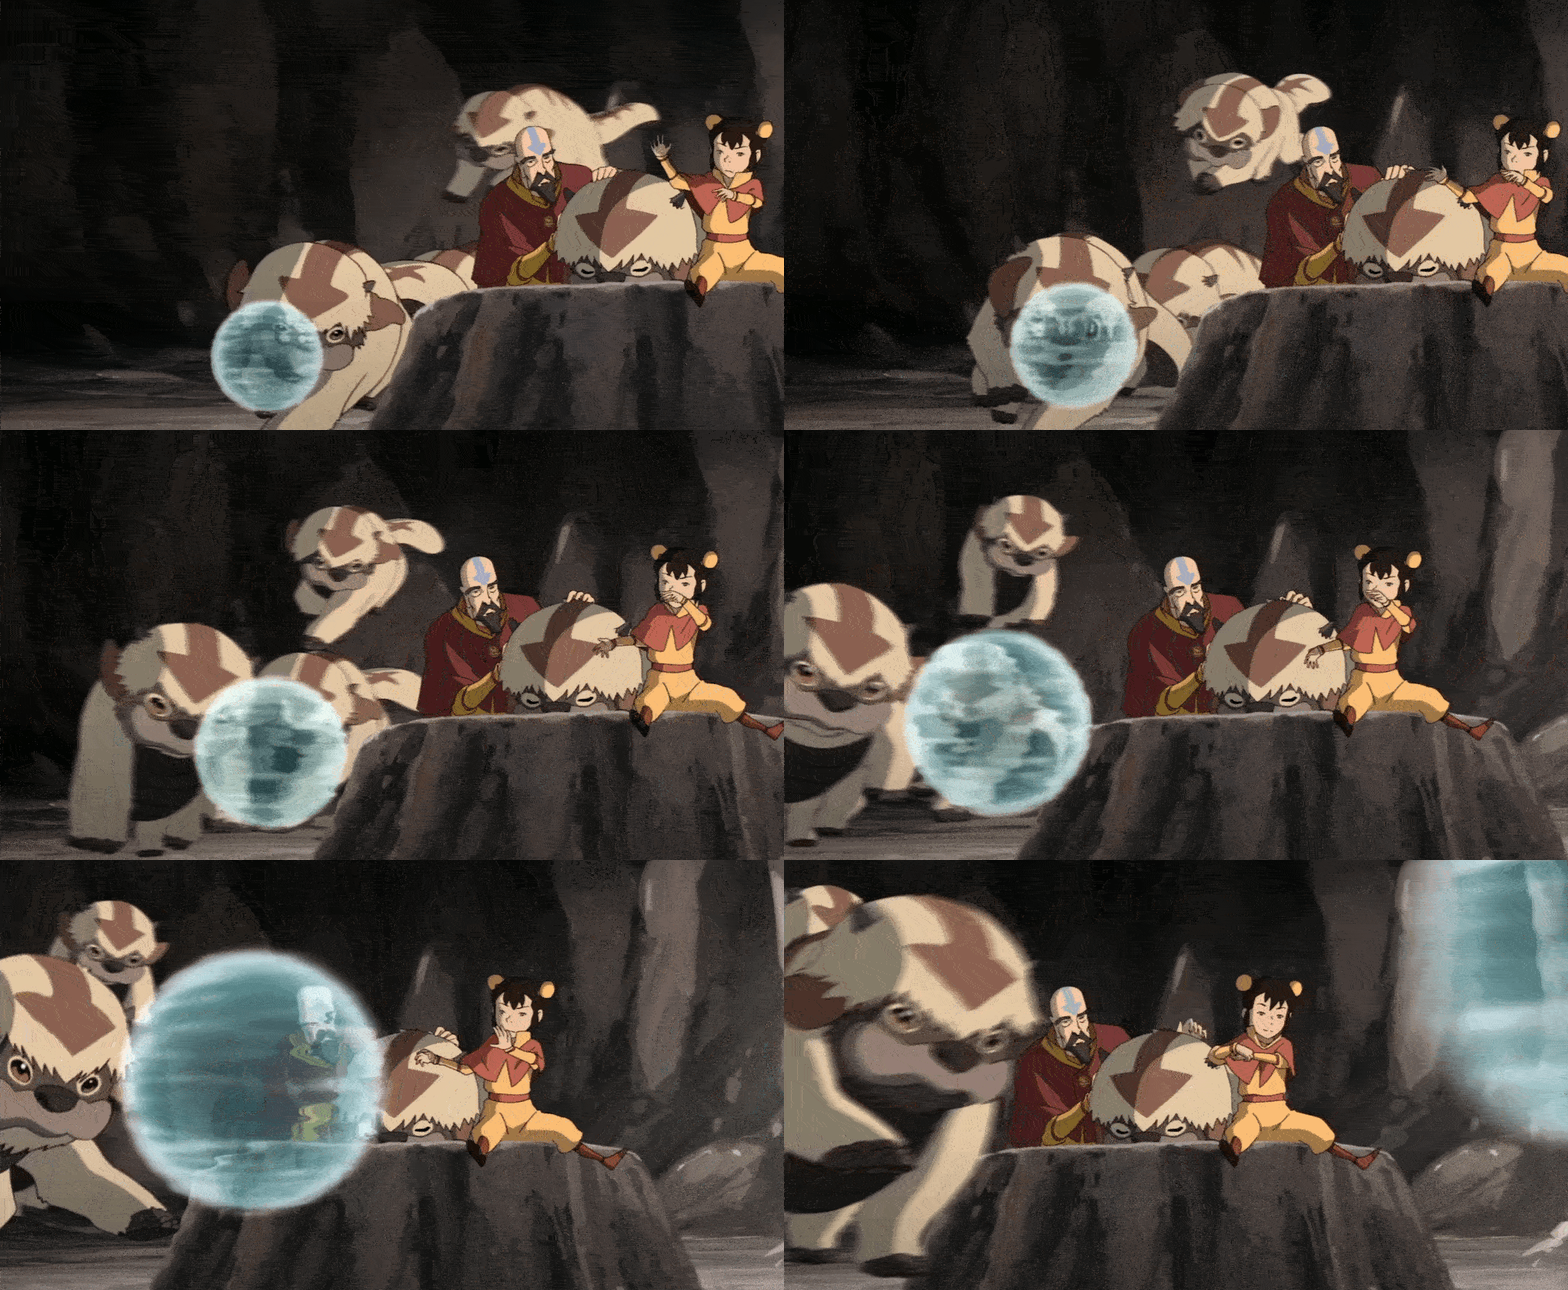
Air Ball:
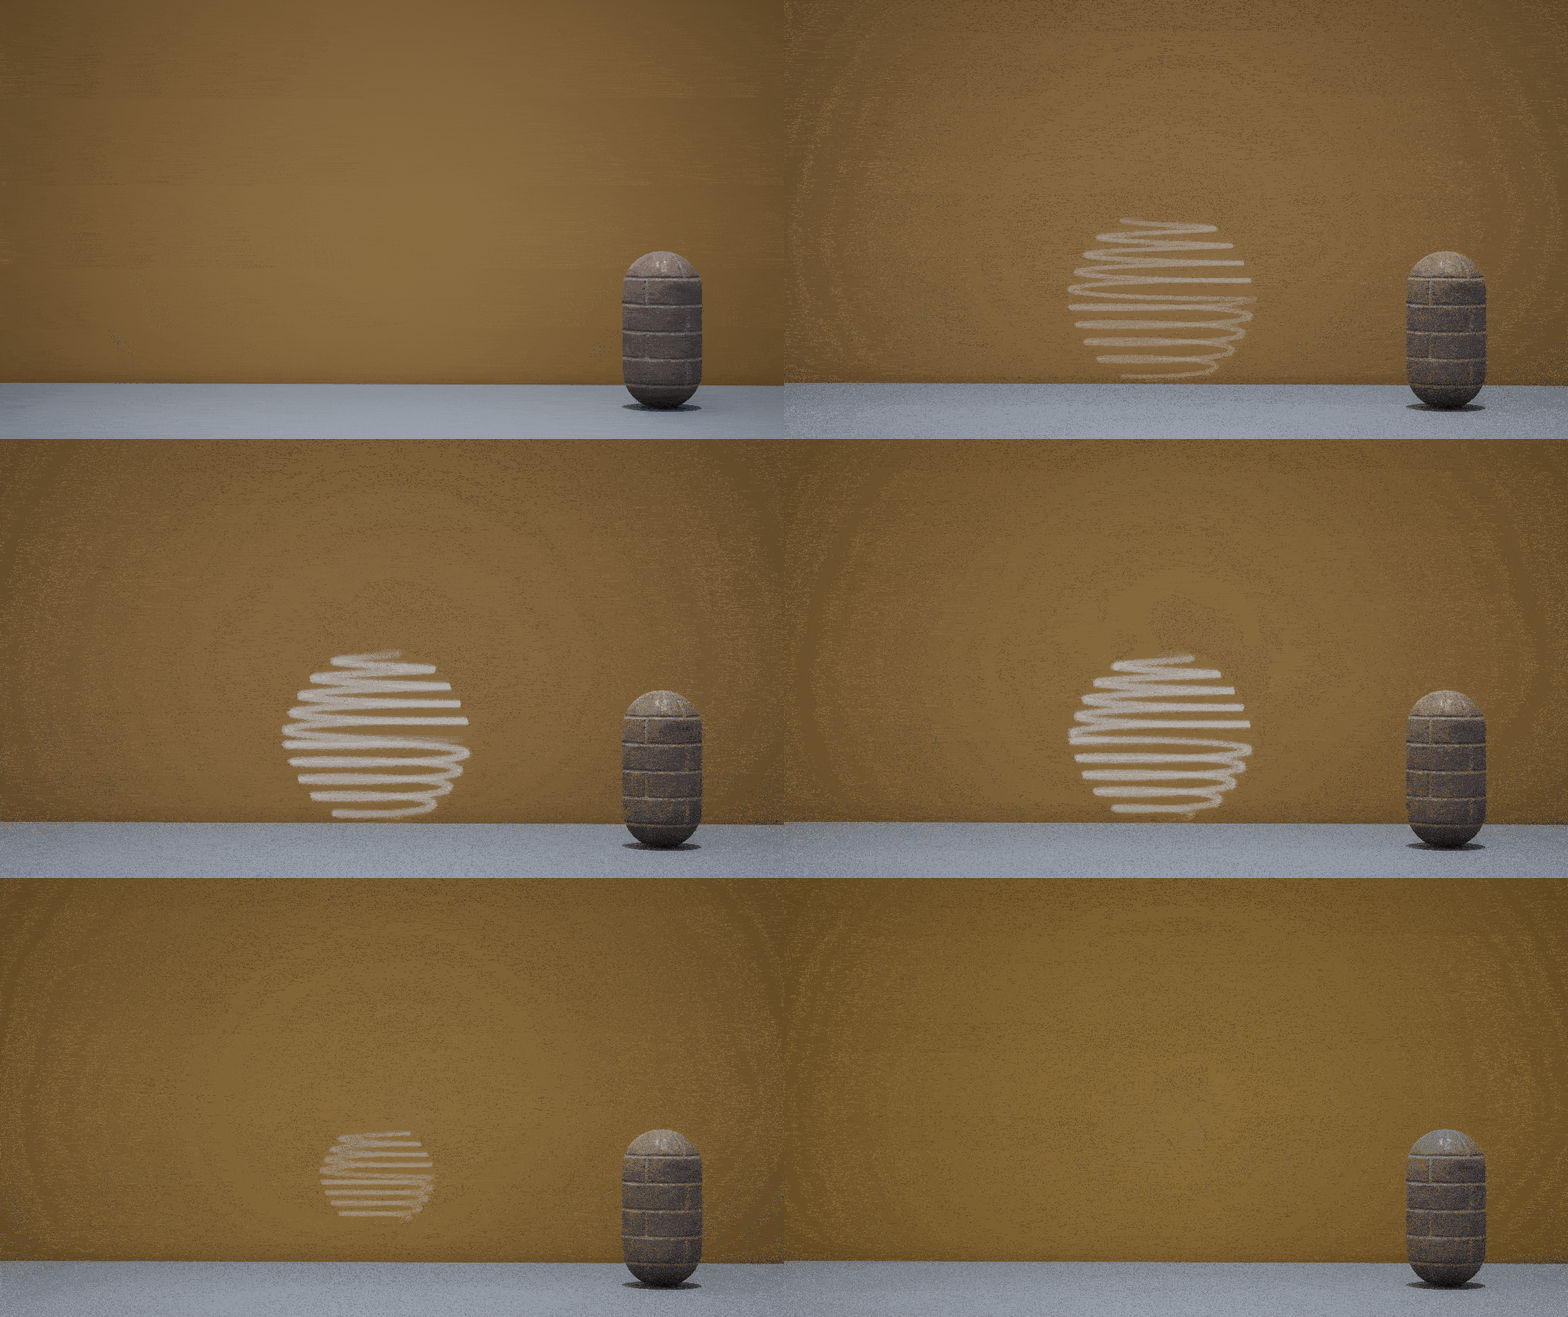
An Air Ball is a staple of the Avatar: The Last Airbender universe, with Aang regularly using it to move around, as well as seeing many other functions. Benders can create this ability By drawing their hands together in a circular fashion, compressing air into a spherical form. Although mostly used for ensnaring objects, fun and games, or movement, the Air Ball can also be used offensively. When launched with force, they have the power to disrupt an opponent’s stance, sending them reeling backwards. (Airbending, n.d.)
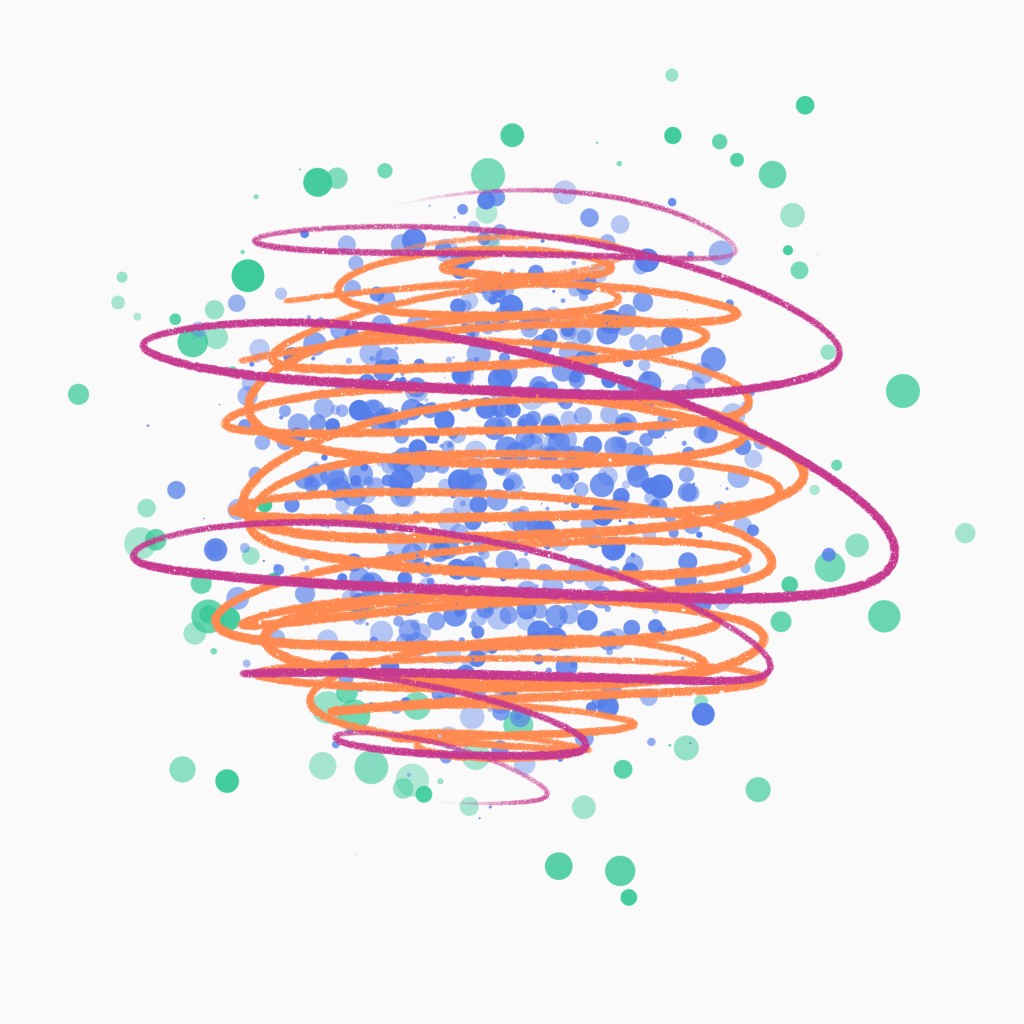
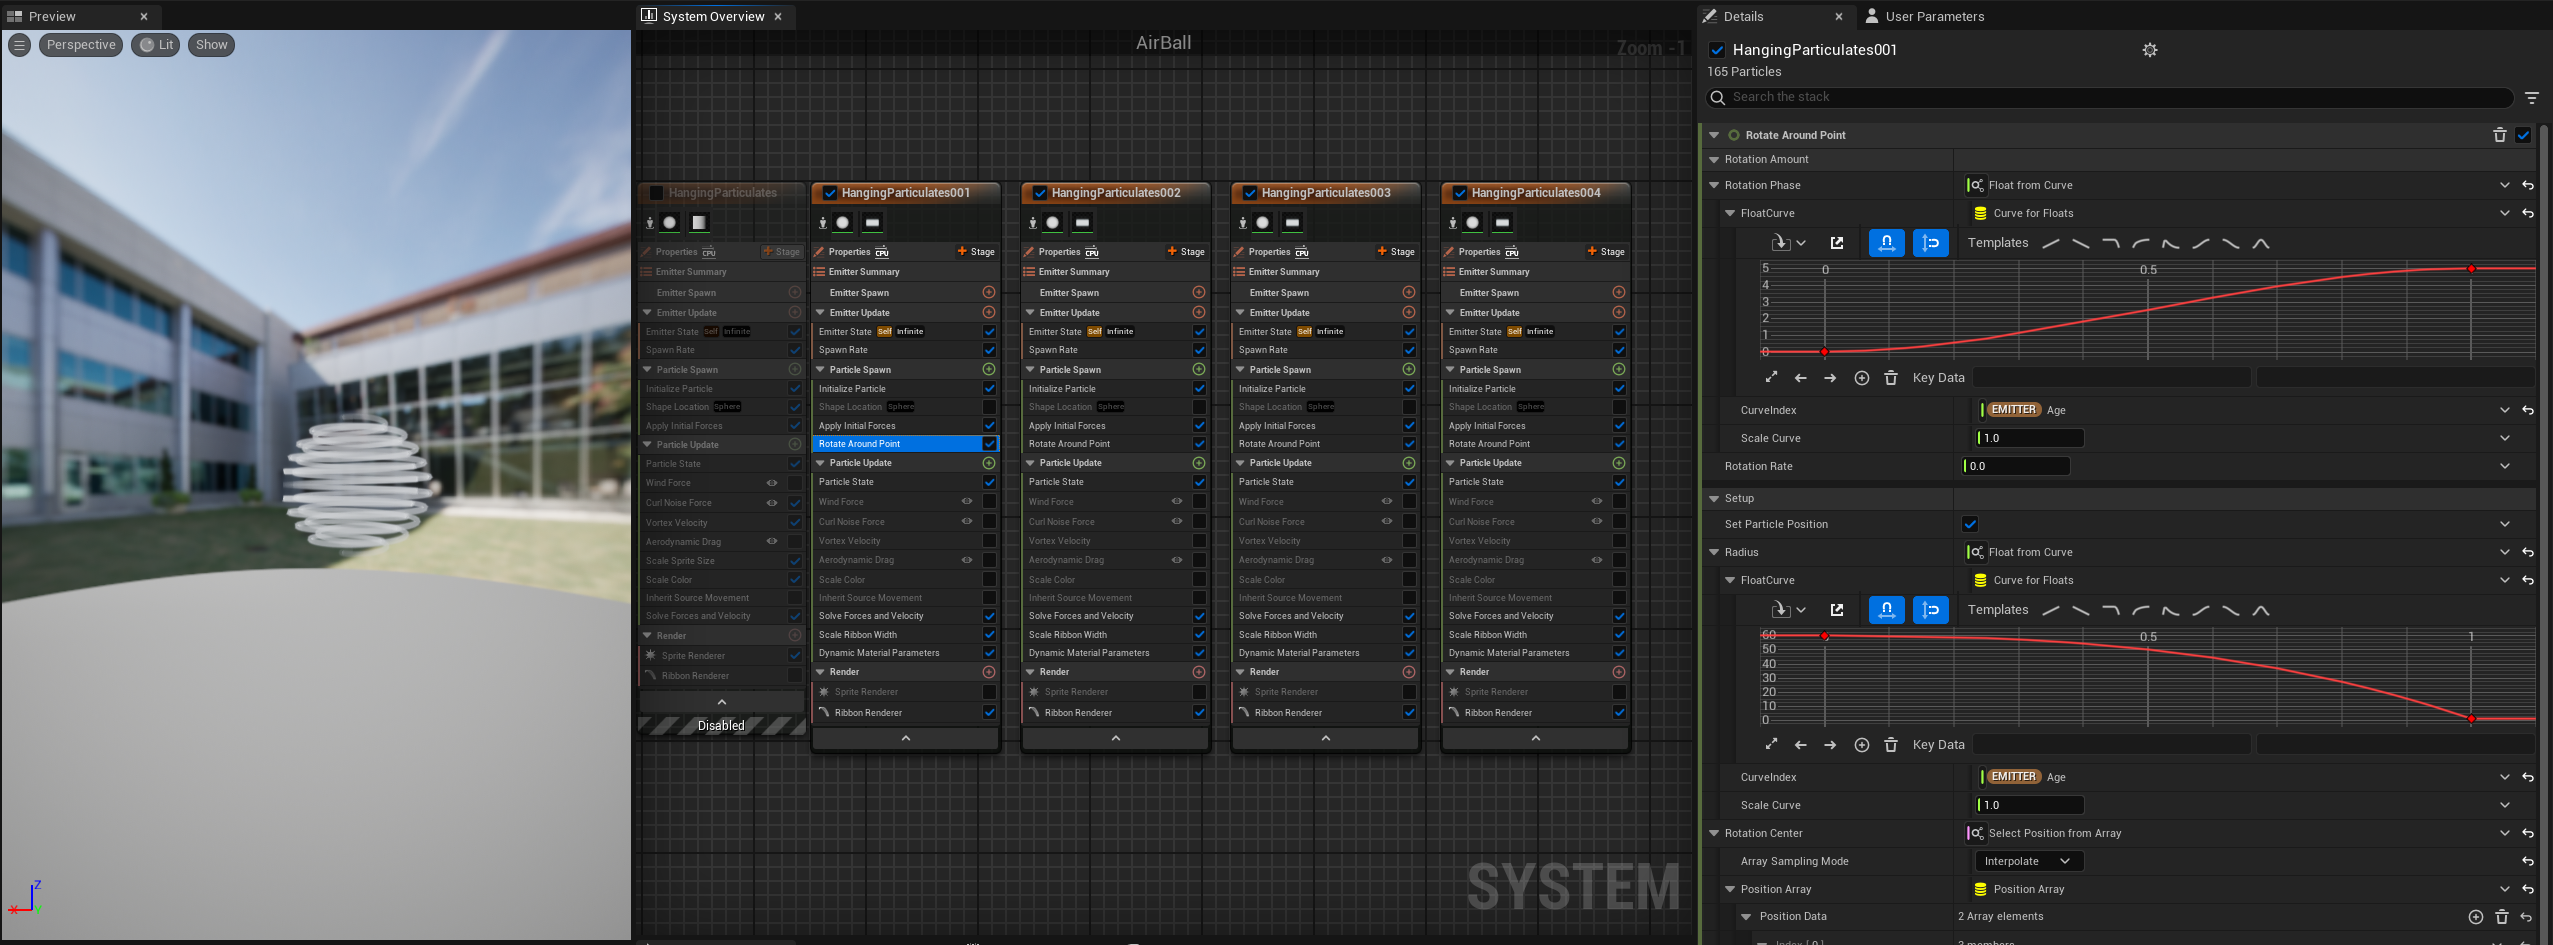
Orange: This represents the dense inner swirling ribbon. This is what gives the sphere its primary shape. This will be created using one or more ribbon renderers and will be given rotation around a point or axis.
Pink: This pink swirl accents the denser orange one and would move at a slightly slower pace. This just gives a stylised look to the composition.
Green: These dots represent low-density particles, which give an airy look and tie the composition together.
Blue: These dots represent high-density particles, which are used to fill the centre of the sphere.
VFX Component Breakdown:

Final VFX Composition:

Air Vortex:
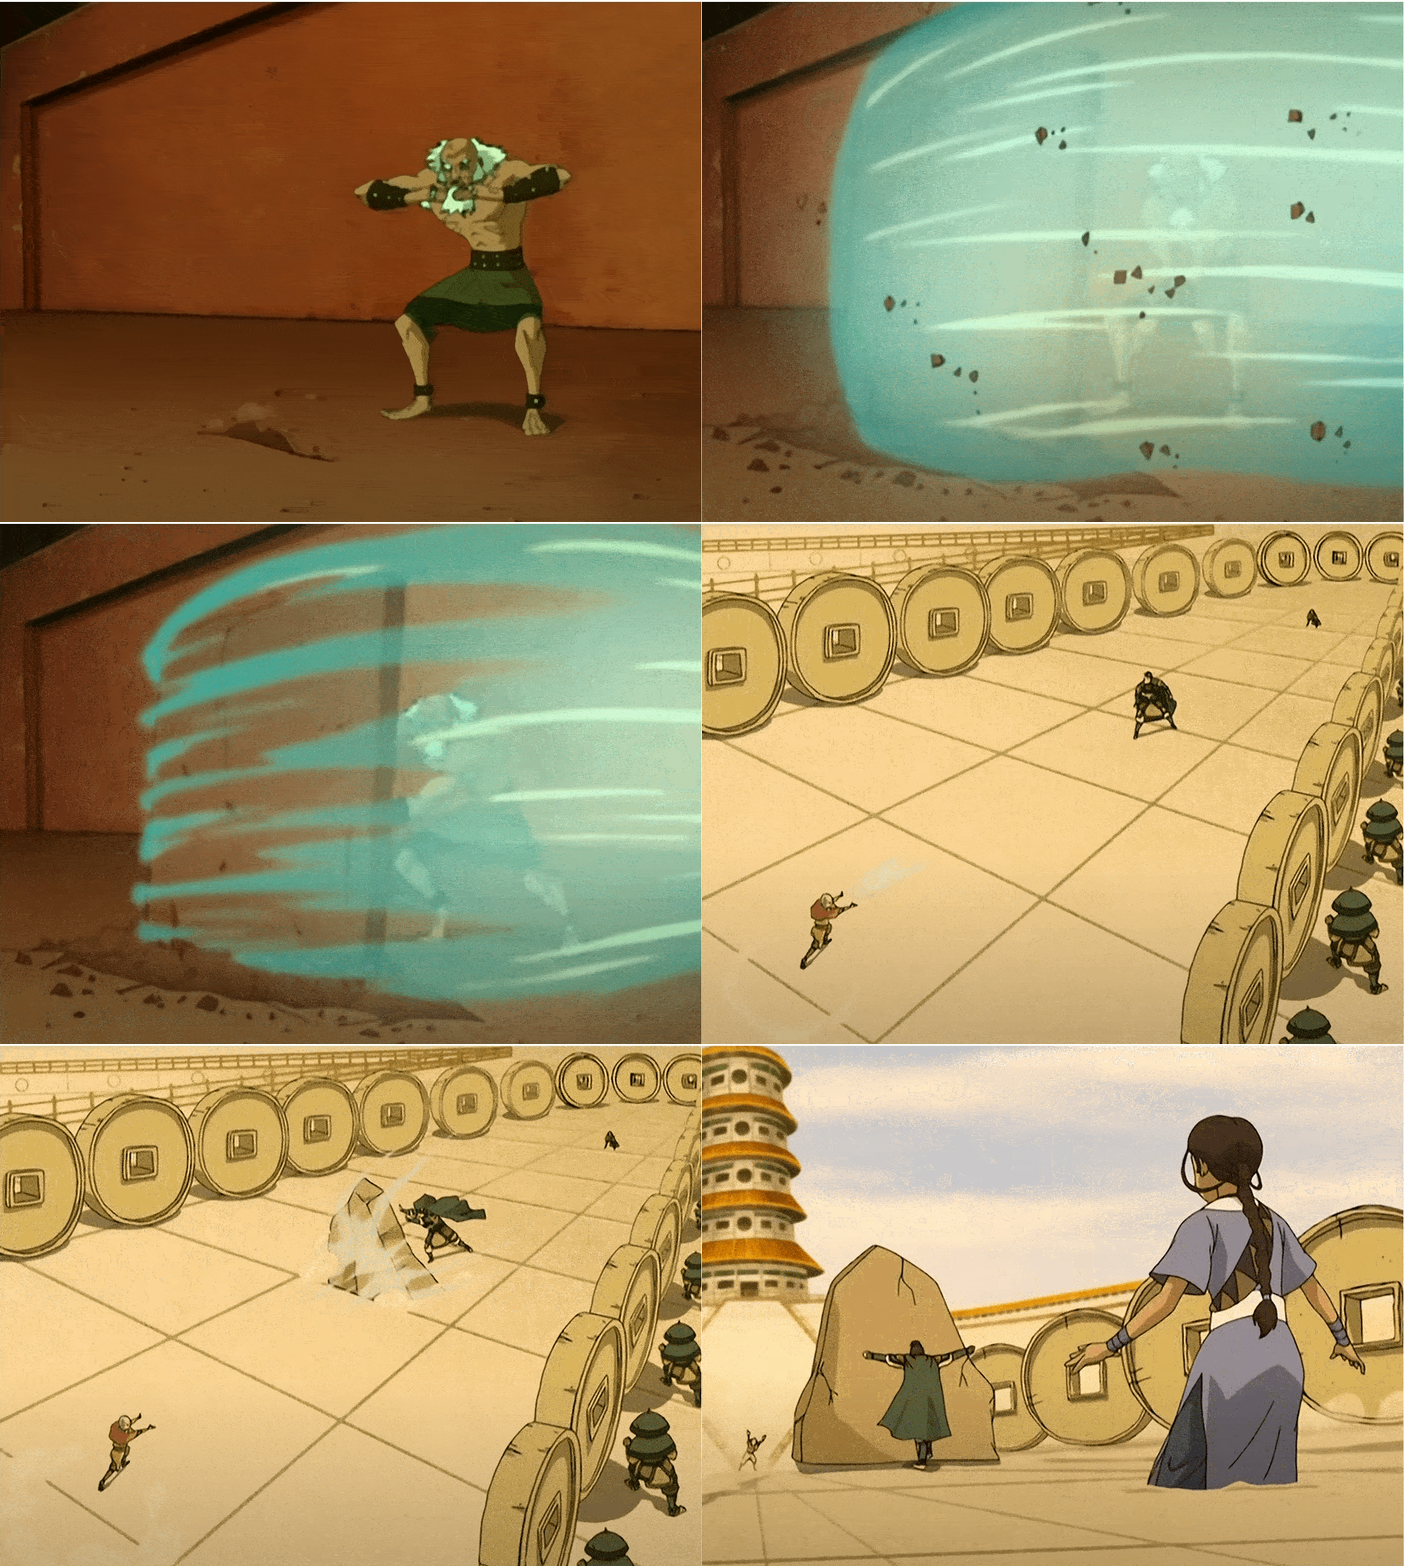
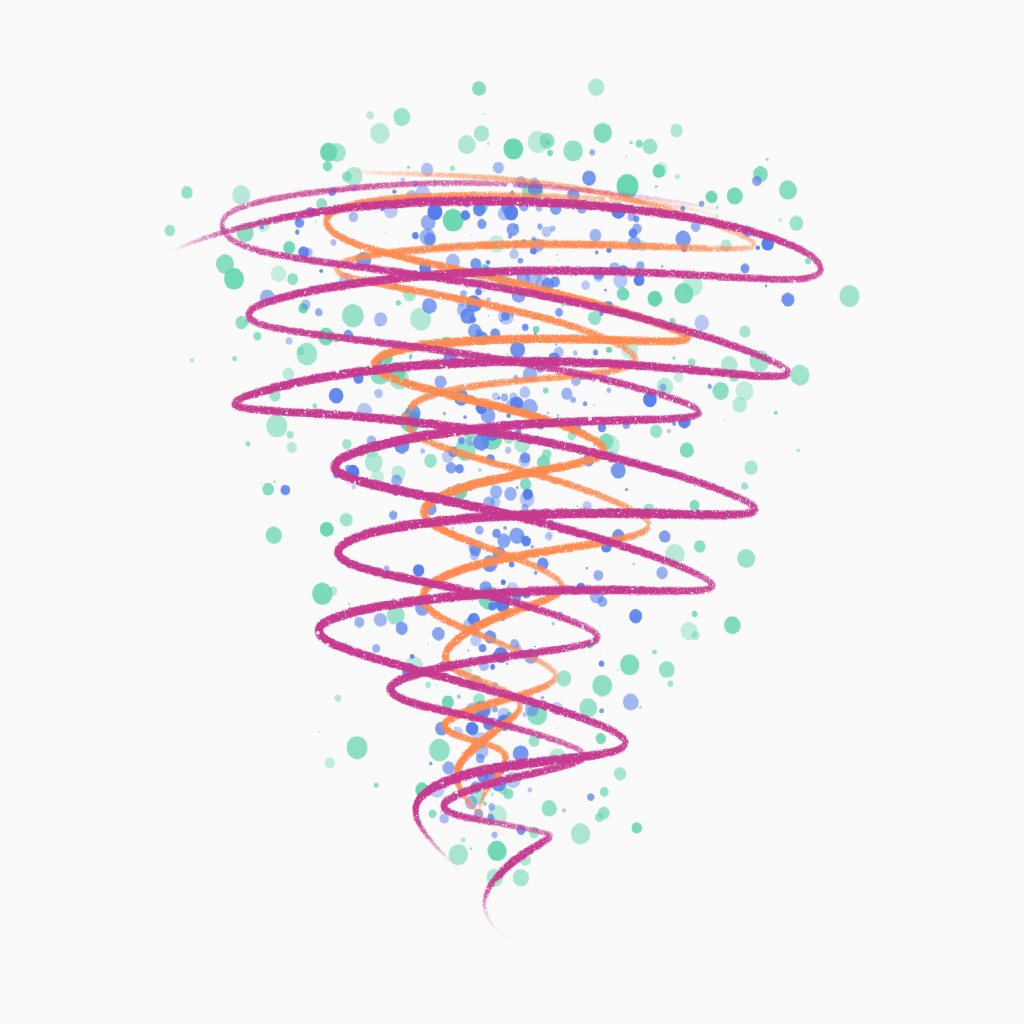
The Air Vortex is a swirling funnel of air that can be adjusted in size. Smaller versions can be seen throughout the series with uses such as catapulting small items, funnelling objects, or deflecting projectiles. However, the full power of the vortex creates a large whirlwind-like towering funnel of air. (Airbending, n.d.)
This ability is very similar to the Air Ball in terms of animated components and should be a reasonably easy follow-on from the Air Ball.
Orange: This represents the dense inner swirling ribbon. This is what gives the vortex its primary conical shape. This will be created using one or more ribbon renderers and will be given rotation around a point or axis.
Pink: This pink swirl accents the denser orange one and would move at a slightly slower pace. This just gives a stylised look to the composition.
Green: These dots represent low-density particles, which give an airy look and tie the composition together.
Blue: These dots represent high-density particles, which are used to fill the centre of the vortex, with a particular focus on the very centre column, or eye.
VFX Component Breakdown:
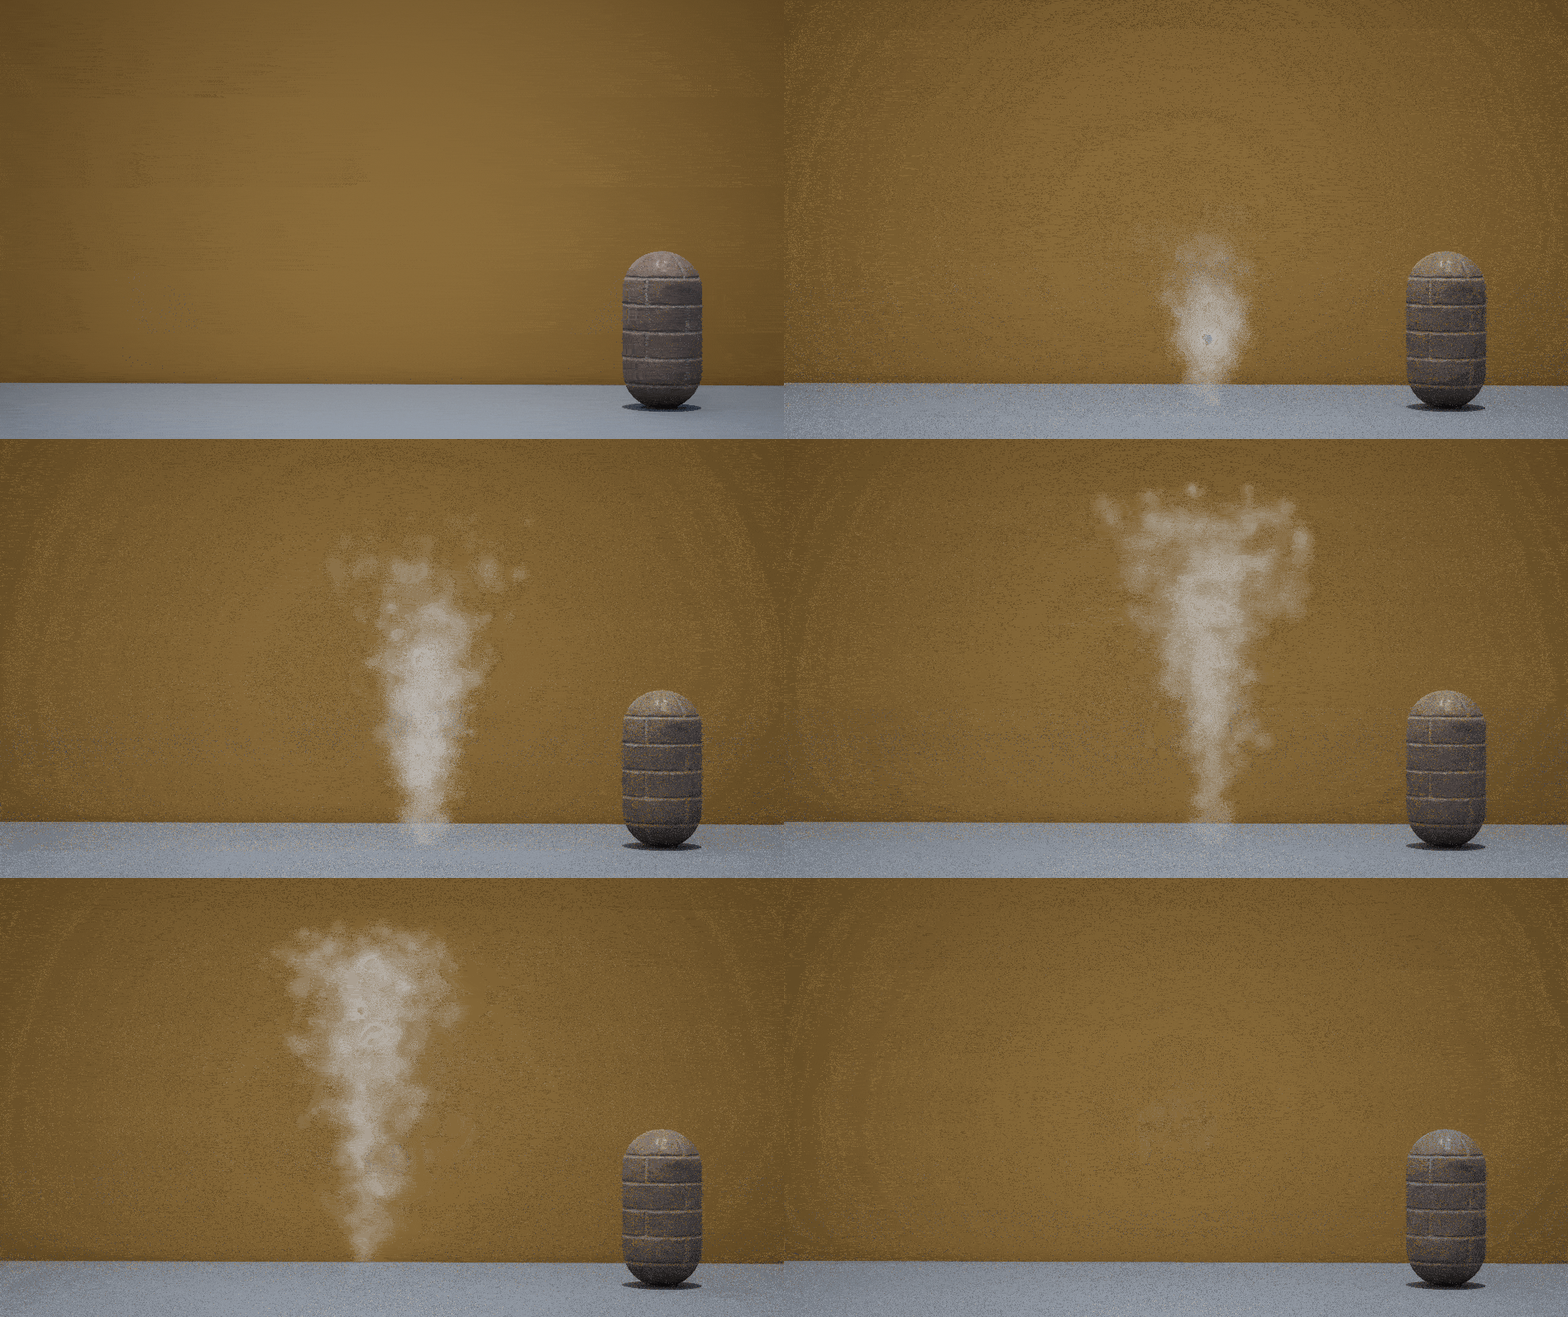
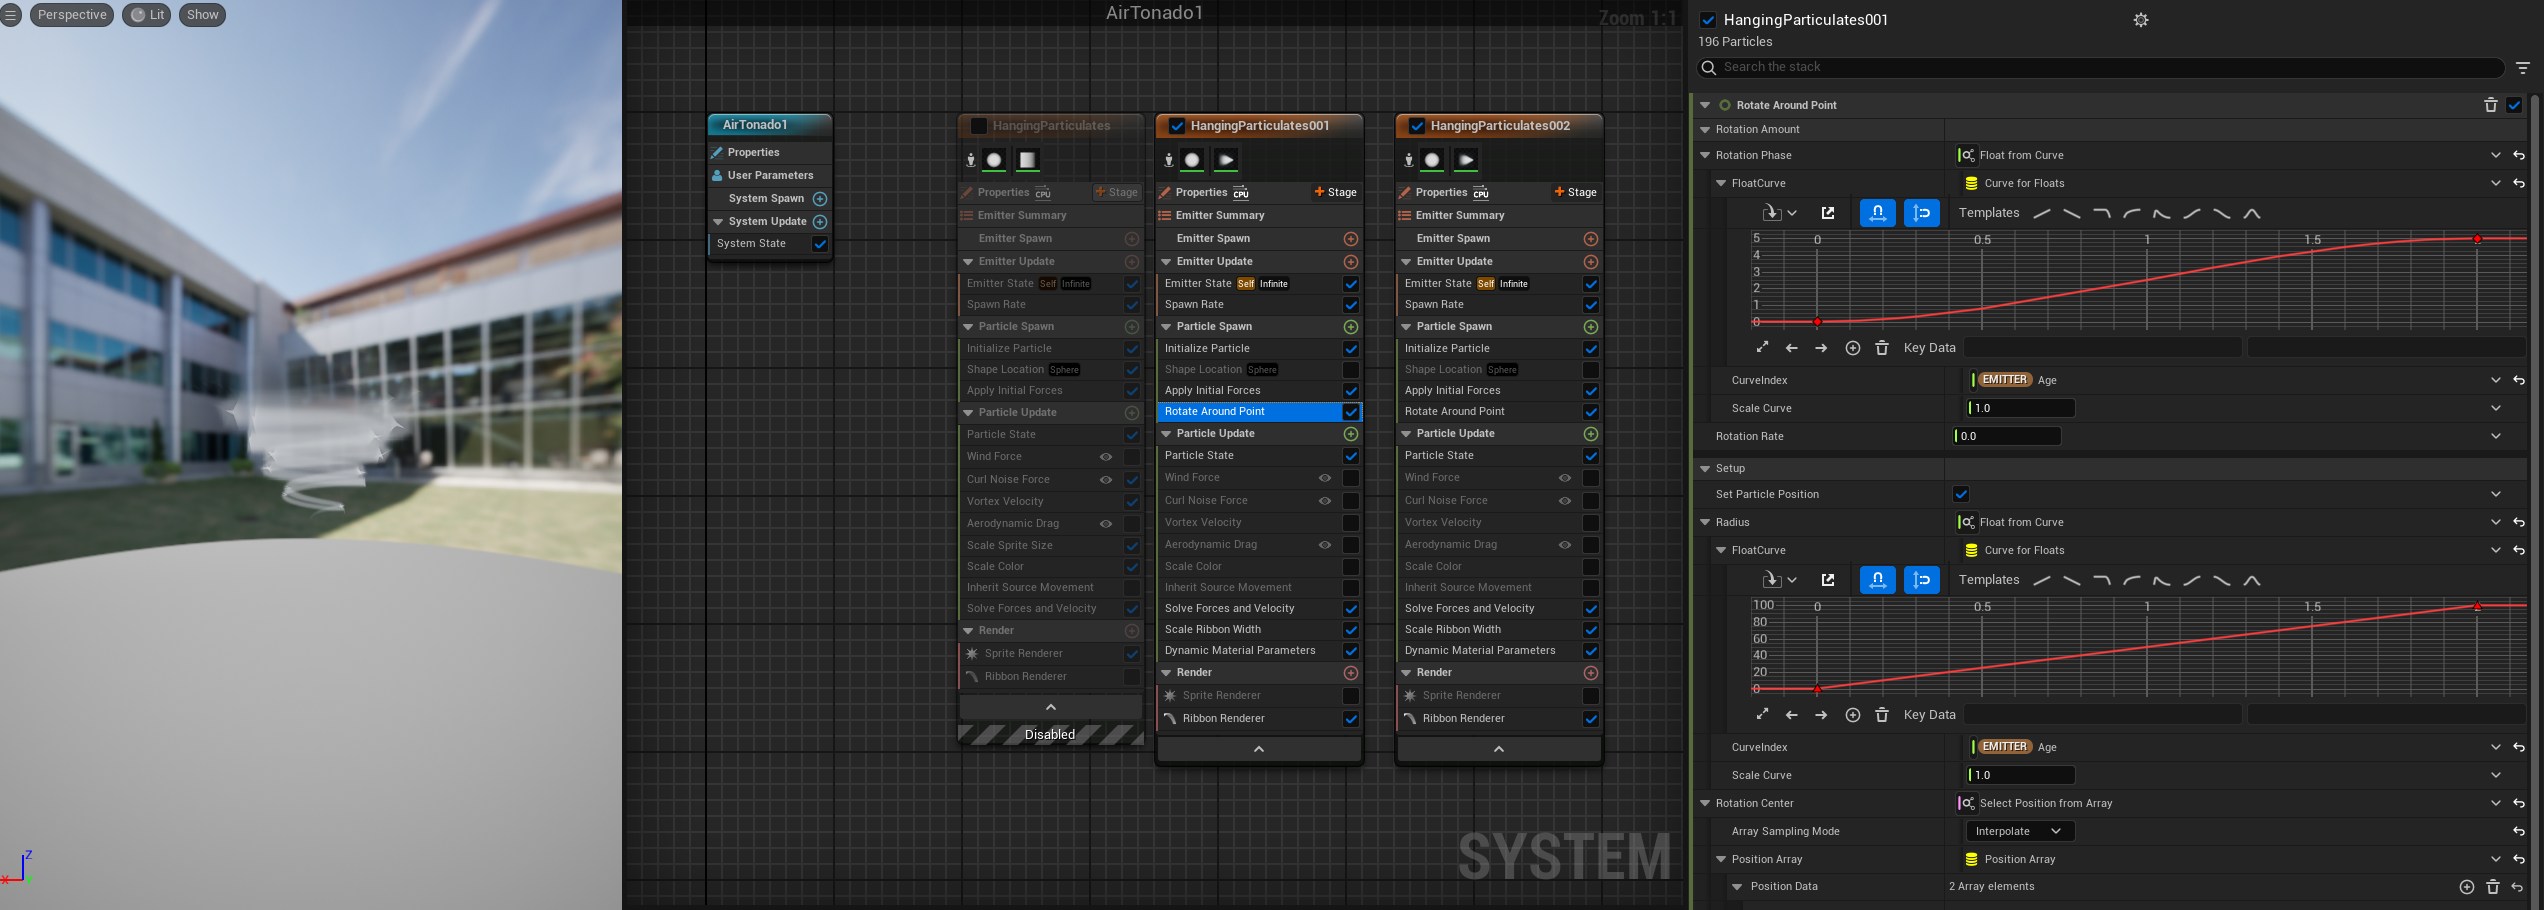
Final VFX Composition:

Air Blast:
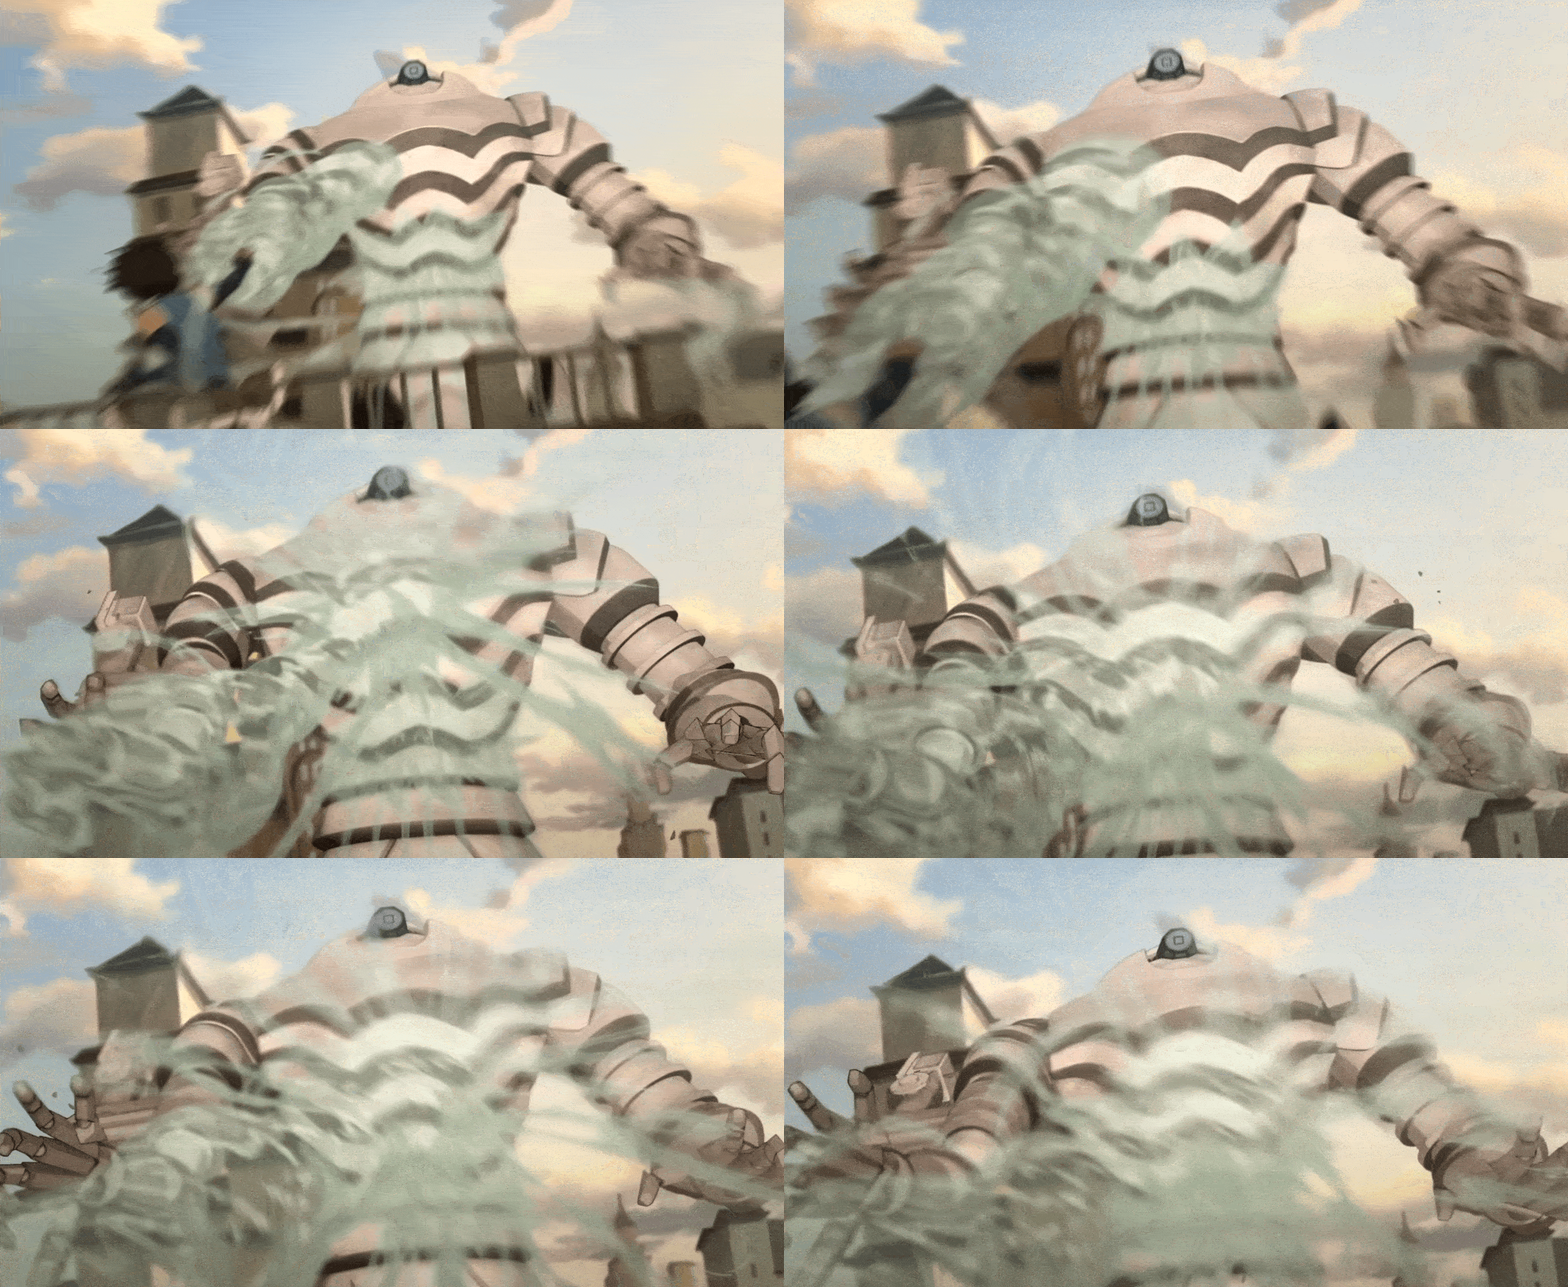
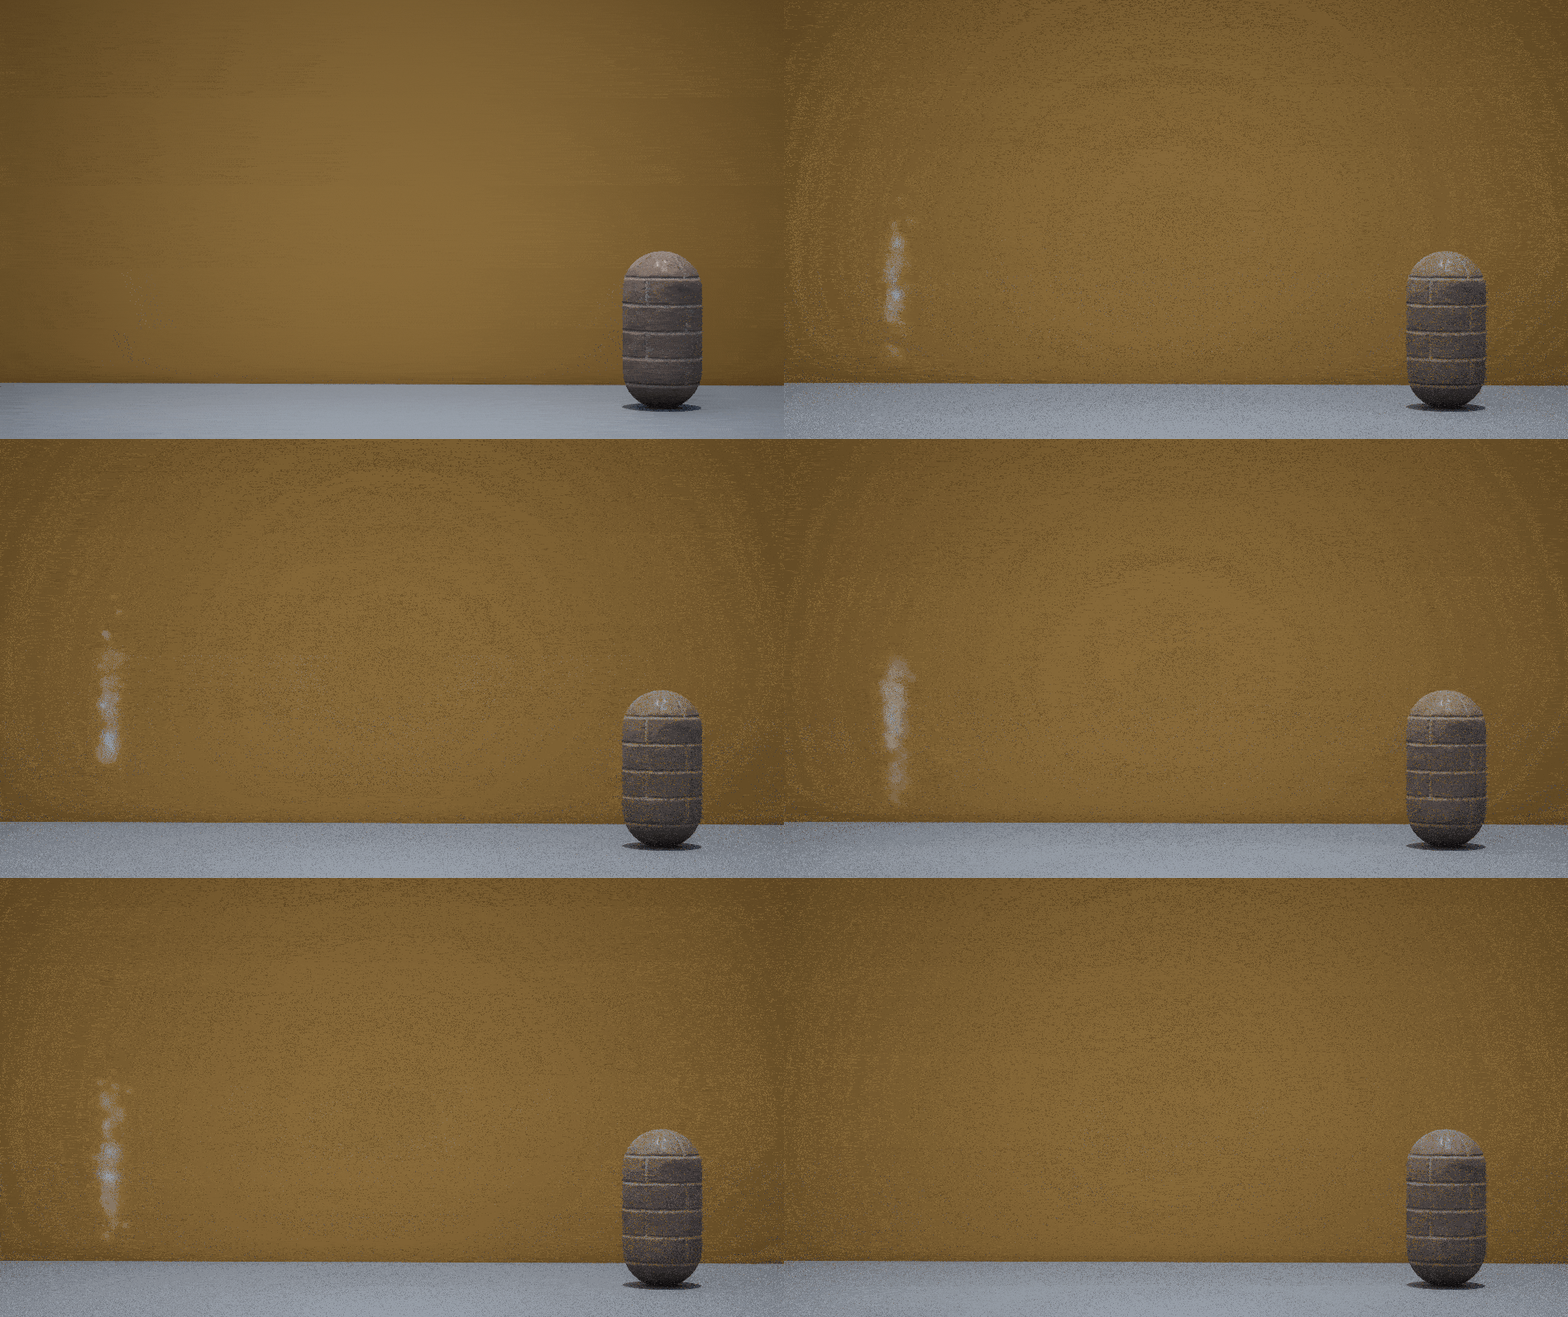
An air blast is a particularly aggressive tactic for an Airbender to use, involving the emission of a concentrated stream or burst of air from the hands, feet, or mouth. This derives its strength from the bender’s own inherent power rather than relying on external momentum. It’s capable of reaching targets over great distances, making it particularly effective against large, far-away enemies. (Airbending, n.d.)
Air Blasts can also be sustained over time, allowing Airbenders to exert continuous force. This was demonstrated when the Airbenders of the new Air Nation joined forces to confront Kuvira’s mecha suit, using synchronized air blasts against it.
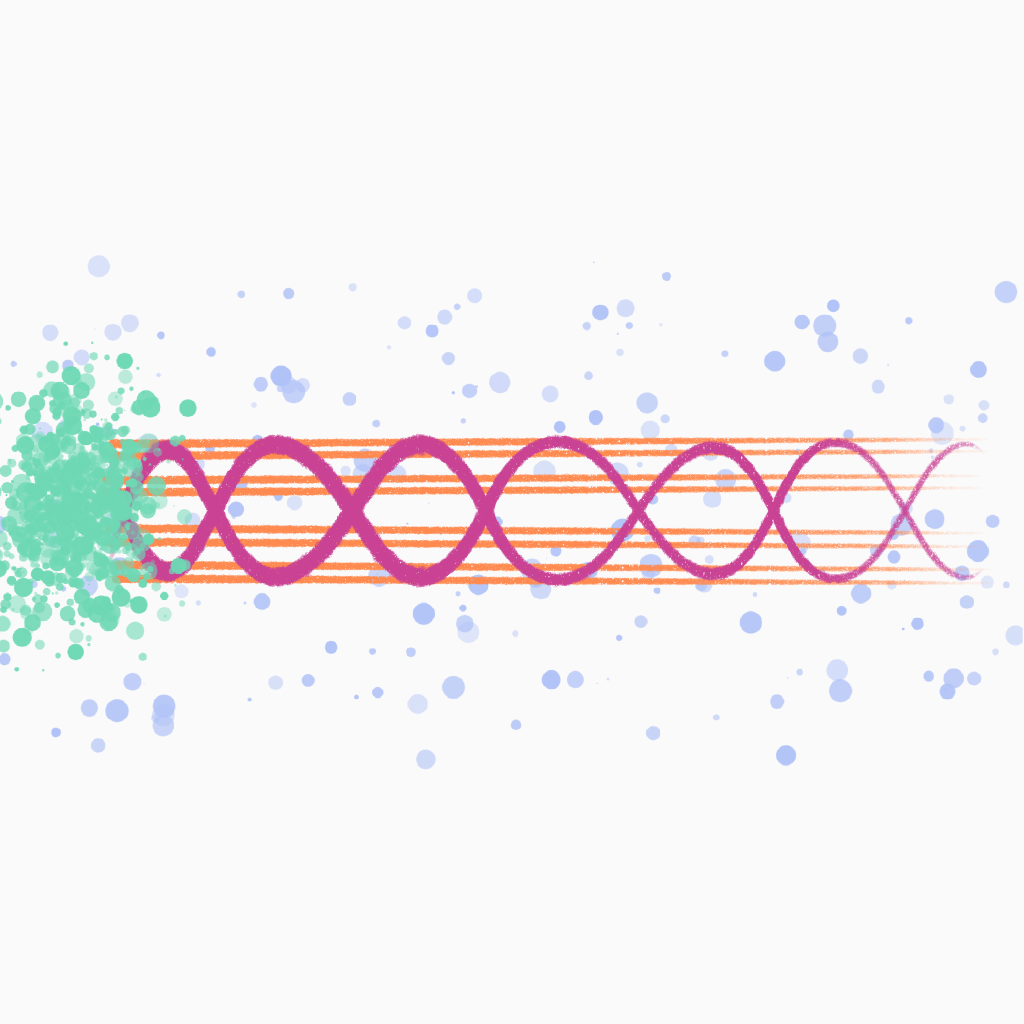
Orange: These orange lines represent both the bounds of the primary cylindrical form and stylisation lines which will run along the cylinder. This will likely be created using a dynamic, animated material.
Pink: This pink swirl accents the cylinder, and would rotate giving a sense of motion.
Green: These dots represent high-density airy particles at the tip of the animation; as the blast is sent off-screen, this will disappear. This effect acts almost like a loading blip on a loading bar.
Blue: These dots represent low-density particles, which will expand away from the central cylinder. This will be done using a vortex effect.
VFX Component Breakdown:
Final VFX Composition:

Water
Water Knives:
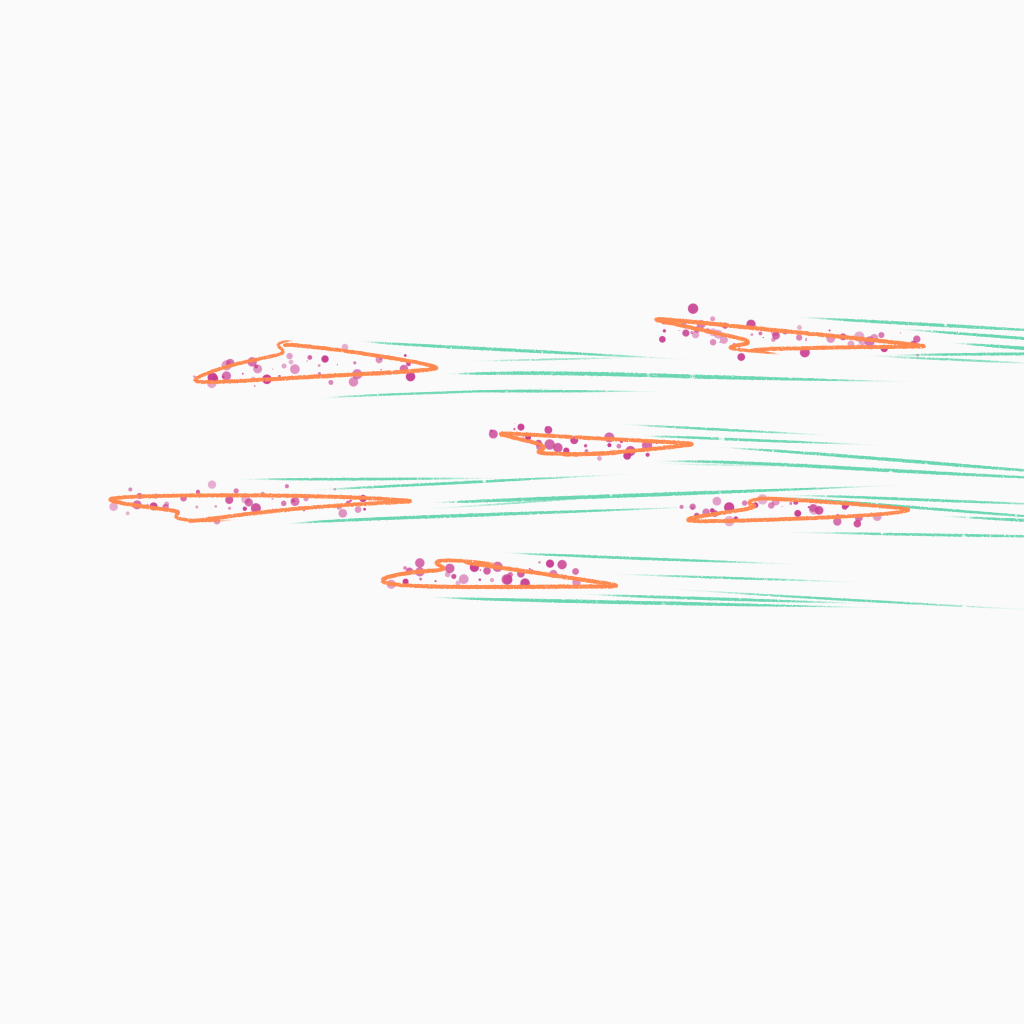
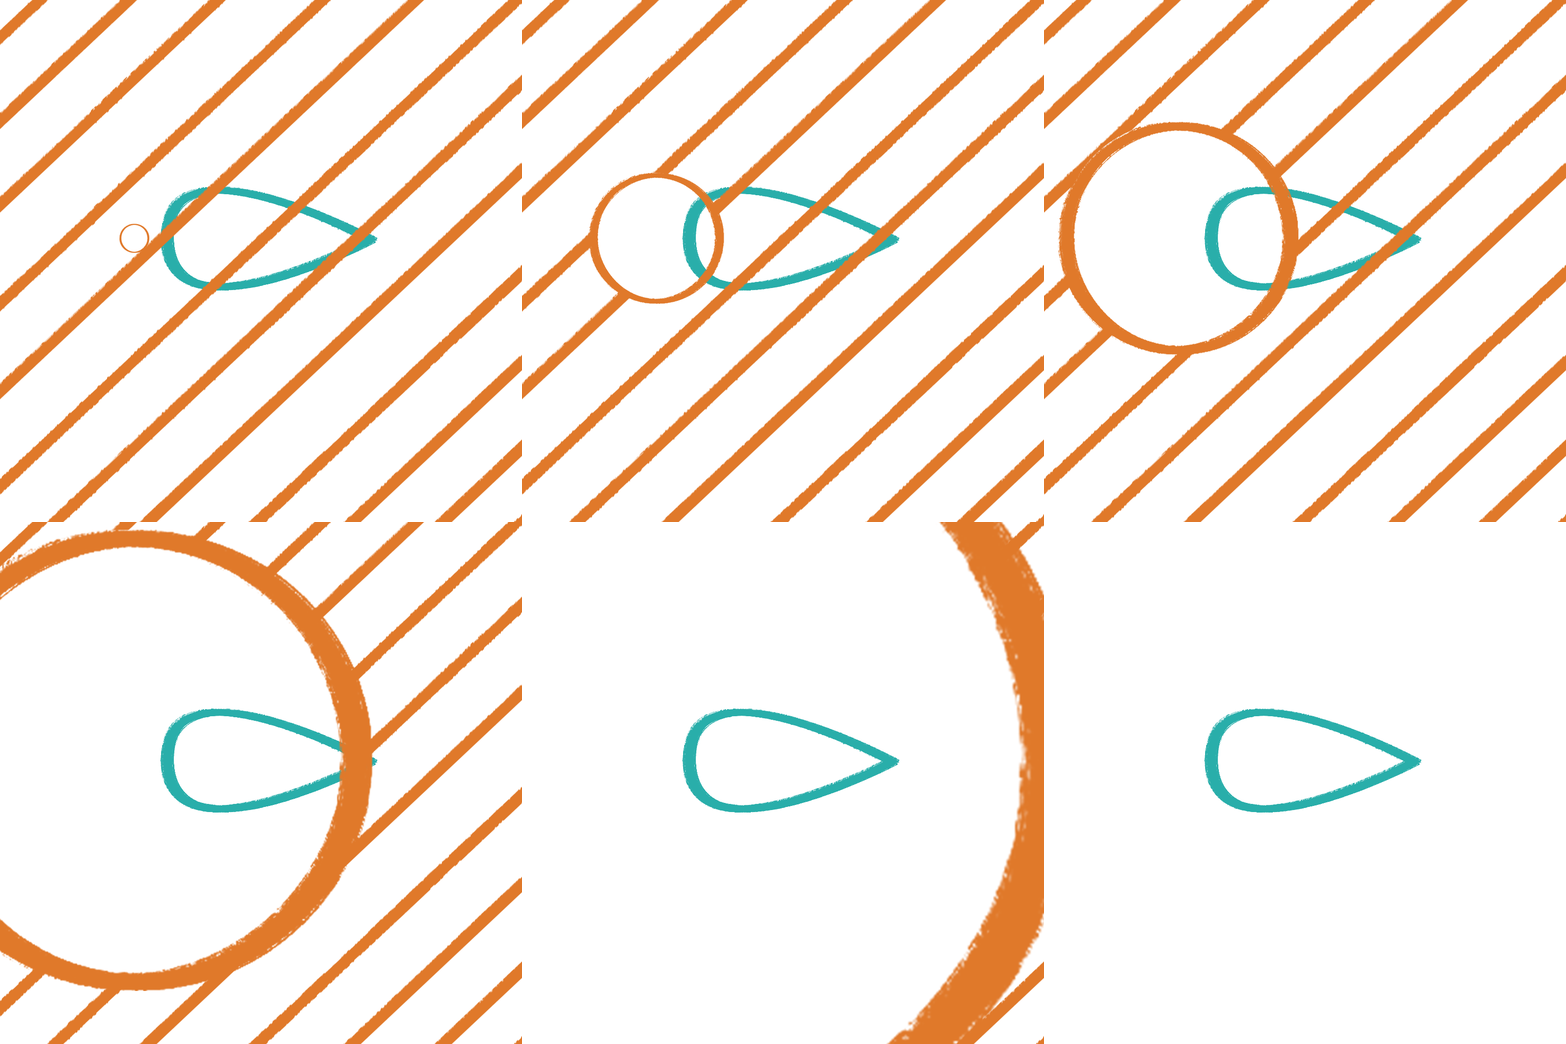
A Water Knife is a swift moving piece of water which uses its speed to create a slicing motion. This skill turns water into a sharp edge capable of slicing through materials or being fired at enemies. The precision afforded by this move is greater than that of the Water Spout or Water Bullet. However, the water knife is usually only appropriate for small-scale battles or out-of-combat activities. (Waterbending, n.d.)
This may be a difficult animation to produce due to it requiring controlling many instances of the VFX at one time.
Orange: These orange shapes show the expected bounds of these small water knives or daggers. They should be fairly sharp in form and will be created using liquid simulations.
Pink: The pink dots represent the sprites used in liquid simulation, and any outside of the bounding lines represent white water foam.
Green: These green speed lines are a stylisation effect. These could be added using ribbon renderers, but may be unnecessary depending on the final outcome and desired amount of stylisation.
Blue: –
VFX Component Breakdown:
Final VFX Composition:

Water Wave:
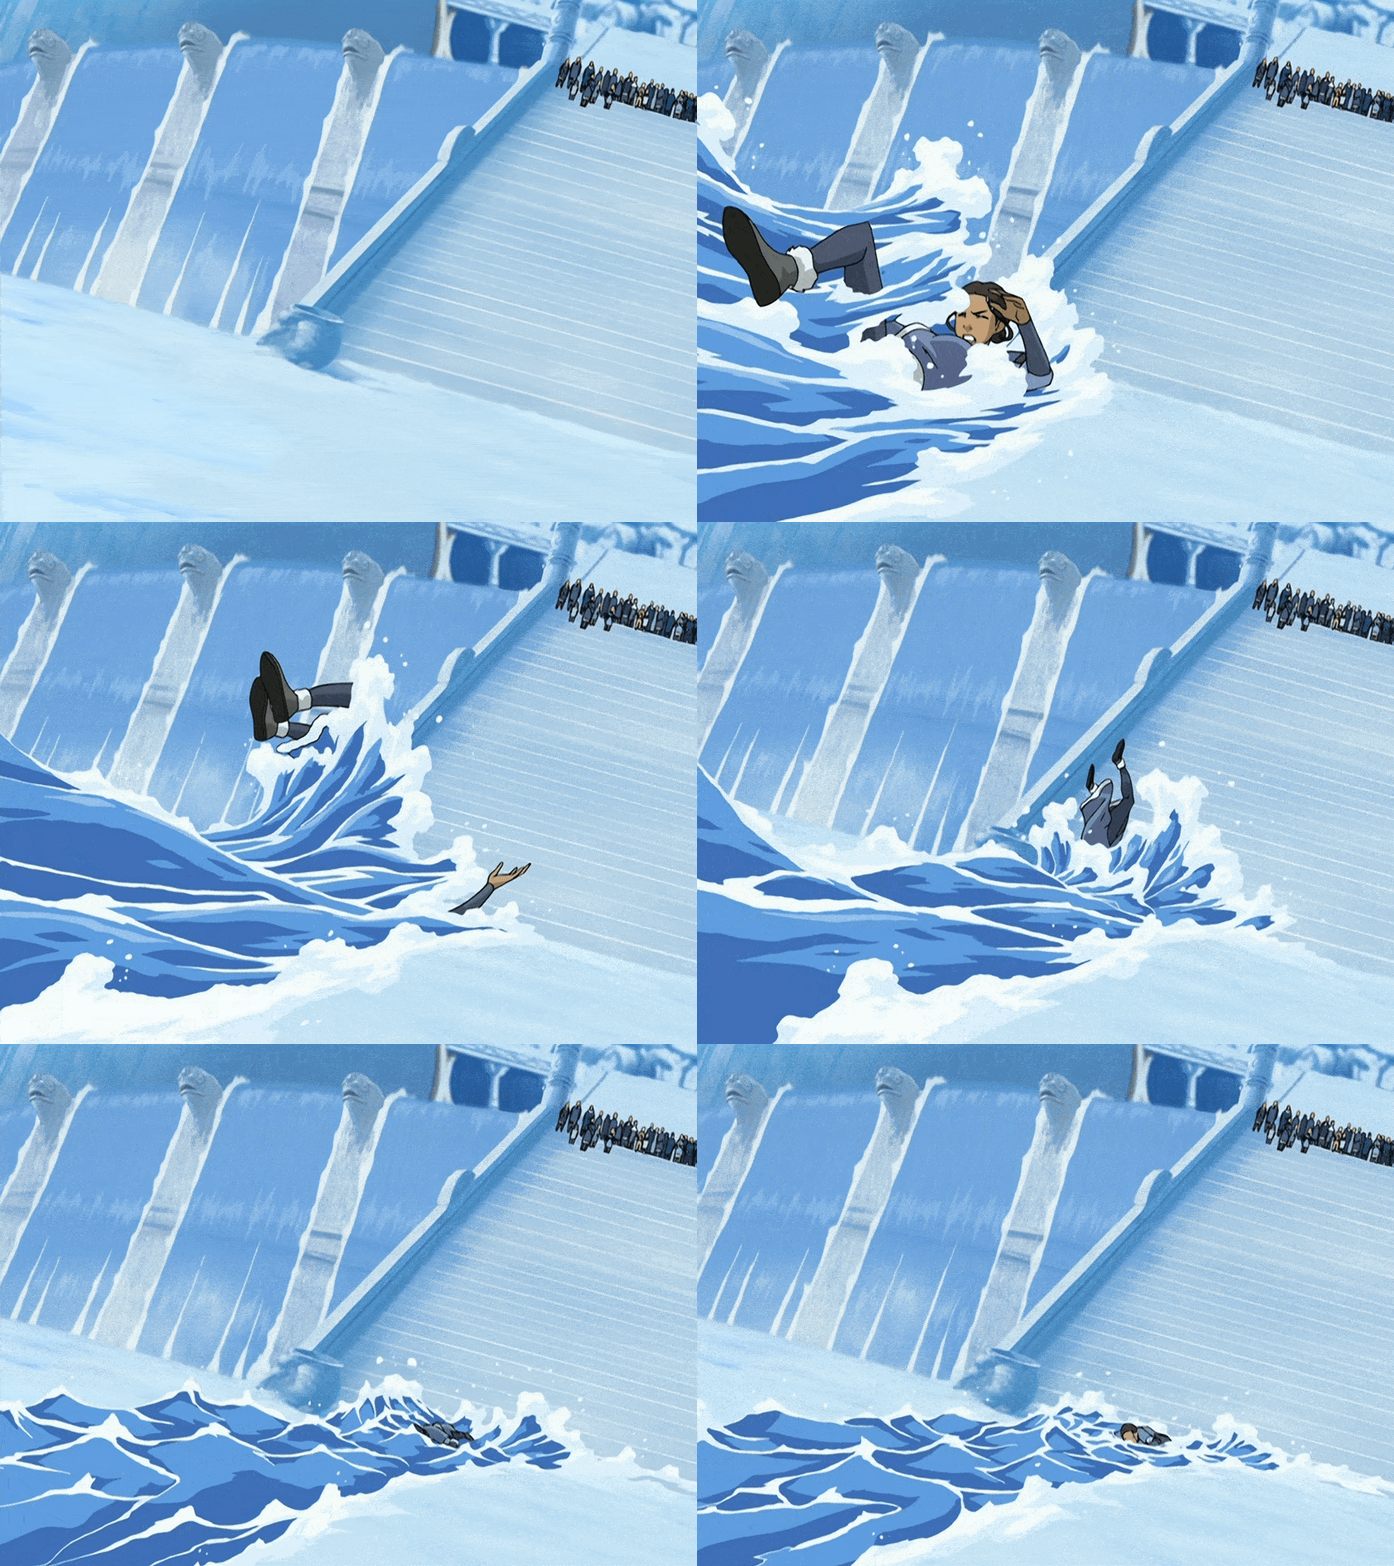
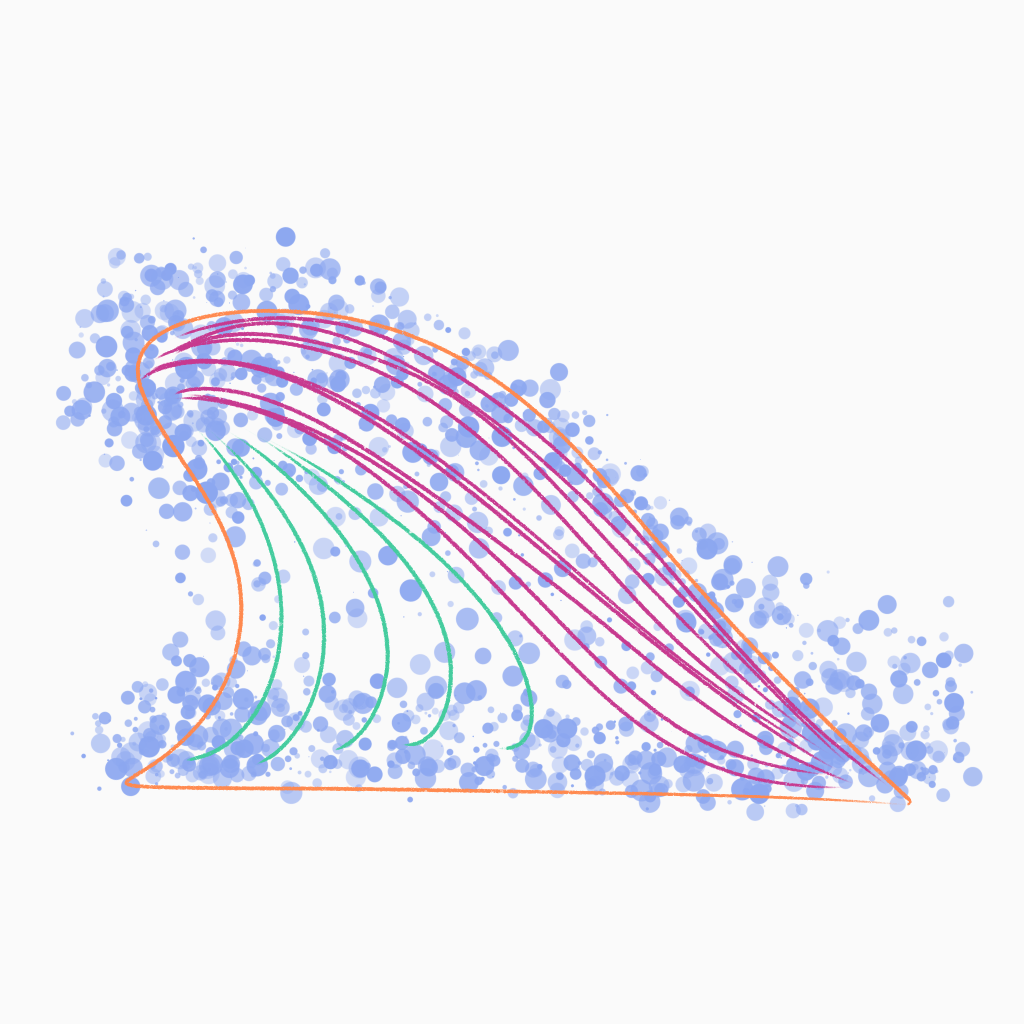
Moving a large mass of water, waterbenders can create a wave of nearly any size. They require a water source to create a wave and the wave often stays connected to the water source throughout its movement. Waves can be used offensively, defensively, or for utility such as propelling boats. The animation shows Pakku using this technique against Katara in their duel in the Northern Water Tribe. (Waterbending, n.d.)
In my final animation I will need to find a way to provide a water source for the wave to develop from; preferably the source should be utelised for the other water animations as well.
Orange: This orange border shows the curling bounds of the wave. This will be created using liquid simulation within a cubic simulation area.
Pink: These pink lines are a stylistic addition and will render from base to tip of the wave to show the movement up and over.
Green: The green lines are also a stylistic addition; they will ripple out and across as the wave builds.
Blue: The blue dots represent the sprites used in liquid simulation, and any outside of the bounding lines represent white water foam.
VFX Component Breakdown:
Final VFX Composition:

Water Rings:
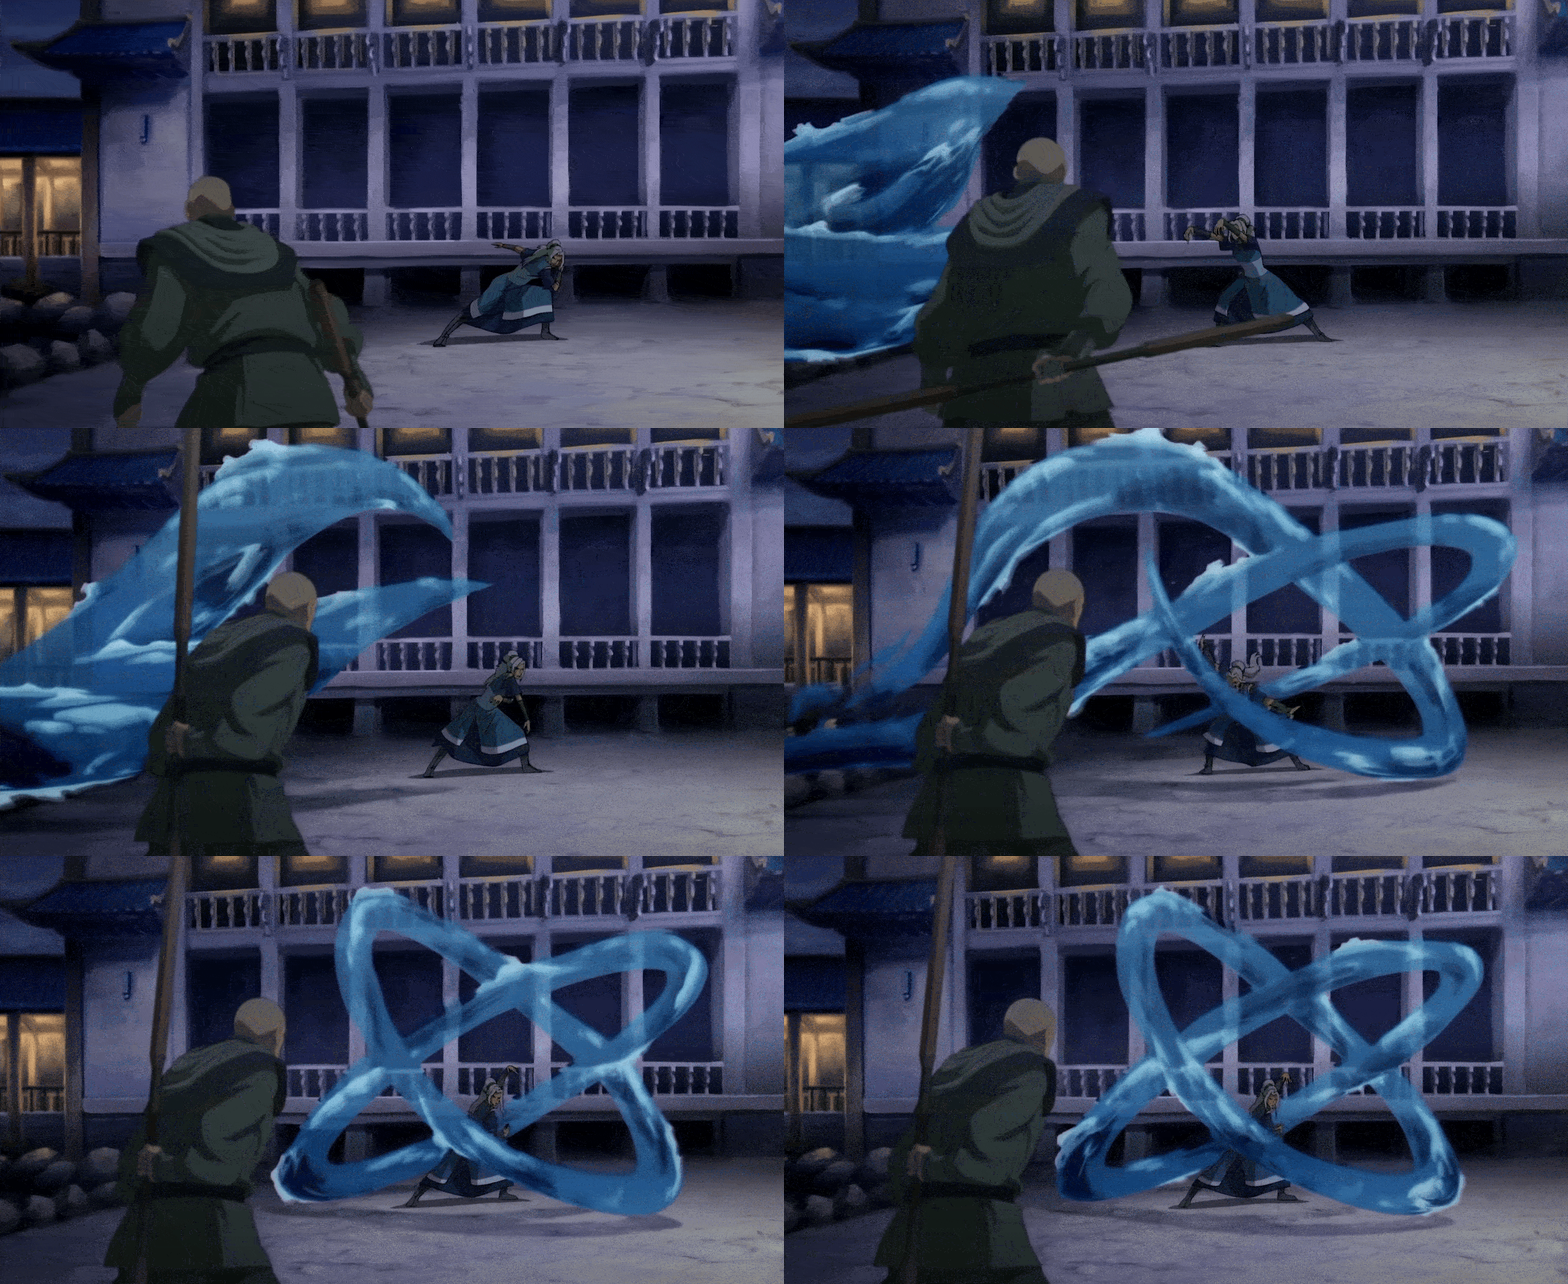
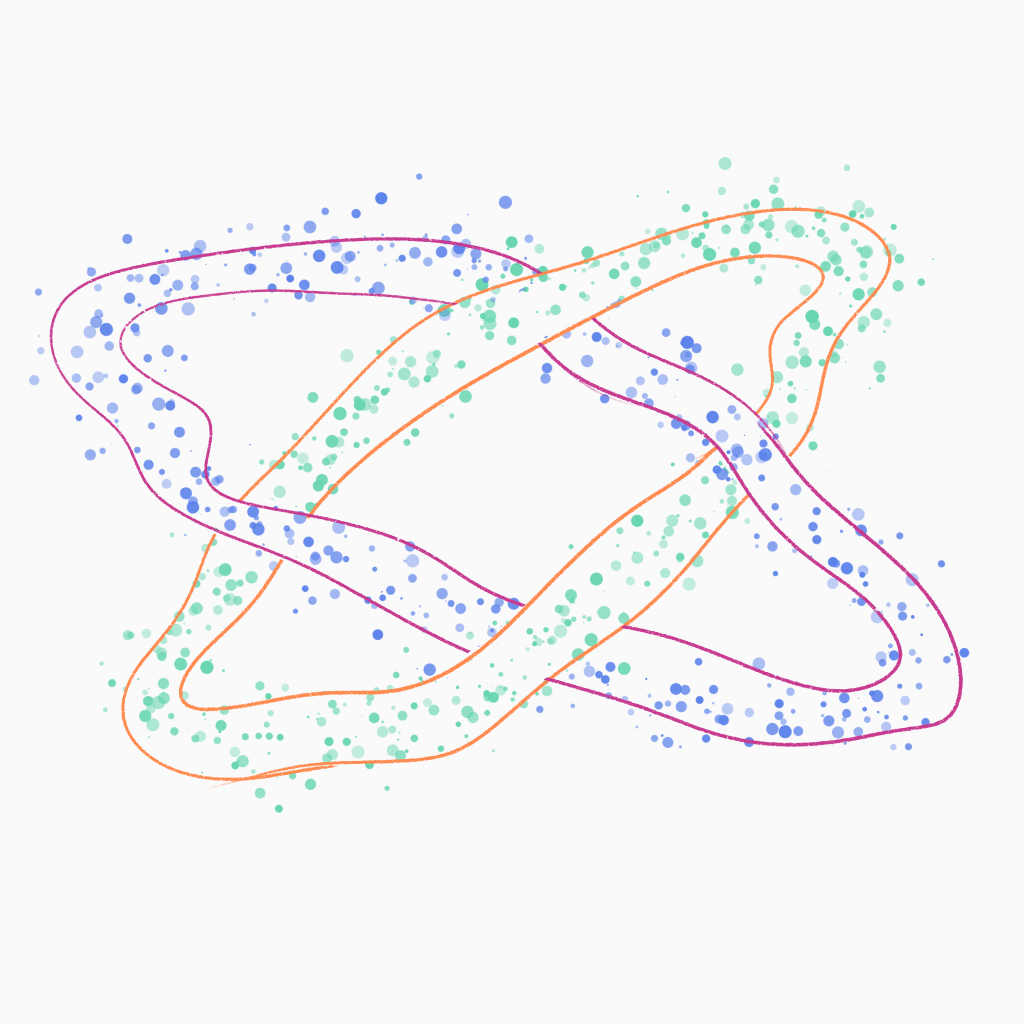
Skilled Wanterbenders can conjure rotating rings of water, holding large volumes, that spin around their bodies. In this animation Kya can be seen using water rings during her fight with Zaheer. This ability has both defensive and offensive capability, and once rotating around the body the water within the rings can be used as a water source for other abilities. (Waterbending, n.d.)
Orange: This orange border shows the bounds of one of the water rings. These rings will be created in a 360 swirl and will continue to rotate around the bender.
Pink: This pink border shows the bounds of the second one of the water rings. These rings will be created in a 360 swirl and will continue to rotate around the bender.
Green: The green dots represent the sprites used in liquid simulation, and any outside of the bounding lines represent white water foam.
Blue: The blue dots represent the sprites used in liquid simulation, and any outside of the bounding lines represent white water foam.
VFX Component Breakdown:
Final VFX Composition:

Conclusion
Final Thoughts:
I am pleased with the outcome of my VFX tests. Each effect provides a solid base for my final animation. Although some effects could use more stylised elements, I now have a clearer idea of what to change to create a solid final sequence.
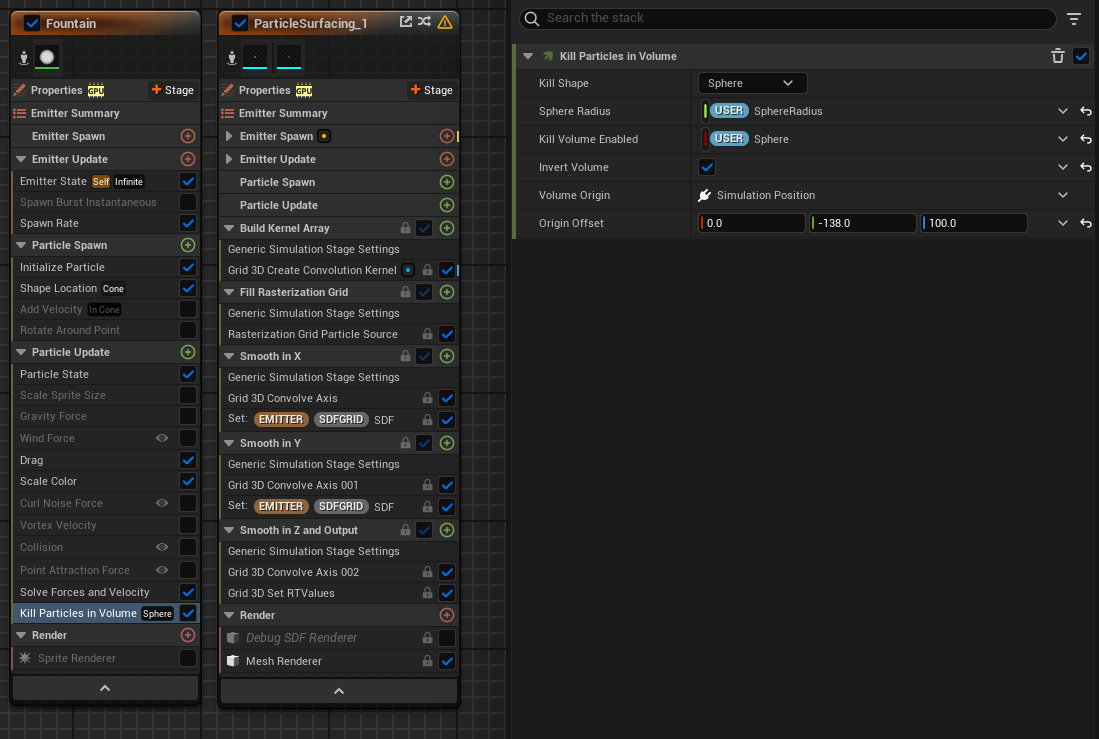
One challenge that I encountered while working on the water effects was a bug, which unfortunately remains unfixed. During playback, the simulations often experience an error that causes the entire simulation zone to emit bright white light. This error made the editing process very tiresome, as I had to refresh the simulations to reset them constantly. Controlling the liquid simulation is challenging, and it has few customisation options without delving deep into Niagra’s liquid rendering settings. I believe that replacing these water effects with sprite effects will make my work much more manageable while finishing up the final sequence.
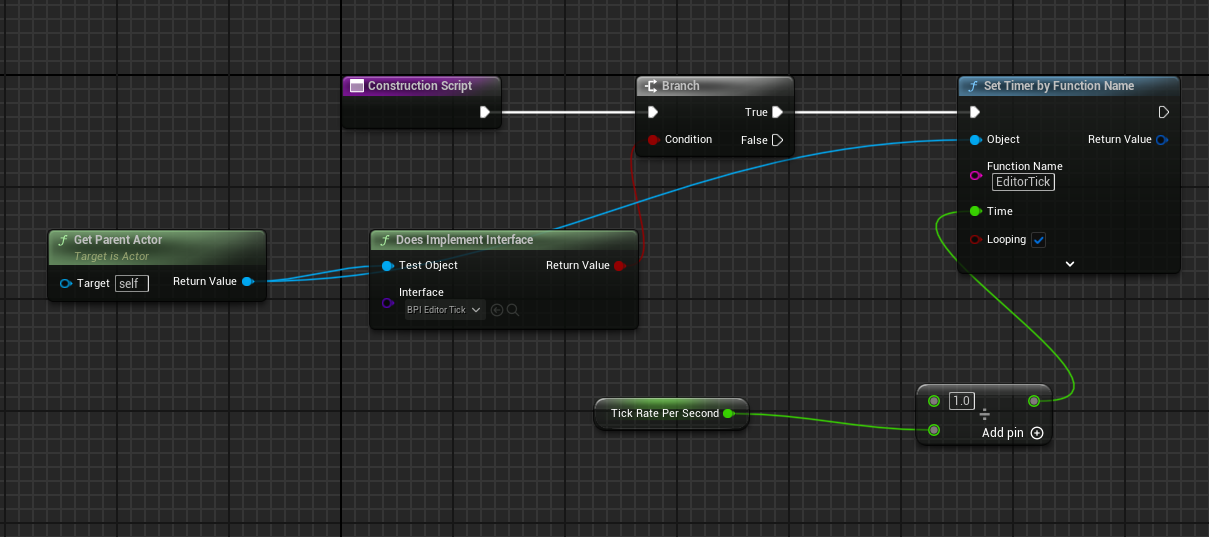
Another unique challenge was working out how to animate the spline within the Sequencer. It took me a few days to figure out that the issue was only in the editor and even longer to figure out how to resolve it. Thankfully, I was able to persevere through these issues, and with a lot of research, I came upon a solution to add in-editor ticking.
I certainly learned a lot while creating these VFX tests, and I will be able to take everything that I have learned forward into the final sequence—hopefully with much improved stylised effects!
References:
Airbending (no date) Avatar Wiki. Available at: https://avatar.fandom.com/wiki/Airbending.
BRT Videos (2021) All Three Avatar Intros Comparison- Aang Intro vs Korra Intro vs Avatar Legends Intro, www.youtube.com. Available at: https://www.youtube.com/watch?v=NpQCcwqc2mU.
DiMartino, M.D. and Konietzko, B. (2005) ‘ Avatar: The Last Airbender’. Nickelodeon.
DiMartino, M.D. and Konietzko, B. (2012) ‘Avatar: The Legend of Korra’. Nickelodeon Animation Studio.
Earthbending (no date) Avatar Wiki. Available at: https://avatar.fandom.com/wiki/Earthbending.
Firebending (no date) Avatar Wiki. Available at: https://avatar.fandom.com/wiki/Firebending.
Jared Koh (2023) Avatar Element Animation 2, www.youtube.com. Available at: https://www.youtube.com/watch?v=T5vdPy7nbRQ.
SiLi (2021) Unreal Engine | editor Tick Tutorial using blueprint, YouTube. Available at: https://www.youtube.com/watch?v=HDFvh-CYIGA.
The Amagi (2021) Every Bending Ability In Avatar, www.youtube.com. Available at: https://www.youtube.com/watch?v=9RpzGl92PJI.
Waterbending (no date) Avatar Wiki. Available at: https://avatar.fandom.com/wiki/Waterbending.
